
Нижняя линия вверху: Замена автоматического выключателя — это вполне осуществимая задача для опытных домовладельцев, но безопасность превыше всего. В этом руководстве рассказывается, когда необходима замена, даны пошаговые инструкции, указаны расходы и когда следует обратиться к специалистам.
Автоматические выключатели — незаметные герои электросистемы вашего дома, защищающие вашу проводку и семью от опасных перегрузок. Если автоматический выключатель выходит из строя, знание того, как безопасно его заменить, может сэкономить деньги и быстро восстановить электроснабжение. Однако этот проект требует тщательного соблюдения правил безопасности и глубоких знаний в области электротехники.
Когда следует заменять автоматический выключатель
Признаки неисправного автоматического выключателя
Частые спотыкания: Если ваш выключатель постоянно срабатывает даже после сброса настроек и снижения электрической нагрузки, возможно, он изношен за годы эксплуатации.
Не останется сброса: Выключатель, который немедленно срабатывает снова или не фиксируется в положении «ВКЛ», скорее всего, достиг конца своего срока службы.
Физический ущерб: Обратите внимание на эти предупреждающие знаки:
- Следы подгорания или запах гари вокруг выключателя
- Трещины или повреждения корпуса
- Ослабленные соединения или оголенная проводка
- Горячий брейкер, теплый на ощупь
Возрастная одежда: Срок службы автоматических выключателей обычно составляет 25–30 лет. Если вашему электрощиту больше 20 лет и он неисправен, может потребоваться его замена.
Модернизация электрооборудования: Установка новых высоковольтных приборов может потребовать модернизации с 15-20 ампер выключатель, при условии, что электропроводка вашего дома выдержит возросшую нагрузку.
Когда следует обращаться к профессионалам
Немедленно остановитесь и обратитесь к квалифицированному электрику, если:
- Электрическая панель кажется горячей или на ней видны следы влаги
- Вы чувствуете запах гари или видите искры
- Вы не знакомы с правилами электробезопасности
- Местные нормы и правила требуют разрешений на электромонтажные работы.
- Вы имеете дело с главным выключателем или обновлением панели.
Понимание затрат на замену автоматического выключателя
Замена автоматического выключателя требует затрат как на запчасти, так и на работу. Самостоятельная замена значительно дешевле профессиональной установки, но вопросы безопасности должны быть в приоритете. Профессиональный монтаж гарантирует соблюдение норм и правил безопасности, в то время как самостоятельная замена требует опыта работы с электроприборами и надлежащего защитного оборудования.
Необходимые инструменты и материалы
Оборудование безопасности (не подлежит обсуждению)
- Защитные очки – Защитите от возможных искр
- Обувь на резиновой подошве или резиновый коврик – Необходимая защита заземления
- Утепленные резиновые перчатки – Только перчатки с электрозащитой
- Фонарик или налобный фонарь – Вы будете работать с выключенным питанием.
Необходимые инструменты
- Бесконтактный тестер напряжения – Убедитесь, что питание действительно отключено.
- Мультиметр – Проверка целостности цепи
- Изолированные отвертки – Филлипс и плоская головка
- Плоскогубцы с тонкими губками (изолированные ручки)
- Инструменты для зачистки проводов (если требуется перемонтаж проводки)
Материалы
- Замена автоматического выключателя – Должны точно совпадать (марка, сила тока, тип)
- Электрическая лента – Для маркировки и закрепления
- Гайки для проводов (при необходимости для подключений)
Пошаговая замена автоматического выключателя
Безопасность прежде всего: предварительная подготовка
1. Определите проблемную цепь
Если вы не уверены, какой выключатель отвечает за проблемную цепь, подключите радиоприёмник к розетке в этой цепи. Увеличьте громкость, а затем поочередно переключайте выключатели, пока радиоприёмник не замолчит.
2. Отключите все подключенные устройства.
Отключите приборы и выключите свет, подключенные к цепи, с которой вы работаете.
3. Создайте сухую рабочую среду
Убедитесь, что область вокруг электрощитка абсолютно сухая. Вода и электричество — смертельно опасное сочетание.
Шаг 1: Безопасное отключение питания
Выключите главный выключатель: Найдите главный автоматический выключатель (обычно он находится в верхней или нижней части панели) и переведите его в положение «ВЫКЛ». Это отключит питание всех ответвлений цепи.
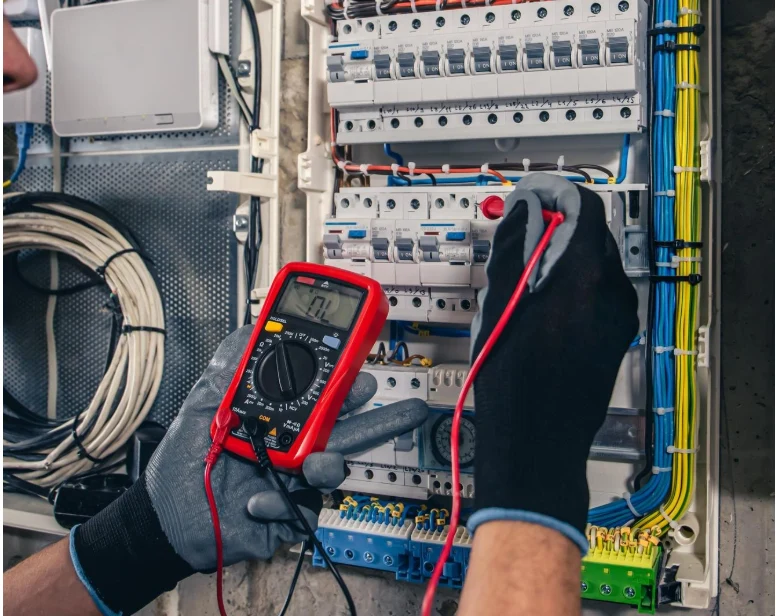
Убедитесь, что питание выключено: Проверьте напряжение бесконтактным тестером на выключателе, который вы планируете заменить. Тестер не должен светиться или издавать звуковой сигнал.
Настройте освещение: Расположите фонарик или налобный фонарь так, чтобы у вас не было рук для освещения.
Шаг 2: Снимите крышку панели.
Сначала снимите угловые винты: Начните с четырех угловых винтов, оставив средние винты напоследок, чтобы предотвратить падение крышки.
Поддержите обложку: Крепко держите крышку, откручивая последние винты, чтобы она не упала на панель или на пол.
Осмотрите на предмет наличия проблем: Прежде чем продолжить, проверьте наличие любых очевидных признаков повреждения, коррозии или необычной проводки.
Шаг 3: Определите и проверьте неисправный выключатель
Найдите выключатель: Найдите конкретный выключатель, который необходимо заменить. Он должен быть чётко обозначен, но если нет, обратитесь к предыдущей идентификации цепи.
Окончательная проверка безопасности: Еще раз проверьте напряжение на клеммах выключателя с помощью тестера, чтобы убедиться в отсутствии напряжения.
Сфотографируйте установку: Прежде чем что-либо отсоединять, сделайте четкую фотографию того, как подключены провода.
Шаг 4: Снимите старый автоматический выключатель.
Поверните выключатель в положение «ВЫКЛ.»: Убедитесь, что неисправный выключатель находится в положении «ВЫКЛ».
Отсоедините горячий провод: Осторожно ослабьте винтовую клемму, удерживающую чёрный (фазный) провод. В цепях 240 В будет два фазных провода (обычно чёрный и красный).
Отсоедините дополнительные провода: При замене автоматических выключателей AFCI или GFCI отсоедините белый нейтральный провод и все соединительные провода.
Снимите выключатель: Возьмитесь за внешний край выключателя и, слегка покачивая его, потяните наружу. Он должен отсоединиться от шины.
Шаг 5: Установите новый автоматический выключатель
Проверка совместимости: Еще раз проверьте, что новый выключатель полностью соответствует старому: та же марка, сила тока и тип.
Установите новый выключатель: Перед установкой убедитесь, что новый выключатель находится в положении «ВЫКЛ».
Подключиться к шине: Совместите выключатель с шиной и нажмите на него до щелчка. Вы должны почувствовать, что он надёжно зафиксировался.
Переподключите провода:
– Подсоедините черный провод под напряжением к клемме «LINE» или «LOAD».
– Для автоматических выключателей AFCI/GFCI подключите белый нейтральный провод к соответствующей клемме.
– Плотно затяните все соединения, но не перетягивайте.
Шаг 6: Проверка и восстановление питания
Заменить крышку панели: Осторожно установите крышку панели на место, следя за тем, чтобы не защемить провода.
Включите главный выключатель: Восстановите подачу питания на панель, переключив главный выключатель в положение «ВКЛ».
Испытайте новый Breaker:
– Переключите новый выключатель в положение «ВКЛ».
– Проверьте розетки и приборы на цепи
– Убедитесь, что выключатель не срабатывает немедленно.
Поиск и устранение неисправностей
Советы новичкам по немедленному использованию
- Проверьте цепь на перегрузку – Удалите некоторые устройства и повторите попытку.
- Проверьте на наличие коротких замыканий – Проверьте наличие поврежденных проводов или неисправных приборов.
- Проверьте правильность установки – Убедитесь, что выключатель полностью установлен на шине.
Выключатель не остается в положении «ВКЛ»
- Подтвердите правильный тип выключателя – Неправильная сила тока или несовместимая марка
- Проверьте соединения проводов – Эта проблема может быть вызвана неплотными соединениями.
- Повреждение внутреннего выключателя – Может потребоваться еще одна замена
Нет питания, несмотря на успешную установку
- Проверьте другие схемы – Главный выключатель может быть не полностью включен.
- Проверьте настройки GFCI/AFCI – После установки может потребоваться сброс этих выключателей.
- Проверьте все соединения – Дважды проверьте надежность затяжки всех клемм проводов.
Понимание типов автоматических выключателей
Стандартные автоматические выключатели
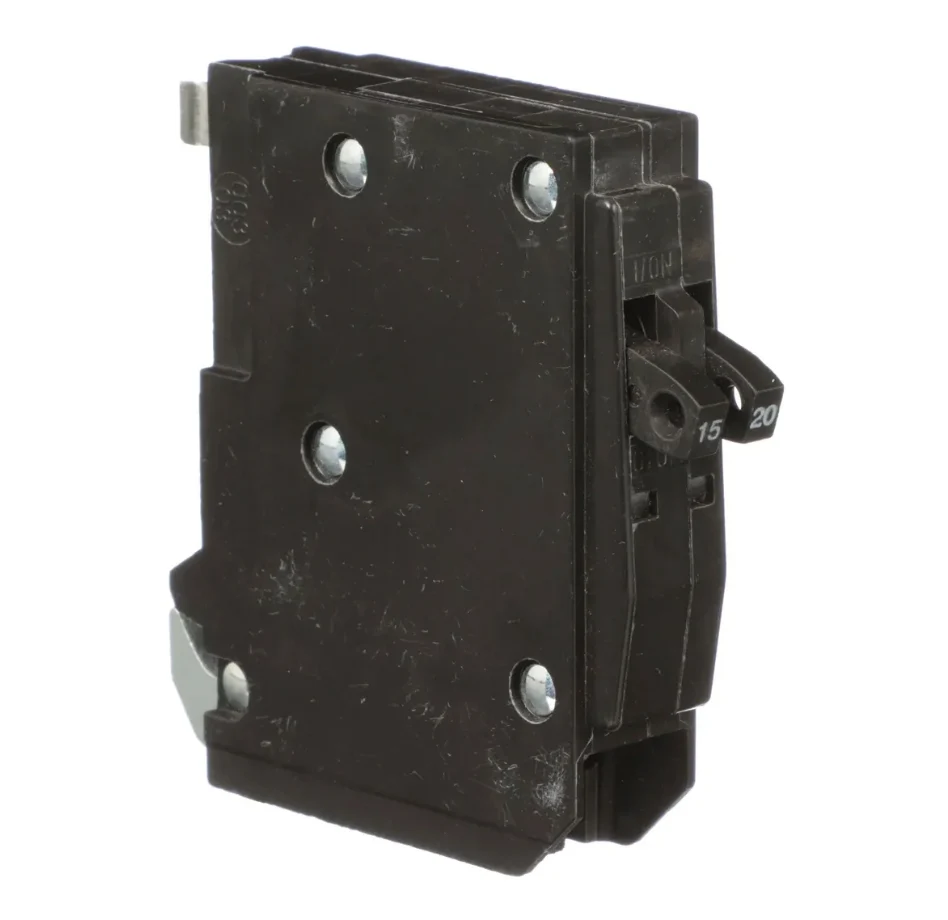
- Однополюсный (15-20 А): Управляет цепями 120 В, такими как розетки и освещение.
- Двухполюсный (20-60 А): Управляет цепями 240 В для таких приборов, как сушилки и водонагреватели.
Автоматические выключатели безопасности
- AFCI (автоматический выключатель дугового замыкания): Требуется в спальнях и жилых помещениях, обнаруживает опасные электрические дуги.
- GFCI (устройство защитного отключения при замыкании на землю): Требуется в ванных комнатах и кухнях, защищает от поражения электрическим током.
- Двойная функция: Объединяет защиту AFCI и GFCI в одном выключателе
Примечание: Требования к нормативам различаются в зависимости от местоположения и возраста дома. Для новых установок часто требуется защита от короткого замыкания (AFCI/GFCI).
Профессионал против мастера-самоучки: как сделать правильный выбор
Хорошие кандидаты для самостоятельного изготовления
- Опыт выполнения основных электромонтажных работ
- Комфортное соблюдение протоколов безопасности
- Замена стандартных выключателей на панелях в хорошем состоянии
- Иметь необходимые инструменты и средства безопасности
Когда следует нанимать профессионала
- Первичные электромонтажные работы
- Старые панели (Federal Pacific, Zinsco и т. д.)
- Требуется замена главного выключателя
- Требуется модернизация панели или дополнительные цепи
- Требуются местные разрешения
Техническое обслуживание автоматических выключателей
Ежемесячные проверки
- Визуальный осмотр на наличие каких-либо признаков повреждения или перегрева
- Прислушивайтесь к необычным звукам как жужжание или потрескивание
- Тест GFCI/AFCI выключатели используя их тестовые кнопки
Ежегодное обслуживание
- Профессиональный осмотр электрической панели
- Затяжка соединений по мере необходимости
- Оценка нагрузки для предотвращения перегрузки цепей
Напоминания о безопасности и заключительные советы
Никогда не работайте на цепях под напряжением: Перед началом работы всегда выключайте главный выключатель и проверяйте, что питание отключено.
Используйте соответствующие средства индивидуальной защиты: Защитные очки, защитные перчатки и обувь на резиновой подошве являются необходимыми, а не дополнительными принадлежностями.
Не торопись: Спешные электромонтажные работы приводят к ошибкам и угрозам безопасности.
Если вы сомневаетесь, остановитесь: Если что-то кажется вам неясным или опасным, обратитесь к профессиональному электрику.
Ведите записи: Задокументируйте замену выключателей и сделайте фотографии для дальнейшего использования.
Заключение
Умение заменить автоматический выключатель — ценный навык для домовладельца, который поможет сэкономить деньги и быстро восстановить электроснабжение. Однако ни в коем случае нельзя пренебрегать электробезопасностью. Соблюдайте правила техники безопасности, используйте подходящие средства защиты и не стесняйтесь обращаться к профессионалам, если ситуация требует экспертных знаний.
Помните, что, хотя самостоятельная замена автоматического выключателя может быть экономически выгодной, душевное спокойствие и гарантия безопасности, обеспечиваемые профессиональной установкой, могут оправдать инвестиции, особенно для неопытных домовладельцев.
Прежде чем начинать какой-либо электромонтажный проект, проконсультируйтесь с местным строительным департаментом о требованиях к получению разрешений и всегда ставьте безопасность выше экономии.
Связанные
Что такое автоматический выключатель постоянного тока?
Что такое автоматический выключатель без предохранителя (NFB)?
Что включено и выключено в MCB
Можно ли использовать трехполюсный выключатель для двухполюсной цепи?
Данное руководство содержит только общую информацию. Электротехнические нормы и требования различаются в зависимости от региона. Всегда сверяйтесь с местными нормами и при выполнении сложных электромонтажных работ обращайтесь к профессионалам.
