
The 3 AM Phone Call Every Plant Engineer Dreads
Picture this: Your facility’s main water pumps just tripped—again. It’s 3 AM, production is down, and your maintenance team is scrambling. After an hour of troubleshooting, you discover the culprit: three 50-HP motors trying to start simultaneously, creating a massive inrush current that’s overloading your electrical system. The voltage sag is so severe that your other equipment is dropping offline like dominoes.
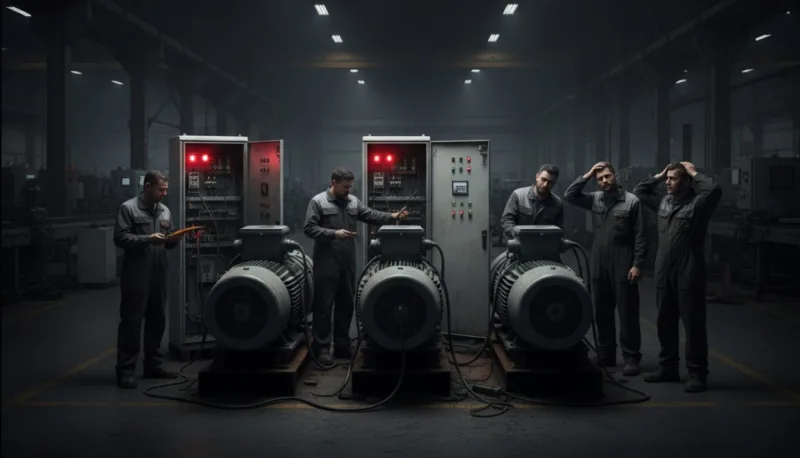
This scenario plays out in industrial facilities every day, and the root cause is almost always the same: motors starting without coordinated timing control. When multiple motors fire up at once, the combined inrush current (typically 6-8 times the motor’s full-load current) can exceed your service entrance capacity, trigger nuisance trips on upstream breakers, or cause damaging voltage dips that ripple through your entire facility.
Why Standard Motor Starters Fall Short
Traditional direct-online (DOL) motor starters are designed to do one thing: close their contacts and energize the motor immediately when commanded. There’s no intelligence, no sequencing, and no delay. In single-motor applications, this works fine. But in facilities with multiple motors, conveyor systems, or equipment that requires staged startup sequences, DOL starters alone create three critical problems:
- Electrical Demand Spikes: Simultaneous starts compound inrush currents, potentially exceeding your utility’s demand charges or tripping main breakers
- Mechanical Shock: Conveyor belts, pump systems, and process equipment can suffer mechanical damage when all components engage instantly without ramp-up time
- Process Disruption: Critical sequences (like purge fans before burners, or cooling pumps before compressors) require timed coordination that basic starters can’t provide
The conventional “solution”—manually staggering starts or using complex PLC programming—is either unreliable (human error) or expensive (engineering time and hardware costs).

The Aha! Moment: Time Relays as Your Startup Traffic Controller
This is where time relays transform your motor control strategy. Think of a time relay as a traffic light for your electrical system—it controls when power flows to your motor starter coil, not အကယ်၍ it flows. By inserting a compact time relay between your control switch and the motor starter’s coil circuit, you gain precise, adjustable control over startup sequences without expensive PLCs or complicated programming.
Here’s the elegant simplicity: When your start button is pressed, the time relay begins its countdown (on-delay) or holds its contacts closed for a set duration (off-delay). Only after this precise interval does it complete the circuit to your motor starter coil, energizing the contactor and starting your motor. The result? Coordinated, sequential motor starts that eliminate inrush conflicts and protect your equipment.
သော့ယူသွားပါ။: Your time relay doesn’t control the motor directly—it controls the motor starter’s coil circuit. This low-current control logic means you can use a compact relay with small contact ratings to command a large motor starter.
The Complete Step-by-Step Wiring Guide
Step 1: Match Your Relay Type to Your Application
Before you touch a single wire, you must identify whether you need an on-delay သို့မဟုတ် ပိတ်ချိန်နှောင့်နှေး time relay—get this wrong and your motor will start at completely the wrong time.
On-Delay Time Relays (also called delay-on-make or DORM relays):
- When to use: When you need a motor to start ပြီးနောက် a specific delay following a start command
- အသုံးများသော application များ: Sequential pump starts, delayed fan startups, conveyor staging
- ဒါကြောင့်ဘယ်လိုအလုပ်လုပ်တယ်: When the relay coil is energized, it begins timing. After the preset delay expires, the output contacts close, energizing the motor starter coil
Off-Delay Time Relay များ (also called delay-on-break or DODB relays):
- When to use: When you need a motor to continue running for a period ပြီးနောက် the stop command
- အသုံးများသော application များ: Purge fans that must run after burners shut down, cooling pumps that continue after process equipment stops
- ဒါကြောင့်ဘယ်လိုအလုပ်လုပ်တယ်: When the relay coil is de-energized, it begins timing. The output contacts remain closed (keeping the motor running) until the delay expires
ကျွမ်းကျင်သူအကြံပြုချက်: In 80% of industrial sequencing applications, you’ll use on-delay relays. Off-delay relays are specialized for safety interlocks and cooling/purge requirements. If you’re simply trying to stagger multiple motor starts, start with on-delay.
Step 2: Verify Critical Electrical Ratings (The Spec Sheet Doesn’t Lie)
This is where most wiring failures originate—not in the physical connections, but in the specification stage. You must verify three critical ratings:
A. Control Circuit Voltage
Your time relay’s coil voltage must exactly match your motor starter’s control circuit voltage. Common voltages include:
- 24V DC (increasingly common in modern systems with PLC integration)
- 120V AC (North American standard for control circuits)
- 240V AC (used in some industrial and international applications)
Check your motor starter’s wiring diagram—the control circuit voltage is typically labeled on the schematic or on the starter’s coil itself. A mismatch here means instant relay failure or, at best, unreliable operation.
B. Contact Ratings (Load vs. Relay Capacity)
Your time relay’s output contacts must be rated to handle the motor starter’s coil current. Here’s the calculation:
- Find your motor starter’s coil current rating (typically listed in milliamps or watts on the coil)
- Add a 25% safety factor
- Verify your time relay’s contact rating exceeds this value
ဥပမာ: If your contactor coil draws 50mA at 120V AC, your time relay contacts should be rated for at least 65mA (50mA × 1.25). Most standard time relays have contacts rated for 5A or more at 120/240V AC, which provides plenty of headroom—but always verify.
သော့ယူသွားပါ။: The most common specification error is confusing the relay’s coil voltage with its contact ratings. These are independent specs. Your relay coil might be 24V DC, but its contacts can still switch 240V AC loads—check both.
C. Timing Range
Ensure the relay’s adjustable time range covers your application needs. Common ranges:
- 0.1 to 10 seconds (fast sequencing)
- 1 to 60 seconds (general motor staging)
- 1 to 999 seconds (extended delays for cooling or purge cycles)
Step 3: Wire the Control Circuit (The Critical Connections)
Now we get to the actual wiring. This is where theory meets practice, and where proper technique prevents future failures.
Required Components:
- အချိန်တိုင်းကိရိယာ (အဆင့် ၂ မှအတည်ပြုထားသောသတ်မှတ်ချက်များ)
- ထိန်းချုပ်ပတ်လမ်း terminals များတပ်ဆင်ထားသောမော်တာစတင်စက်
- ထိန်းချုပ်ပါဝါအရင်းအမြစ် (ထရန်စဖော်မာ သို့မဟုတ် တိုက်ရိုက်လိုင်းဗို့အား)
- စတင်/ရပ်တန့်ခလုတ်များ (သို့မဟုတ် ထိန်းချုပ်ခလုတ်)
- Overload relay contacts (ပုံမှန်အားဖြင့် မော်တာစတင်စက်တွင် တပ်ဆင်ထားသည်)
- ထိန်းချုပ်ပတ်လမ်းများအတွက် NEC Article 430 အရ ဝါယာကြိုးအရွယ်အစား (ပုံမှန်အားဖြင့် 14-18 AWG)
On-Delay အချိန်တိုင်းကိရိယာ ဝါယာကြိုးဆက်သွယ်မှုအစီအစဉ် (အသုံးအများဆုံးပုံစံ):
- ထိန်းချုပ်ပါဝါကို တည်ဆောက်ပါ:
- သင်၏ထိန်းချုပ်ဗို့အားအရင်းအမြစ်၏ Line 1 (L1) ကို သင်၏စတင်ခလုတ်၏ တစ်ဖက်သို့ ချိတ်ဆက်ပါ
- ၎င်းသည် သင်၏ “hot” ထိန်းချုပ်ခြေထောက်ဖြစ်သည်
- စတင်ခလုတ်နှင့် အချိန်တိုင်းကိရိယာကွိုင်ကို ဝါယာကြိုးဆက်သွယ်ပါ:
- ပုံမှန်အားဖြင့်ပွင့်နေသော (NO) စတင်ခလုတ်အထွက်ကို အချိန်တိုင်းကိရိယာကွိုင်၏ terminal တစ်ခုသို့ ချိတ်ဆက်ပါ (A1 ဟု မကြာခဏတံဆိပ်ကပ်သည်)
- အခြားအချိန်တိုင်းကိရိယာကွိုင် terminal (A2 ဟု မကြာခဏတံဆိပ်ကပ်သည်) ကို သင်၏ထိန်းချုပ်ဗို့အား၏ Line 2 (L2/Neutral) သို့ ပြန်လည်ချိတ်ဆက်ပါ
- အရေးကြီးသည်- သင်၏ရပ်တန့်ခလုတ် (NC contact) နှင့် overload relay contacts (NC) ကို စတင်ခလုတ်မတိုင်မီ L1 ခြေထောက်ပေါ်တွင် ဆက်တိုက်ချိတ်ဆက်ခြင်းဖြင့် လုံခြုံရေးကွင်းဆက်တစ်ခုကို ဖန်တီးပါ
- အချိန်တိုင်းကိရိယာအထွက် Contacts များကို မော်တာစတင်စက်ကွိုင်သို့ ချိတ်ဆက်ပါ:
- အချိန်တိုင်းကိရိယာ၏ အချိန်သတ်မှတ်ထားသော အထွက် contacts များကို ခွဲခြားသတ်မှတ်ပါ (ပုံမှန်အားဖြင့် NO contacts များအဖြစ် တံဆိပ်ကပ်သည်- 15-18, 25-28, စသည်)
- ဤအချိန်သတ်မှတ်ထားသော NO contacts များ၏ တစ်ဖက်ကို တူညီသော L1 ထိန်းချုပ်ခြေထောက်သို့ ချိတ်ဆက်ပါ
- အချိန်သတ်မှတ်ထားသော NO contacts များ၏ အခြားတစ်ဖက်ကို မော်တာစတင်စက်ကွိုင်၏ terminal တစ်ခုသို့ ချိတ်ဆက်ပါ (A1 သို့မဟုတ် အလားတူ တံဆိပ်ကပ်သည်)
- အခြားမော်တာစတင်စက်ကွိုင် terminal (A2) ကို L2 သို့ ပြန်လည်ချိတ်ဆက်ပါ
- ၎င်းသည် အရေးကြီးသောလမ်းကြောင်းဖြစ်သည်: အချိန်တိုင်းကိရိယာသည် အချိန်ကုန်ဆုံးသောအခါ ၎င်း၏ NO contacts များကို ပိတ်ပြီး မော်တာစတင်စက်ကွိုင်ကို အားသွင်းရန်အတွက် ပတ်လမ်းကို ပြီးမြောက်စေသည်
- Holding Circuit ကို ထည့်ပါ (ထိန်းသိမ်းထားသော လည်ပတ်မှုအတွက်):
- စတင်ခလုတ်နှင့်အပြိုင် မော်တာစတင်စက်မှ အရန် NO contact (13-14 သို့မဟုတ် အလားတူ တံဆိပ်ကပ်သည်) ကို ချိတ်ဆက်ပါ
- ၎င်းသည် “seal-in” ပတ်လမ်းတစ်ခုကို ဖန်တီးပေးသောကြောင့် သင်သည် စတင်ခလုတ်ကို လွှတ်လိုက်ပြီးနောက် မော်တာသည် ဆက်လက်လည်ပတ်နေမည်ဖြစ်သည်။
သော့ယူသွားပါ။: အချိန်တိုင်းကိရိယာသည် သင်၏စတင်ခလုတ်နှင့် သင်၏မော်တာစတင်စက်ကွိုင်ကြားတွင် တည်ရှိသည်—၎င်းသည် ထိန်းချုပ်ယုတ္တိဗေဒတွင် တံခါးစောင့်ဖြစ်ပြီး အဓိကပါဝါပတ်လမ်းမဟုတ်ပါ။ မော်တာ၏ အဓိကပါဝါ conductors များနှင့် ဆက်တိုက် အချိန်တိုင်းကိရိယာကို ဘယ်တော့မှ မဆက်သွယ်ပါနှင့်။.
အရေးကြီးသော တပ်ဆင်မှုအသေးစိတ်များ
- တုန်ခါမှုကိုခံနိုင်ရည်ရှိစေရန်အတွက် stranded ဝါယာကြိုးပေါ်တွင် ferrule terminals များကို အသုံးပြုပါ
- terminal ဝက်အူများကို ထုတ်လုပ်သူ၏ သတ်မှတ်ချက်များနှင့်အညီ တင်းကျပ်ပါ (ထိန်းချုပ် terminals များအတွက် ပုံမှန်အားဖြင့် 7-9 in-lbs)
- အရင်းအမြစ်နှင့် ဦးတည်ရာကို ဖော်ထုတ်သည့် ဝါယာကြိုးအမှတ်အသားများဖြင့် ဝါယာကြိုးအားလုံးကို တံဆိပ်ကပ်ပါ
- လျှပ်စစ်ဆူညံသံကို လျှော့ချရန်အတွက် ထိန်းချုပ်ပတ်လမ်းဝါယာကြိုးများကို ဗို့အားမြင့်မော်တာပါဝါကြိုးများနှင့် ခွဲထားပါ
အဆင့် ၄- အချိန်ကို သတ်မှတ်ပြီး အစီအစဉ်ကို စမ်းသပ်ပါ
ဝါယာကြိုးဆက်သွယ်မှု ပြီးစီးပါက အချိန်လုပ်ဆောင်ချက်ကို မှန်ကန်စွာ သတ်မှတ်ပြီး အတည်ပြုရမည်-
အချိန်ညှိနှိုင်းမှု:
- အချိန်ညှိနှိုင်းမှုခလုတ် သို့မဟုတ် ဒစ်ဂျစ်တယ်ဆက်တင်ကို ရှာဖွေပါ (သင်၏ သီးခြားမော်ဒယ်အတွက် relay လက်စွဲကို တိုင်ပင်ပါ)
- ကနဦးစတင်ခြင်းအစီအစဉ်အတွက် မော်တာများကြားတွင် ကြာမြင့်ချိန်များကို ပိုရှည်စွာထား၍ စတင်ပါ (၁၀-၁၅ စက္ကန့်)
- အမှန်တကယ် inrush အပြုအမူကို လေ့လာပြီးနောက် ကြာမြင့်ချိန်ကို လျှော့ချနိုင်သည်
စမ်းသပ်ခြင်း Protocol (မော်တာကို ချိတ်ဆက်မှုဖြုတ်ထားခြင်း သို့မဟုတ် စမ်းသပ်မုဒ်တွင် လုပ်ဆောင်ပါ):
- ကွိုင်အားသွင်းစမ်းသပ်ခြင်း: စတင်ခလုတ်ကို နှိပ်ပါ။ အချိန်တိုင်းကိရိယာ အားသွင်းသည်ကို ကြား/မြင်ရမည် (LED အညွှန်း သို့မဟုတ် ကြားနိုင်သော ကလစ်သံ)
- အချိန်အတည်ပြုခြင်း: သင်၏ဆက်တင်နှင့် ကိုက်ညီမှုရှိမရှိ စစ်ဆေးရန်အတွက် နာရီကို အသုံးပြုပါ။ မော်တာစတင်စက်သည် ကြိုတင်သတ်မှတ်ထားသောအချိန်ပြီးမှသာ အားသွင်းသင့်သည်
- ရပ်တန့်လုပ်ဆောင်ချက်စမ်းသပ်ခြင်း: ရပ်တန့်ခလုတ်ကို နှိပ်ပါ။ အချိန်တိုင်းကိရိယာနှင့် မော်တာစတင်စက် နှစ်ခုစလုံးသည် ချက်ချင်းအားကုန်သွားသင့်သည် (on-delay relays များအတွက်)
- Holding Circuit စမ်းသပ်ခြင်း: အချိန်သတ်မှတ်ထားသော စတင်ပြီးနောက် စတင်ခလုတ်ကို လွှတ်ပါ။ အရန် contact seal-in မှတဆင့် မော်တာသည် ဆက်လက်လည်ပတ်သင့်သည်
ကျွမ်းကျင်သူအကြံပြုချက်: မော်တာအများအပြားပါဝင်သော အစီအစဉ်များတွင် မတူညီသော ကြာမြင့်ချိန်များကို သတ်မှတ်ပါ (မော်တာ ၁- ၀ စက္ကန့်၊ မော်တာ ၂- ၈ စက္ကန့်၊ မော်တာ ၃- ၁၆ စက္ကန့်)။ ၎င်းသည် အထွတ်အထိပ်လိုအပ်ချက်ကို သိသိသာသာ လျှော့ချပေးသည့် “rolling start” ကို ဖန်တီးပေးသည်။.
လက်တွေ့ကမ္ဘာအသုံးချမှု- သုံးလုံးထိုးစက်များ အစီအစဉ်ဖြေရှင်းချက်
ရေစုပ်စက်များ ခရီးထွက်ခြင်းနှင့်ပတ်သက်၍ ကျွန်ုပ်တို့၏အဖွင့်အခြေအနေကို ပြန်လည်သုံးသပ်ကြည့်ကြပါစို့။ ဤပြဿနာကို အချိန်တိုင်းကိရိယာများက ဖြေရှင်းပေးပုံမှာ ဤတွင်ဖြစ်သည်-
ဖွဲ့စည်းမှု:
- 50-HP စုပ်စက်သုံးလုံး၊ တစ်လုံးစီတွင် ၎င်း၏ကိုယ်ပိုင်မော်တာစတင်စက်ပါရှိသည်
- တစ်ခုတည်းသော စတင်ခလုတ်သည် အစီအစဉ်အပြည့်အစုံကို စတင်သည်
- စုပ်စက် ၁- တိုက်ရိုက်စတင်ခြင်း (ကြာမြင့်ချိန်မရှိ)
- စုပ်စက် ၂- On-delay relay ကို ၁၀ စက္ကန့် သတ်မှတ်ထားသည်
- စုပ်စက် ၃- On-delay relay ကို ၂၀ စက္ကန့် သတ်မှတ်ထားသည်
ရလဒ်: 450A တစ်ပြိုင်နက် inrush (မော်တာ ၃ လုံး × တစ်လုံးလျှင် 150A) အစား 150A အထွတ်အထိပ်သုံးခုကို ၁၀ စက္ကန့်ခြားပြီး ရရှိမည်ဖြစ်သည်။ သင်၏လျှပ်စစ်စနစ်သည် ၎င်းကို အလွယ်တကူကိုင်တွယ်နိုင်ပြီး ဗို့အားတည်ငြိမ်နေကာ downstream ပစ္စည်းများသည် ပုံမှန်အတိုင်း ဆက်လက်လည်ပတ်နေမည်ဖြစ်သည်။.
ကုန်ကျစရိတ်-အကျိုးအမြတ်: အချိန်တိုင်းကိရိယာ သုံးလုံး ($150 စုစုပေါင်း) နှင့် PLC-based ဖြေရှင်းချက် ($2,000+) သို့မဟုတ် ဆက်လက်ဖြစ်ပွားနေသော အနှောက်အယှက်ခရီးစဉ်များနှင့် ဖြစ်နိုင်ချေရှိသော ပစ္စည်းပျက်စီးမှု ($$$$) ကို လက်ခံခြင်း။.
အဘယ်ကြောင့် အချိန်တိုင်းကိရိယာများသည် သင်၏ အကုန်အကျသက်သာဆုံး ထိန်းချုပ်ဖြေရှင်းချက်ဖြစ်သနည်း
| အင်္ဂါ | သင့်အတွက် တန်ဖိုး |
|---|---|
| ရိုးရှင်းသော တပ်ဆင်မှု | DIN rail ပေါ်တွင် တပ်ဆင်သည်၊ စံထိန်းချုပ်ပတ်လမ်းဝါယာကြိုး—ပရိုဂရမ်ရေးရန်မလိုအပ်ပါ |
| ချိန်ညှိနိုင်သော အချိန် | Dial or digital setting allows on-site optimization without hardware changes |
| Compact Footprint | Fits in existing control panels without major modifications |
| High Reliability | Solid-state or electromechanical designs with 100,000+ operation cycles |
| Low Cost | $50-150 per relay versus thousands for PLC-based solutions |
အောက်ခြေလိုင်း: Time relays give you precise motor startup sequencing at a fraction of the cost and complexity of programmable controllers. For applications requiring simple delays or staging without complex logic, they’re the most reliable and economical solution available.
Common Wiring Mistakes to Avoid
Even experienced electricians make these errors:
- Wiring the time relay in the motor power circuit: Time relays control the starter coil (low current), never the motor power (high current)
- Mismatching coil voltages: A 24V relay coil won’t operate reliably on 120V, and vice versa
- Inadequate wire sizing: Control circuits still require proper AWG sizing per NEC standards
- Forgetting the holding circuit: Without auxiliary contact seal-in, the motor stops when you release the start button
- Skipping the timing test: Always verify actual timing matches your setting before commissioning
Ready to Eliminate Startup Problems?
Proper time relay selection and wiring transforms chaotic motor startups into coordinated, reliable sequences. Whether you’re staging multiple pumps, protecting equipment with delayed starts, or implementing safety interlocks, time relays provide the timing intelligence your motor starters need.
Next Steps:
- Review your motor starter control schematics to identify timing opportunities
- Select time relays that match your control voltage and contact requirements
- Follow the wiring steps above for reliable, long-term operation
Need technical support? Major manufacturers like Eaton, ABB, Schneider Electric, and Phoenix Contact offer comprehensive time relay product lines with detailed wiring diagrams and application engineering support. Always consult the specific datasheet for your chosen relay model to verify terminal designations and ratings.
Your motor control system is only as reliable as its weakest link—make sure timing control isn’t yours.
