
جب “کافی حد تک اچھی” حفاظت کافی نہ ہو
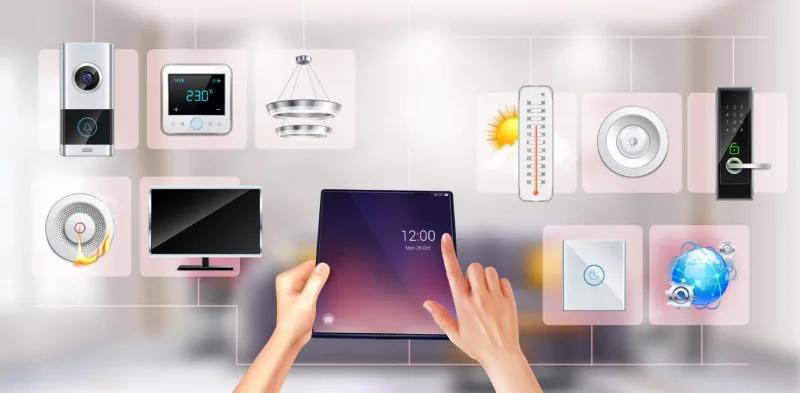
آپ نے سب کچھ ٹھیک کیا ہے۔ آپ کی 200-ایمپ کی الیکٹریکل سروس پیشہ ورانہ طور پر نصب کی گئی تھی۔ آپ کا سمارٹ ہوم سسٹم لائٹنگ سے لے کر HVAC تک ہر چیز کو کنٹرول کرتا ہے۔ آپ کے ہوم آفس میں 15,000 ڈالر کے کمپیوٹر اور ڈسپلے ہیں۔ آپ کا کچن پریمیم آلات سے چمکتا ہے۔ زندگی اچھی ہے۔.
پھر، منگل کی دوپہر کو، دو بلاک دور ایک ٹرانسفارمر کی خرابی آپ کے محلے میں ایک زبردست وولٹیج اسپائک بھیجتی ہے۔ ایک سیکنڈ سے بھی کم وقت میں، آپ کا روٹر مردہ ہو جاتا ہے۔ آپ کا سمارٹ تھرموسٹیٹ بوٹ نہیں ہوگا۔ آپ کے ریفریجریٹر کا کنٹرول بورڈ فرائی ہو جاتا ہے۔ ہوم تھیٹر؟ مکمل طور پر برکڈ۔ نقصان کا تخمینہ: 34,000 ڈالر۔.
سب سے بری بات؟ آپ کے پاس ایک سرج پروٹیکٹر تھا—ایک “پورے گھر” والا یونٹ جو آپ کے الیکٹریشن نے تین سال پہلے نصب کیا تھا۔ لیکن یہ ایک 40kA ماڈل تھا جو ایک چھوٹے اپارٹمنٹ کے لیے ڈیزائن کیا گیا تھا، نہ کہ ایک جدید 200-ایمپ گھر کے لیے جس میں اعلیٰ درجے کے الیکٹرانکس ہوں۔ یہ فوری طور پر مغلوب ہو گیا۔.
تو یہاں وہ سوال ہے جو اہمیت رکھتا ہے: آپ سرج پروٹیکشن کا صحیح سائز کیسے طے کرتے ہیں تاکہ آپ کو کبھی بھی وہ تباہ کن کال نہ آئے—اور آپ ضرورت سے زیادہ صلاحیت پر پیسہ ضائع کرنے سے کیسے بچ سکتے ہیں جس کی آپ کو ضرورت نہیں ہے؟
جب آپ کو سب سے زیادہ ضرورت ہوتی ہے تو زیادہ تر سرج پروٹیکٹر کیوں ناکام ہو جاتے ہیں
رہائشی سرج پروٹیکشن کا گندا راز یہ ہے: زیادہ تر تنصیبات پہلے دن سے ہی غلط سائز کی ہوتی ہیں۔.
یہاں عام طور پر کیا ہوتا ہے: ایک گھر کا مالک اپنے الیکٹریشن سے “ایک سرج پروٹیکٹر” کے لیے پوچھتا ہے۔ الیکٹریشن جو کچھ بھی ان کے ٹرک میں ہوتا ہے اسے انسٹال کر دیتا ہے—عام طور پر ایک درمیانی رینج کا 60-80kA یونٹ—گھر کے اصل خطرے کے پروفائل، الیکٹرانکس کی قیمت، یا مقامی سرج کے حالات کا تجزیہ کیے بغیر۔ یہ درست طریقے سے انسٹال کیا گیا ہے، اس پر UL 1449 اسٹیکر لگا ہوا ہے، اور ہر کوئی محفوظ محسوس کرتا ہے۔.
جب تک کہ ایک حقیقی سرج نہ آ جائے۔.
مسئلہ الیکٹریشن کی قابلیت نہیں ہے—یہ ہے کہ سرج پروٹیکٹر کا سائز طے کرنا ایک ہی سائز سب کے لیے موزوں فیصلہ نہیں ہے۔ ایک 200-ایمپ سروس پینل آپ کو آپ کے گھر کی پاور کی صلاحیت, کے بارے میں بتاتا ہے، لیکن یہ آپ کی سرج کی کمزوری. کے بارے میں کچھ نہیں کہتا۔ گھر ایک 2,000 مربع فٹ کا رینچ ہو سکتا ہے جس میں بنیادی آلات ہوں، یا ایک 5,000 مربع فٹ کا سمارٹ ہوم جس میں 100,000 ڈالر کے انٹیگریٹڈ سسٹم ہوں۔ دونوں میں 200-ایمپ سروس ہے۔ دونوں کو بالکل مختلف تحفظ کی ضرورت ہے۔.
پرو-ٹپ: 200-ایمپ کا جال—پینل کے سائز کو اپنا واحد سائز طے کرنے والا عنصر نہ بننے دیں۔ دیہی مونٹانا میں کم سے کم الیکٹرانکس والے 200-ایمپ گھر کو فلوریڈا میں پورے گھر کے آٹومیشن والے 200-ایمپ گھر کے مقابلے میں بہت کم تحفظ کی ضرورت ہے۔ پینل ایمپریج کم از کم ضرورت طے کرتا ہے، ہدف نہیں۔.
حل: ایک تین فیکٹر والا سرج پروٹیکشن سائز طے کرنے کا طریقہ
جواب صرف “سب سے بڑا خریدنا” نہیں ہے۔ یہ آپ کے تحفظ کو تین مخصوص عوامل سے ملانا ہے: آپ کے گھر کا الیکٹریکل انفراسٹرکچر، آپ کا الیکٹرانکس پورٹ فولیو، اور آپ کا مقامی سرج ماحول۔ جب یہ صحیح kA ریٹنگ، کلیمپنگ وولٹیج، اور رسپانس ٹائم کے ساتھ ہم آہنگ ہوتے ہیں، تو آپ کو وہ تحفظ ملتا ہے جو اس وقت کام کرتا ہے جب اس کی اہمیت ہوتی ہے—بغیر اس صلاحیت کے لیے زیادہ ادائیگی کیے جو آپ کبھی استعمال نہیں کریں گے۔.
آئیے بالکل توڑتے ہیں کہ کس طرح ایک منظم انداز کا استعمال کرتے ہوئے 200-ایمپ گھر کے لیے تحفظ کا سائز طے کیا جائے جو تمام تین عوامل پر غور کرتا ہے۔.
مکمل سائز طے کرنے کا فریم ورک: صحیح سرج پروٹیکشن کا انتخاب کیسے کریں
مرحلہ 1: پینل کے سائز کا استعمال کرتے ہوئے اپنی بنیادی تحفظ کی سطح قائم کریں
اپنی بنیادی سرج کی صلاحیت کی ضرورت کا تعین کرنے کے لیے اپنی الیکٹریکل سروس کے سائز سے شروع کریں۔ 200-ایمپ کی رہائشی سروس کے لیے، یہ آپ کی کم از کم حد قائم کرتا ہے۔.
پینل کے سائز کے لحاظ سے بنیادی سفارشات:
| الیکٹریکل سروس | کم از کم سرج کی صلاحیت | Typical Application |
|---|---|---|
| 100-150 ایمپس | 40-60 kA | چھوٹے گھر، بنیادی آلات |
| 200 ایم پی ایس | 60-80 kA | اوسط جدید گھر |
| 200+ ایمپس (اعلیٰ درجے کا) | 100-120 kA | بڑے گھر، زیادہ مانگ والے نظام |
زیادہ تر 200-ایمپ گھروں کے لیے،, 60-80kA آپ کا نقطہ آغاز ہے۔. یہ یوٹیلیٹی سوئچنگ، قریبی بجلی گرنے، اور آپ کی گلی کے ٹرانسفارمر پر آلات کے سائیکل چلانے سے ہونے والے عام سرجز کو سنبھالتا ہے۔.
لیکن یہاں نہ رکیں۔. یہ صرف بنیاد ہے۔ مراحل 2 اور 3 طے کرتے ہیں کہ آیا آپ کو اس بنیادی لائن سے اوپر یا نیچے جانے کی ضرورت ہے۔.
پرو-ٹپ: کیوں 200 ایمپس کا خود بخود مطلب 100kA نہیں ہے—آپ کے پینل کا ایمپریج مسلسل لوڈ کی صلاحیت کو بیان کرتا ہے، سرج کی کمزوری کو نہیں۔ ایک 200-ایمپ سروس ایک بڑے گھر کی مسلسل برقی مانگ کو چلا سکتی ہے، لیکن سرج کا خطرہ اس بات سے طے ہوتا ہے کہ کیا پلگ ان ہے، نہ کہ کیا دستیاب ہے۔ صحیح سائز طے کرکے پیسے بچائیں، زیادہ سائز طے کرکے نہیں۔.
مرحلہ 2: اپنے الیکٹرانکس پورٹ فولیو اور خطرے کی نمائش کے لیے ایڈجسٹ کریں
اب اپنے اصل آلات کی قیمت اور کمزوری کو اوورلے کریں۔ یہ وہ جگہ ہے جہاں زیادہ تر لوگ سائز طے کرنے میں غلطی کرتے ہیں—یا تو وہ مہنگے گیئر کو کم تحفظ دیتے ہیں یا بنیادی بوجھ کو زیادہ تحفظ دیتے ہیں۔.
اپنے الیکٹرانکس کے خطرے کے عنصر کا حساب لگائیں:
اپنے آپ سے یہ سوالات پوچھیں:
- اعلیٰ قیمت والے الیکٹرانکس؟ کیا آپ کے پاس 20,000 ڈالر سے زیادہ کے کمپیوٹر، ڈسپلے، سرور، آڈیو/ویڈیو آلات، یا طبی آلات ہیں؟
- انٹیگریٹڈ سمارٹ سسٹم؟ کیا آپ کے گھر کا آٹومیشن، سیکیورٹی، HVAC، اور لائٹنگ نیٹ ورک والے آلات کے ذریعے کنٹرول کی جاتی ہے جن کی جگہ لینے اور دوبارہ پروگرام کرنے میں 10,000 ڈالر سے زیادہ لاگت آئے گی؟
- حساس HVAC آلات؟ کیا آپ کے پاس متغیر رفتار والے ہیٹ پمپ، ملٹی زون منی اسپلٹس، یا مہنگے کنٹرول بورڈ والے جیوتھرمل سسٹم ہیں؟
- کمرشل گریڈ کے آلات؟ کیا آپ کے کچن میں بلٹ ان ایسپریسو سسٹم، ڈیجیٹل کنٹرول والے وائن ریفریجریٹرز، یا الیکٹرانک اگنیشن والے پیشہ ورانہ رینجز شامل ہیں؟
اگر آپ نے دو یا زیادہ کے لیے “ہاں” میں جواب دیا،, تو اپنی بنیادی لائن سے ایک تحفظ کی سطح اوپر جائیں۔ ایک معیاری 200-ایمپ گھر 60-80kA سے 100-120kA تک چھلانگ لگائے گا۔.
اگر آپ نے ان سب کے لیے “نہیں” میں جواب دیا،, تو آپ اپنی بنیادی رینج کے نچلے سرے پر (80kA کے بجائے 60kA) رہنے پر بھی غور کر سکتے ہیں، خاص طور پر اگر مرحلہ 3 کم سرج فریکوئنسی کی نشاندہی کرتا ہے۔.
پرو-ٹپ: کمزوری کا ضرب—صرف اپنے الیکٹرانکس کی ڈالر کی قیمت نہ گنیں۔ تبدیلی کی لاگت کے علاوہ ڈاؤن ٹائم کی لاگت پر غور کریں۔ ایک 3,000 ڈالر کا ہوم سرور 50,000 ڈالر مالیت کا کام ذخیرہ کر سکتا ہے۔ ایک 5,000 ڈالر کا سمارٹ ہوم سسٹم دوبارہ پروگرام کرنے میں ہفتوں لگ سکتا ہے۔ تحفظ انشورنس ہے: اسے کل نمائش کے لیے سائز دیں، نہ کہ صرف ہارڈ ویئر کی لاگت کے لیے۔.
مرحلہ 3: مقامی سرج کے حالات اور ماحولیاتی خطرے کو مدنظر رکھیں
حتمی متغیر یہ ہے کہ آپ کہاں رہتے ہیں۔. سرج کی فریکوئنسی جغرافیہ کے لحاظ سے ڈرامائی انداز میں مختلف ہوتی ہے، اور اس سے آپ کے حتمی انتخاب میں کمی یا اضافہ ہونا چاہیے۔.
زیادہ خطرے والے مقامات (اعلی تحفظ کی ضرورت):
- بجلی گرنے کے امکان والے علاقے: فلوریڈا، خلیجی ساحل، ماؤنٹین ویسٹ، عظیم جھیلیں۔
- غیر مستحکم گرڈ والے علاقے: وہ علاقے جہاں بجلی کی فراہمی میں اکثر تعطل ہوتا ہے، پرانا انفراسٹرکچر، یا دیہی علاقے جہاں تقسیم کی طویل لائنیں ہیں۔
- صنعتی بوجھ سے قربت: فیکٹریوں، ڈیٹا سینٹرز، یا بڑی موٹرز والی سہولیات کے قریب جو اکثر چلتی ہیں۔
کم خطرے والے مقامات (بیس لائن یا قدرے کم استعمال کر سکتے ہیں):
- زیر زمین یوٹیلیٹیز اور جدید گرڈ انفراسٹرکچر والے شہری علاقے
- وہ علاقے جہاں سالانہ بجلی گرنے کی کثافت کم ہے۔
- مستحکم پاور گرڈ جن میں کم تعطل یا جھلملاہٹ ہو۔
ایڈجسٹ کرنے کا طریقہ یہاں ہے:
- زیادہ خطرے والا مقام + زیادہ قیمت والی الیکٹرانکس؟ اپنے مرحلہ 2 کی سفارش میں 20-40kA شامل کریں۔ (مثال: 80kA بیس لائن 100-120kA ہو جاتی ہے)
- کم خطرے والا مقام + بنیادی الیکٹرانکس؟ آپ آرام سے اپنی بیس لائن کے نچلے سرے پر رہ سکتے ہیں۔ (مثال: 80kA کے بجائے 60kA کافی ہے)
پرو ٹپ: بھولا ہوا عنصر—آپ کا زپ کوڈ آپ کے پینل کے سائز سے زیادہ اہم ہے۔ ٹمپا (امریکہ کا بجلی کا دارالحکومت) میں 200-amp کا گھر سیئٹل میں ایک جیسے گھر کے مقابلے میں 10 گنا زیادہ سرج کے خطرے کا سامنا کرتا ہے۔ اپنا انتخاب حتمی شکل دینے سے پہلے اپنے مقامی بجلی کی کثافت کے نقشے اور یوٹیلیٹی کی وشوسنییتا کے ڈیٹا کی جانچ کریں۔ 100kA یونٹ میں سرمایہ کاری ایک روکے گئے حملے کے بعد خود کو ادا کر دیتی ہے۔.
مرحلہ 4: kA ریٹنگ سے آگے اہم تکنیکی خصوصیات کی تصدیق کریں۔
ایک بار جب آپ مراحل 1-3 کا استعمال کرتے ہوئے اپنی مطلوبہ سرج کی گنجائش کا تعین کر لیتے ہیں، تو تصدیق کریں کہ آپ کا منتخب کردہ یونٹ ان اضافی کارکردگی کے معیار پر پورا اترتا ہے۔. ایک اعلی kA ریٹنگ بیکار ہے اگر آلہ بہت آہستہ جواب دیتا ہے یا بہت زیادہ وولٹیج کو گزرنے دیتا ہے۔.
تصدیق کرنے کے لیے اہم خصوصیات:
کلیمپنگ وولٹیج (وولٹیج پروٹیکشن ریٹنگ):
- ہدف: 400V یا اس سے کم (UL 1449 ٹیسٹنگ کے تحت ماپا جاتا ہے)
- یہ وولٹیج کی وہ سطح ہے جس پر محافظ چالو ہوتا ہے۔ کم بہتر ہے۔.
- بہت سے سستے یونٹ 600-800V پر کلیمپ کرتے ہیں، جس سے نقصان دہ وولٹیج حساس الیکٹرانکس تک پہنچ جاتا ہے۔.
- یہ کیوں اہم ہے: جدید الیکٹرانکس، خاص طور پر کمپیوٹر اور سمارٹ ڈیوائسز، 330V جتنے کم وولٹیج سے بھی خراب ہو سکتے ہیں۔ 600V کلیمپنگ وولٹیج کا مطلب ہے کہ آپ کا سامان تحفظ شروع ہونے سے پہلے محفوظ حد سے تقریبا دوگنا وولٹیج کا سامنا کر رہا ہے۔.
جواب کا وقت:
- ہدف: 1 نینو سیکنڈ سے کم
- تیز ردعمل کا وقت مطلب ہے کہ ابتدائی سرج مرحلے کے دوران کم وولٹیج آپ کے سامان تک پہنچتا ہے۔.
- معیاری یونٹ پکو سیکنڈ میں جواب دیتے ہیں۔ بجٹ یونٹ 3-5 نینو سیکنڈ لے سکتے ہیں۔.
UL 1449 چوتھا ایڈیشن سرٹیفیکیشن:
- غیر گفت و شنید۔. یہ سرٹیفیکیشن ثابت کرتا ہے کہ یونٹ کو حقیقی دنیا کے سرج حالات میں حفاظت اور کارکردگی کے لیے جانچا گیا ہے۔.
- تصدیق کریں کہ یونٹ کو ٹائپ 1 (سروس اینٹرنس) یا ٹائپ 2 (لوڈ سینٹر) محافظ کے طور پر درجہ بندی کیا گیا ہے۔.
زیادہ سے زیادہ مسلسل آپریٹنگ وولٹیج (MCOV):
- آپ کے سسٹم وولٹیج سے مماثل ہونا چاہیے۔ رہائشی 240V اسپلٹ فیز سروس کے لیے، 150V L-N (لائن ٹو نیوٹرل) اور 300V L-L (لائن ٹو لائن) کا MCOV تلاش کریں۔.
اشارے لائٹس اور تشخیص:
- ایل ای ڈی اسٹیٹس انڈیکیٹرز آپ کو بتاتے ہیں کہ آیا تحفظ فعال ہے یا یونٹ سمجھوتہ کر لیا گیا ہے۔.
- کچھ جدید یونٹوں میں قابل سماعت الارم یا ریموٹ مانیٹرنگ کی صلاحیتیں شامل ہیں۔.
وارنٹی:
- معیاری مینوفیکچررز منسلک آلات کے نقصان کے لیے آلات کے تحفظ کی وارنٹی پیش کرتے ہیں ($25,000-$100,000 کوریج)۔.
- محافظ کی اپنی پروڈکٹ وارنٹی بھی چیک کریں (عام طور پر 5-10 سال)۔.
پرو ٹپ: سپیک شیٹ سیلز پچ سے زیادہ اہم ہے—800V کلیمپنگ وولٹیج اور سست ردعمل والا 120kA محافظ 400V کلیمپنگ اور سب نینو سیکنڈ ردعمل والے 80kA یونٹ سے کمتر ہے۔ ہیڈ لائن kA نمبر سے اندھے نہ ہوں۔ مکمل UL 1449 ٹیسٹ رپورٹ دیکھنے کا مطالبہ کریں، خاص طور پر تمام طریقوں (L-N, L-L, L-G) میں کلیمپنگ وولٹیج۔.
حقیقی دنیا کی سائزنگ کی مثالیں: سب کو ایک ساتھ رکھنا
آئیے تین اصل 200-amp گھروں کا جائزہ لیتے ہیں تاکہ یہ معلوم ہو سکے کہ فریم ورک عملی طور پر کیسے کام کرتا ہے:
مثال 1: مضافاتی خاندانی گھر (انڈیاناپولس، IN)
- 200-amp سروس
- بنیادی الیکٹرانکس: لیپ ٹاپ، ٹی وی، معیاری آلات
- سنگل اسٹیج HVAC
- بجلی کے خطرے والا معتدل علاقہ
سفارش: 60-80kA (بیس لائن، کسی ایڈجسٹمنٹ کی ضرورت نہیں)
تخمینہ شدہ لاگت: $400-600 انسٹال
مثال 2: سمارٹ ہوم (ٹمپا، FL)
- 200-amp سروس
- پورے گھر کی آٹومیشن، نیٹ ورکڈ HVAC، سیکیورٹی سسٹمز میں $40,000
- بجلی کی زیادہ فریکوئنسی (سالانہ فی مربع میل 80+ حملے)
- بجلی کی فراہمی میں بار بار تعطل
سفارش: 100-120kA (بیس لائن + الیکٹرانکس کا خطرہ + مقام کا خطرہ)
تخمینہ شدہ لاگت: $800-1,200 انسٹال
مثال 3: دیہی گھر (مونٹانا)
- 200-amp سروس
- بنیادی آلات، کم سے کم الیکٹرانکس
- لمبی ڈسٹری بیوشن لائنیں (غیر مستحکم پاور)
- کم بجلی گرنے کی فریکوئنسی
سفارش: 60-80kA (بنیادی لائن کافی ہے؛ مقام خطرے کو کم کرتا ہے لیکن یوٹیلیٹی کی عدم استحکام اسے رینج میں رکھتی ہے)
تخمینہ شدہ لاگت: $400-600 انسٹال
تنصیب اور پرتوں والی حفاظت: اپنی سرمایہ کاری کو کارآمد بنانا
صحیح سرج کی صلاحیت کا انتخاب کرنا صرف آدھا کام ہے۔. پیشہ ورانہ تنصیب اور پرتوں والی حفاظت ہی ایک اچھے سرج پروٹیکٹر کو جامع دفاع میں بدلتی ہے۔.
پیشہ ورانہ تنصیب کیوں غیر گفت و شنید ہے
پورے گھر کے سرج پروٹیکٹر براہ راست آپ کے مین الیکٹریکل پینل یا سروس کے داخلی راستے سے جڑتے ہیں۔ یہ تین اہم وجوہات کی بنا پر DIY پروجیکٹ نہیں ہے:
- کوڈ کی تعمیل: زیادہ تر دائرہ اختیار میں لائسنس یافتہ الیکٹریشنز کو الیکٹریکل پینلز کے اندر کام کرنے کی ضرورت ہوتی ہے۔.
- مناسب بانڈنگ اور گراؤنڈنگ: سرج پروٹیکٹر اضافی وولٹیج کو محفوظ طریقے سے موڑنے کے لیے آپ کے گھر کے گراؤنڈنگ سسٹم پر انحصار کرتے ہیں۔ اگر گراؤنڈنگ ناکافی ہے تو، تحفظ ناکام ہو جاتا ہے۔.
- درست جگہ کا تعین: پروٹیکٹر کو صحیح جگہ پر نصب کیا جانا چاہیے (عام طور پر ایک وقف شدہ بریکر پر) تاکہ سرجز کو آپ کے گھر کی وائرنگ میں داخل ہونے سے پہلے روکا جا سکے۔.
ناقص نصب شدہ 120kA یونٹ مناسب طریقے سے نصب شدہ 60kA یونٹ سے کم تحفظ فراہم کرتا ہے۔.
پرتوں والی دفاعی حکمت عملی: پورے گھر + پوائنٹ آف یوز
یہاں تک کہ بہترین پورے گھر کا پروٹیکٹر بھی ہر نقصان دہ سرج کو نہیں روک سکتا—خاص طور پر آپ کے گھر کے اندر پیدا ہونے والے چھوٹے ٹرانزینٹس (آلات سائیکلنگ، موٹر اسٹارٹ اپس وغیرہ)۔ یہی وجہ ہے کہ سمارٹ پروٹیکشن تہوں کا استعمال کرتا ہے:
پرت 1: پورے گھر کی حفاظت (بنیادی دفاع)
- یوٹیلیٹی لائنوں اور بجلی گرنے سے آنے والے بڑے بیرونی سرجز کو روکتا ہے
- تمام سرکٹس اور ہارڈ وائرڈ آلات کی حفاظت کرتا ہے
- تباہ کن نقصان کے خلاف آپ کی دفاع کی اہم لائن
پرت 2: پوائنٹ آف یوز پروٹیکشن (ثانوی دفاع)
- حساس الیکٹرانکس کے لیے انفرادی سرج سٹرپس یا آؤٹ لیٹ پروٹیکٹرز
- چھوٹے سرجز اور کسی بھی وولٹیج کو ہینڈل کرتا ہے جو پورے گھر کے یونٹ سے پھسل جاتا ہے
- خاص طور پر کمپیوٹرز، ہوم تھیٹر کے آلات اور نیٹ ورکنگ گیئر کے لیے اہم ہے
پرو ٹپ: 80/20 پروٹیکشن رول—آپ کا پورے گھر کا پروٹیکٹر 80% سرج ایونٹس اور 95% سرج انرجی کو ہینڈل کرتا ہے۔ پوائنٹ آف یوز پروٹیکٹرز باقی 20% ایونٹس اور وہ اہم آخری 5% انرجی کو پکڑتے ہیں جو اب بھی حساس سرکٹس کو فرائی کر سکتے ہیں۔ دونوں کے لیے بجٹ بنائیں: پورے گھر کے لیے 800 + اہم آلات پر معیاری پوائنٹ آف یوز یونٹس کے لیے 200-300۔.
جاری دیکھ بھال: تحفظ کو فعال رکھنا
سرج پروٹیکٹر ہمیشہ کے لیے نہیں رہتے۔ ہر سرج جسے وہ روکتے ہیں ان کے حفاظتی اجزاء کو کمزور کرتا ہے۔ ان دیکھ بھال کے اقدامات پر عمل کریں:
- ہر ماہ اسٹیٹس لائٹس چیک کریں۔ زیادہ تر یونٹس میں ایل ای ڈی اشارے ہوتے ہیں جو تحفظ کی حیثیت کو ظاہر کرتے ہیں۔.
- بڑے سرجز کے بعد ٹیسٹ کریں۔ اگر آپ کے علاقے میں براہ راست بجلی گرتی ہے یا کوئی بڑا یوٹیلیٹی ایونٹ ہوتا ہے، تو تصدیق کریں کہ آپ کا پروٹیکٹر اب بھی فعال ہے۔.
- ہر 5-10 سال بعد تبدیل کریں۔ یہاں تک کہ بڑے سرج ایونٹس کے بغیر بھی، حفاظتی اجزاء وقت کے ساتھ ساتھ کمزور ہو جاتے ہیں۔.
- سالانہ گراؤنڈنگ کی تصدیق کریں۔ اپنے الیکٹریشن سے اپنے گھر کے گراؤنڈنگ سسٹم کی جانچ کروائیں تاکہ یہ یقینی بنایا جا سکے کہ یہ موجودہ کوڈ کی ضروریات کو پورا کرتا ہے۔.
ان عام سائزنگ کی غلطیوں سے بچیں
اپنا حتمی انتخاب کرنے سے پہلے، ان جالوں سے ہوشیار رہیں:
- غلطی 1: “میرے پاس 200 ایمپس ہیں، اس لیے مجھے 200kA پروٹیکٹر کی ضرورت ہے۔” پینل ایمپریج اور سرج کی صلاحیت براہ راست متعلق نہیں ہیں۔ ایک 200-ایمپ پینل 200kA سرجز پیدا نہیں کرتا ہے۔ پینل کی درجہ بندی کی بجائے خطرے کی بنیاد پر سائز کریں۔.
- غلطی 2: “سب سے سستا 80kA یونٹ ٹھیک ہے—kA ہی سب کچھ ہے۔” 800V کلیمپنگ وولٹیج اور UL 1449 سرٹیفیکیشن کے بغیر ایک بجٹ 80kA پروٹیکٹر تقریباً بیکار ہے۔ تمام اسپیکس کی تصدیق کریں۔.
- غلطی 3: “ایک سرج پروٹیکٹر سب کچھ کور کرتا ہے۔” پورے گھر کی حفاظت ضروری ہے، لیکن حساس الیکٹرانکس کو پوائنٹ آف یوز بیک اپ پروٹیکشن کی ضرورت ہے۔.
- غلطی 4: “میں اسے خود انسٹال کروں گا اور 200 بچاؤں گا۔” غلط تنصیب وارنٹیوں کو باطل کر دیتی ہے، کوڈز کی خلاف ورزی کرتی ہے، اور آپ کو مکمل طور پر غیر محفوظ چھوڑ سکتی ہے۔ ہمیشہ ایک لائسنس یافتہ الیکٹریشن کی خدمات حاصل کریں۔.
- غلطی 5: “ایک بار انسٹال ہونے کے بعد، میں ہمیشہ کے لیے محفوظ ہوں۔” سرج پروٹیکٹر ہر سرج ایونٹ کے ساتھ کمزور ہوتے ہیں۔ اسٹیٹس انڈیکیٹرز چیک کریں اور بالآخر تبدیلی کی منصوبہ بندی کریں۔.
خلاصہ: اپنے سرج پروٹیکشن کا صحیح سائز
اپنے 200-ایمپ گھر کو برقی سرجز سے بچانا سب سے بڑا یونٹ یا سب سے سستا یونٹ خریدنے کے بارے میں نہیں ہے—یہ آپ کے اصل خطرے کے پروفائل سے تحفظ کو منظم طریقے سے ملانے کے بارے میں ہے۔ اس تین قدمی فریم ورک پر عمل کر کے، آپ یہ کر سکتے ہیں:
- ✓ اپنے الیکٹریکل سروس کے سائز سے شروع کریں۔ بنیادی تحفظ قائم کرنے کے لیے (زیادہ تر 200-ایمپ گھروں کے لیے 60-80kA)
- ✓ اپنے الیکٹرانکس پورٹ فولیو کے لیے ایڈجسٹ کریں۔ اعلیٰ قیمت یا حساس آلات کا حساب لگانے کے لیے (اگر ضرورت ہو تو 100-120kA پر منتقل ہوں)
- ✓ مقامی سرج کے حالات میں فیکٹر ان کریں۔ بجلی کی فریکوئنسی اور گرڈ کے استحکام کی بنیاد پر (زیادہ خطرے والے علاقوں میں 20-40kA شامل کریں)
- ✓ kA درجہ بندی سے آگے اہم اسپیکس کی تصدیق کریں: کلیمپنگ وولٹیج ≤400V، UL 1449 سرٹیفیکیشن، سب-نانو سیکنڈ رسپانس ٹائم
- ✓ اپنے دفاع کی پرت لگائیں پورے گھر کی حفاظت کے علاوہ حساس آلات کے لیے پوائنٹ آف یوز یونٹس کے ساتھ
- ✓ پیشہ ورانہ تنصیب میں سرمایہ کاری کریں۔ مناسب بانڈنگ، گراؤنڈنگ اور کوڈ کی تعمیل کو یقینی بنانے کے لیے
60kA اور 120kA یونٹ کے درمیان لاگت کا فرق 300-400 ہو سکتا ہے۔ تباہ شدہ الیکٹرانکس کو تبدیل کرنے، ڈیٹا کے نقصان اور سرج کے بعد ڈاؤن ٹائم کی لاگت آسانی سے 50,000 سے تجاوز کر سکتی ہے۔ یہ کونے کاٹنے کا علاقہ نہیں ہے—لیکن یہ اندازے کی بنیاد پر جنگلی طور پر زیادہ خرچ کرنے کا علاقہ بھی نہیں ہے۔.
اب کارروائی کریں۔. اس فریم ورک کا استعمال کرتے ہوئے اپنے گھر کے موجودہ تحفظ (یا اس کی کمی) کا جائزہ لیں۔ ایک لائسنس یافتہ الیکٹریشن سے مشورہ کریں جو سرج پروٹیکشن کو سمجھتا ہو—نہ کہ صرف کوئی ایسا شخص جو “ٹرک پر جو کچھ ہے” انسٹال کرتا ہے۔ اور یاد رکھیں: سرج پروٹیکشن انسٹال کرنے کا بہترین وقت اگلے طوفان سے پہلے ہے، بعد میں نہیں۔.
آپ کے گھر کے الیکٹرانکس، آلات اور سسٹمز اس بات پر منحصر ہیں کہ آپ اسے درست کریں۔ اب آپ کے پاس بالکل وہی کرنے کا علم ہے۔.
پورے گھر کے سرج پروٹیکشن کے سائز اور انسٹال کرنے میں ماہر مدد کی ضرورت ہے؟ ایک لائسنس یافتہ الیکٹریشن سے رابطہ کریں جو پاور کوالٹی اور سرج پروٹیکشن میں مہارت رکھتا ہو۔ اس گائیڈ کو اپنے ساتھ لائیں تاکہ یہ یقینی بنایا جا سکے کہ وہ تمام تین سائزنگ عوامل پر غور کرتے ہیں—نہ کہ صرف آپ کے پینل ایمپریج پر۔ آپ کی سرمایہ کاری اس تحفظ کی مستحق ہے جو آپ کو سب سے زیادہ ضرورت کے وقت اصل میں کام کرے۔.
