Οι χρονοδιακόπτες διακόπτη φωτός προσφέρουν έναν βολικό τρόπο για την αυτοματοποίηση του οικιακού φωτισμού, με επιλογές που κυμαίνονται από απλές μηχανικές συσκευές έως εξελιγμένους ψηφιακούς έξυπνους χρονοδιακόπτες και ακόμη και DIY λύσεις με βάση το Arduino. Ο προγραμματισμός αυτών των χρονοδιακοπτών συνήθως περιλαμβάνει τη ρύθμιση της τρέχουσας ώρας, τη δημιουργία χρονοδιαγραμμάτων ενεργοποίησης/απενεργοποίησης και τη διασφάλιση της σωστής σύνδεσης της συσκευής με τα φωτιστικά σας.
Προγραμματισμός ενός μηχανικού χρονοδιακόπτη

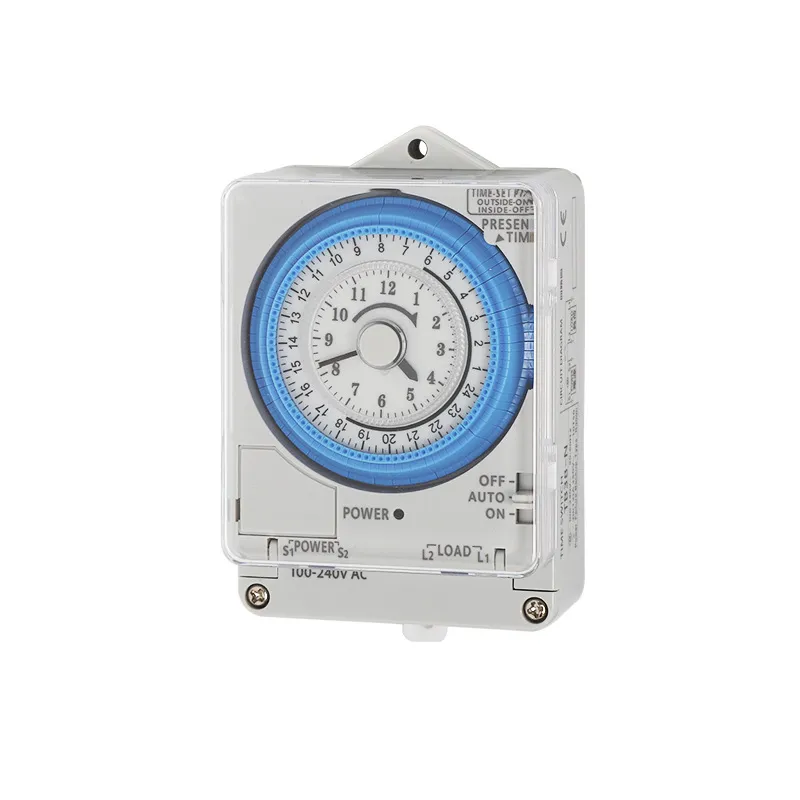
Οι μηχανικοί χρονοδιακόπτες προσφέρουν έναν απλό και αξιόπιστο τρόπο αυτοματοποίησης των προγραμμάτων φωτισμού χωρίς την ανάγκη ψηφιακών διεπαφών ή πολύπλοκου προγραμματισμού. Αυτές οι συσκευές χρησιμοποιούν συνήθως έναν περιστρεφόμενο επιλογέα με καρφίτσες ή καρτέλες για τη ρύθμιση των χρόνων ενεργοποίησης/απενεργοποίησης. Ακολουθεί ο τρόπος προγραμματισμού ενός μηχανικού χρονοδιακόπτη:
- Ρυθμίστε την τρέχουσα ώρα περιστρέφοντας τον επιλογέα μέχρι το βέλος ή η ένδειξη να δείχνει τη σωστή ώρα.
- Εισάγετε καρφίτσες ή πιέστε κάτω τις γλωττίδες στους επιθυμητούς χρόνους ενεργοποίησης/απενεργοποίησης γύρω από τον 24ωρο επιλογέα.
- Βεβαιωθείτε ότι ο διακόπτης του χρονοδιακόπτη είναι ρυθμισμένος στη λειτουργία "Χρονοδιακόπτης" ή "Αυτόματη" και όχι στη λειτουργία "Ενεργοποίηση" ή "Απενεργοποίηση".
- Για εβδομαδιαία προγράμματα, ορισμένα μοντέλα διαθέτουν καντράν 7 ημερών με πολλαπλές σειρές καρφιτσών.
- Οι περισσότεροι μηχανικοί χρονοδιακόπτες διαθέτουν δυνατότητα χειροκίνητης παράκαμψης για την ενεργοποίηση/απενεργοποίηση των φώτων εκτός των προγραμματισμένων χρόνων.
- Θυμηθείτε να προσαρμόζετε το χρονοδιακόπτη κατά τη διάρκεια αλλαγής της θερινής ώρας.
Οι μηχανικοί χρονοδιακόπτες είναι ιδιαίτερα χρήσιμοι για σταθερά χρονοδιαγράμματα και συχνά προτιμώνται για την ανθεκτικότητα και την ευκολία χρήσης τους σε εφαρμογές όπως οι εσωτερικοί κήποι ή ο φωτισμός ενυδρείων χελωνών.
Εξερευνήστε περισσότερα
Προγραμματισμός ψηφιακού χρονοδιακόπτη
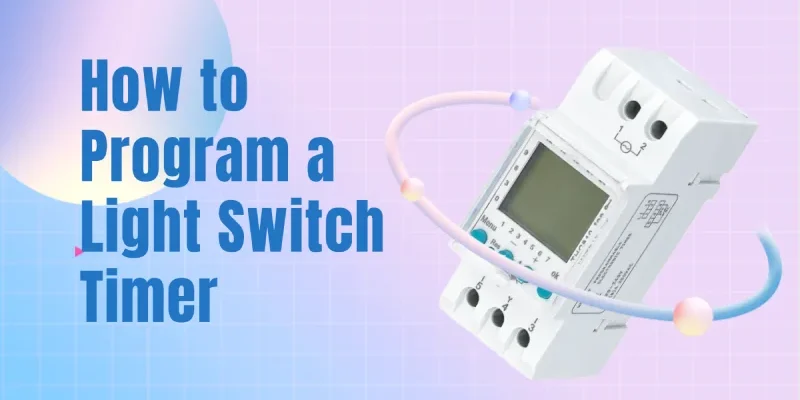
Οι ψηφιακοί χρονοδιακόπτες προσφέρουν προηγμένα χαρακτηριστικά και ευελιξία για τον προγραμματισμό των προγραμμάτων φωτισμού. Ακολουθεί ένας οδηγός για τον προγραμματισμό ενός τυπικού ψηφιακού χρονοδιακόπτη φωτισμού:
- Ρυθμίστε την τρέχουσα ώρα και ημέρα πατώντας το κουμπί ρολογιού και χρησιμοποιώντας τα βέλη πάνω/κάτω για να ρυθμίσετε.
- Εισέλθετε στη λειτουργία προγραμματισμού πατώντας το κουμπί "PROG".
- Επιλέξτε την ημέρα (ή τις ημέρες) για το πρόγραμμα χρησιμοποιώντας το κουμπί ημέρας ή τα βέλη.
- Ρυθμίστε την ώρα "ON" χρησιμοποιώντας τα κουμπιά ώρας και λεπτού και, στη συνέχεια, πατήστε enter.
- Ρυθμίστε το χρόνο "OFF" με την ίδια μέθοδο και, στη συνέχεια, πατήστε ξανά enter.
- Για πολλαπλά προγράμματα, επαναλάβετε τη διαδικασία για κάθε επιθυμητό κύκλο ενεργοποίησης/απενεργοποίησης.
- Βεβαιωθείτε ότι ο χρονοδιακόπτης είναι ρυθμισμένος στη λειτουργία "AUTO" για να ενεργοποιήσετε το προγραμματισμένο πρόγραμμα.
Οι περισσότεροι ψηφιακοί χρονοδιακόπτες προσφέρουν δυνατότητα χειροκίνητης παράκαμψης για την ενεργοποίηση/απενεργοποίηση των φώτων εκτός των προγραμματισμένων ωρών. Ορισμένα μοντέλα επιτρέπουν διαφορετικά χρονοδιαγράμματα για τις καθημερινές και τα Σαββατοκύριακα για μεγαλύτερη προσαρμογή.
Θυμηθείτε να προσαρμόσετε το χρονοδιακόπτη κατά τη διάρκεια αλλαγής της θερινής ώρας, αν και ορισμένα προηγμένα μοντέλα μπορεί να το κάνουν αυτό αυτόματα. Οι ψηφιακοί χρονοδιακόπτες παρέχουν συχνά ακριβέστερο έλεγχο και τη δυνατότητα δημιουργίας σύνθετων προγραμμάτων σε σύγκριση με τις μηχανικές εναλλακτικές λύσεις, καθιστώντας τους ιδανικούς για σπίτια με ποικίλα πρότυπα χρήσης ή ειδικές ανάγκες φωτισμού.
Μηχανικός έναντι ψηφιακού προγραμματισμού
Οι βασικές διαφορές μεταξύ του προγραμματισμού μηχανικών και ψηφιακών χρονοδιακοπτών έγκεινται στις μεθόδους ρύθμισης, την ακρίβεια και την ευελιξία τους:
- Εγκατάσταση: Οι μηχανικοί χρονοδιακόπτες χρησιμοποιούν φυσικές καρφίτσες ή καρτέλες σε ένα περιστρεφόμενο καντράν, ενώ οι ψηφιακοί χρονοδιακόπτες απαιτούν το πάτημα κουμπιών για την εισαγωγή χρονοδιαγραμμάτων μέσω μιας ψηφιακής διασύνδεσης.
- Ακρίβεια: Τα ψηφιακά χρονόμετρα προσφέρουν μεγαλύτερη ακρίβεια, συχνά με ακρίβεια λεπτού, ενώ τα μηχανικά χρονόμετρα έχουν συνήθως διαβαθμίσεις 15-30 λεπτών.
- Ευελιξία: Οι ψηφιακοί χρονοδιακόπτες επιτρέπουν πολύπλοκα προγράμματα με πολλαπλούς ημερήσιους κύκλους και διαφορετικές ρυθμίσεις για τις καθημερινές/σαββατοκύριακα. Οι μηχανικοί χρονοδιακόπτες περιορίζονται σε απλούστερους, επαναλαμβανόμενους 24ωρους κύκλους.
- Παράκαμψη: Και οι δύο τύποι προσφέρουν συνήθως χειροκίνητη παράκαμψη, αλλά οι ψηφιακοί χρονοδιακόπτες μπορεί να παρέχουν πιο εξελιγμένες προσωρινές αναστολές του προγράμματος.
- Εξάρτηση από την εξουσία: Οι μηχανικοί χρονοδιακόπτες διατηρούν τις ρυθμίσεις τους κατά τη διάρκεια διακοπών ρεύματος, ενώ οι ψηφιακοί χρονοδιακόπτες μπορεί να απαιτούν εφεδρικές μπαταρίες για να διατηρήσουν τον προγραμματισμό.
Αυτές οι διαφορές καθιστούν τους ψηφιακούς χρονοδιακόπτες πιο κατάλληλους για ποικίλα χρονοδιαγράμματα και ανάγκες ακριβούς χρονομέτρησης, ενώ οι μηχανικοί χρονοδιακόπτες ξεχωρίζουν για την απλότητα και την αξιοπιστία τους για σταθερές καθημερινές ρουτίνες.


