
Bottom Line Up Front: Replacing a circuit breaker is a manageable DIY project for experienced homeowners, but safety is paramount. This guide covers when replacement is necessary, step-by-step instructions, costs, and when to call professionals.
Circuit breakers are the unsung heroes of your home’s electrical system, protecting your wiring and family from dangerous electrical overloads. When a circuit breaker fails, knowing how to replace a circuit breaker safely can save you money and restore power quickly. However, this project requires careful attention to safety protocols and electrical knowledge.
When to Replace a Circuit Breaker
Signs of a Bad Circuit Breaker
Frequent Tripping: If your breaker trips repeatedly even after resetting and reducing the electrical load, it may be worn out from years of use.
Won’t Stay Reset: A breaker that immediately trips again or won’t click firmly into the “ON” position has likely reached the end of its lifespan.
Physical Damage: Look for these warning signs:
- Scorch marks or burn smells around the breaker
- Cracked or damaged housing
- Loose connections or exposed wiring
- Hot breaker that’s warm to the touch
Age-Related Wear: Circuit breakers typically last 25-30 years. If your electrical panel is over 20 years old and experiencing issues, replacement may be necessary.
Electrical Upgrades: Installing new high-amperage appliances may require upgrading from a 15-amp to 20-amp breaker, provided your home’s wiring can handle the increased load.
When to Call a Professional
Stop immediately and contact a licensed electrician if:
- The electrical panel feels hot or shows signs of moisture
- You smell burning or see sparks
- You’re unfamiliar with electrical safety procedures
- Local codes require permits for electrical work
- You’re dealing with a main breaker or panel upgrades
Understanding Circuit Breaker Replacement Costs
Circuit breaker replacement involves both parts and labor costs. DIY replacement is significantly less expensive than professional installation, but safety considerations should be your primary concern. Professional installation ensures code compliance and proper safety protocols, while DIY replacement requires electrical experience and proper safety equipment.
Essential Tools and Materials
Safety Equipment (Non-Negotiable)
- Safety glasses – Protect against potential sparks
- Rubber-soled shoes or rubber mat – Essential grounding protection
- Insulated rubber gloves – Electrical-rated gloves only
- Flashlight or headlamp – You’ll be working with power off
Required Tools
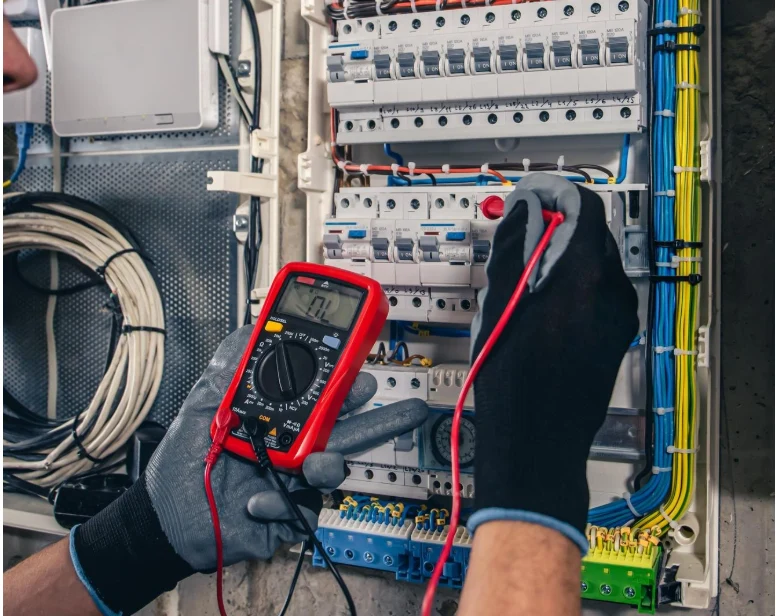
- Non-contact voltage tester – Verify power is truly off
- Multimeter – Test circuit continuity
- Insulated screwdrivers – Phillips and flathead
- Needle-nose pliers (insulated handles)
- Wire strippers (if rewiring needed)
Materials
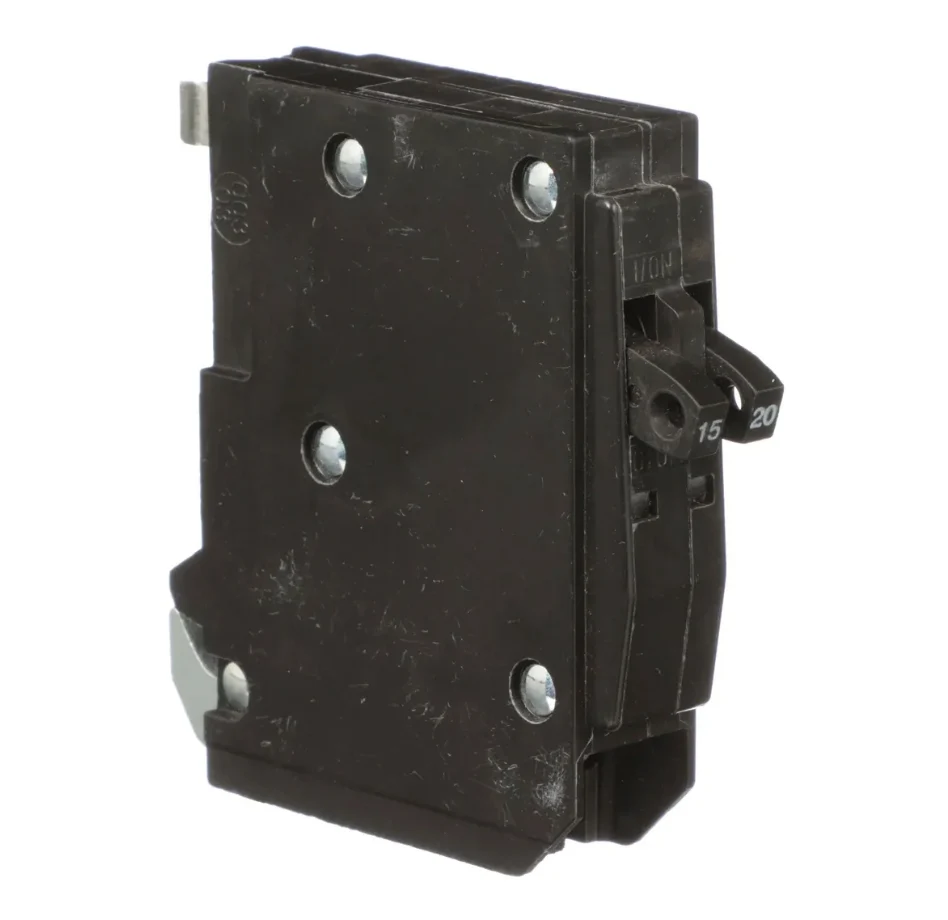
- Replacement circuit breaker – Must match exactly (brand, amperage, type)
- Electrical tape – For marking and securing
- Wire nuts (if needed for connections)
Step-by-Step Circuit Breaker Replacement
Safety First: Pre-Work Preparation
1. Identify the Problem Circuit
If you’re unsure which breaker controls the problematic circuit, plug a radio into an outlet on that circuit. Turn up the volume, then flip breakers one by one until the radio goes silent.
2. Turn Off All Connected Devices
Unplug appliances and turn off lights connected to the circuit you’re working on.
3. Create a Dry Work Environment
Ensure the area around your electrical panel is completely dry. Water and electricity are a deadly combination.
Step 1: Shut Down Power Safely
Turn Off the Main Breaker: Locate your main circuit breaker (usually at the top or bottom of the panel) and flip it to “OFF.” This cuts power to all branch circuits.
Verify Power is Off: Use a non-contact voltage tester on the breaker you plan to replace. The tester should not light up or beep.
Set Up Lighting: Position your flashlight or headlamp for hands-free illumination.
Step 2: Remove the Panel Cover
Remove Corner Screws First: Start with the four corner screws, leaving the middle screws for last to prevent the cover from falling.
Support the Cover: Hold the cover firmly while removing the final screws to prevent it from falling into the panel or onto the floor.
Inspect for Issues: Look for any obvious signs of damage, corrosion, or unusual wiring before proceeding.
Step 3: Identify and Test the Faulty Breaker
Locate the Breaker: Find the specific breaker that needs replacement. It should be clearly labeled, but if not, refer to your earlier circuit identification.
Final Safety Check: Use your voltage tester once more on the breaker terminals to confirm no power is present.
Photograph the Setup: Take a clear photo of how wires are connected before disconnecting anything.
Step 4: Remove the Old Circuit Breaker
Turn Breaker to OFF: Ensure the faulty breaker is in the “OFF” position.
Disconnect the Hot Wire: Carefully loosen the screw terminal holding the black (hot) wire. For 240V circuits, there will be two hot wires (typically black and red).
Disconnect Additional Wires: If replacing AFCI or GFCI breakers, disconnect the white neutral wire and any pigtail connections.
Remove the Breaker: Grip the outer edge of the breaker and rock it gently while pulling outward. It should snap free from the bus bar connection.
Step 5: Install the New Circuit Breaker
Verify Compatibility: Double-check that your new breaker matches the old one exactly – same brand, amperage, and type.
Position the New Breaker: Ensure the new breaker is in the “OFF” position before installation.
Connect to Bus Bar: Align the breaker with the bus bar and push firmly until it clicks into place. You should feel it seat securely.
Reconnect Wires:
– Attach the black hot wire to the “LINE” or “LOAD” terminal
– For AFCI/GFCI breakers, connect the white neutral wire to the appropriate terminal
– Tighten all connections firmly but don’t overtighten
Step 6: Test and Restore Power
Replace Panel Cover: Carefully reinstall the panel cover, ensuring no wires are pinched.
Turn On Main Breaker: Restore power to your panel by switching the main breaker to “ON.”
Test the New Breaker:
– Switch the new breaker to “ON”
– Test outlets and fixtures on the circuit
– Verify the breaker doesn’t immediately trip
Troubleshooting Common Issues
New Breaker Immediately Tips
- Check for overloaded circuit – Remove some devices and try again
- Inspect for short circuits – Look for damaged wires or faulty appliances
- Verify proper installation – Ensure breaker is fully seated on bus bar
Breaker Won’t Stay in “ON” Position
- Confirm correct breaker type – Wrong amperage or incompatible brand
- Check wire connections – Loose connections can cause this issue
- Internal breaker damage – May need another replacement
No Power Despite Successful Installation
- Test other circuits – Main breaker may not be fully engaged
- Check GFCI/AFCI settings – These breakers may require reset after installation
- Verify all connections – Double-check all wire terminals are tight
Understanding Circuit Breaker Types
Standard Circuit Breakers
- Single-Pole (15-20 amp): Controls 120V circuits like outlets and lights
- Double-Pole (20-60 amp): Controls 240V circuits for appliances like dryers and water heaters
Safety Circuit Breakers
- AFCI (Arc-Fault Circuit Interrupter): Required in bedrooms and living areas, detects dangerous electrical arcs
- GFCI (Ground-Fault Circuit Interrupter): Required in bathrooms and kitchens, protects against electrical shock
- Dual-Function: Combines AFCI and GFCI protection in one breaker
Note: Code requirements vary by location and home age. Newer installations often require AFCI/GFCI protection.
Professional vs. DIY: Making the Right Choice
Good Candidates for DIY
- Experienced with basic electrical work
- Comfortable following safety protocols
- Replacing standard breakers in good condition panels
- Have proper tools and safety equipment
When to Hire a Professional
- First-time electrical work
- Older panels (Federal Pacific, Zinsco, etc.)
- Main breaker replacement needed
- Panel upgrades or additional circuits required
- Local permits required
Maintaining Your Circuit Breakers
Monthly Checks
- Visual inspection for any signs of damage or overheating
- Listen for unusual sounds like buzzing or crackling
- Test GFCI/AFCI breakers using their test buttons
Annual Maintenance
- Professional inspection of electrical panel
- Tightening connections as needed
- Load assessment to prevent overloaded circuits
Safety Reminders and Final Tips
Never Work on Live Circuits: Always turn off the main breaker and verify power is off before starting work.
Use Proper PPE: Safety glasses, insulated gloves, and rubber-soled shoes are essential, not optional.
Take Your Time: Rushing electrical work leads to mistakes and safety hazards.
When in Doubt, Stop: If anything seems unclear or dangerous, consult a professional electrician.
Keep Records: Document breaker replacements and take photos for future reference.
نتیجہ
Knowing how to replace a circuit breaker is a valuable homeowner skill that can save money and restore power quickly. However, electrical safety should never be compromised. Follow proper procedures, use appropriate safety equipment, and don’t hesitate to call a professional when the situation demands expertise.
Remember that while DIY circuit breaker replacement can be cost-effective, the peace of mind and safety assurance from professional installation may justify the investment, especially for inexperienced homeowners.
Before starting any electrical project, check with your local building department about permit requirements and always prioritize safety over savings.
متعلقہ
A Practical Guide to DC Circuit Breakers for Solar, Battery, and EV Systems
نو فیوز سرکٹ بریکر (NFB) کیا ہے؟
This guide provides general information only. Electrical codes and requirements vary by location. Always consult local codes and consider professional installation for complex electrical work.
