L'installazione di uno staccabatteria è un pratico progetto fai-da-te che aumenta la sicurezza del veicolo e la longevità dell'impianto elettrico consentendo un rapido isolamento della batteria, prevenendo lo scaricamento, il furto e potenziali incendi elettrici. Questa guida illustra gli strumenti, i materiali e la procedura passo-passo necessari per installare uno staccabatteria sulla vostra auto o barca.
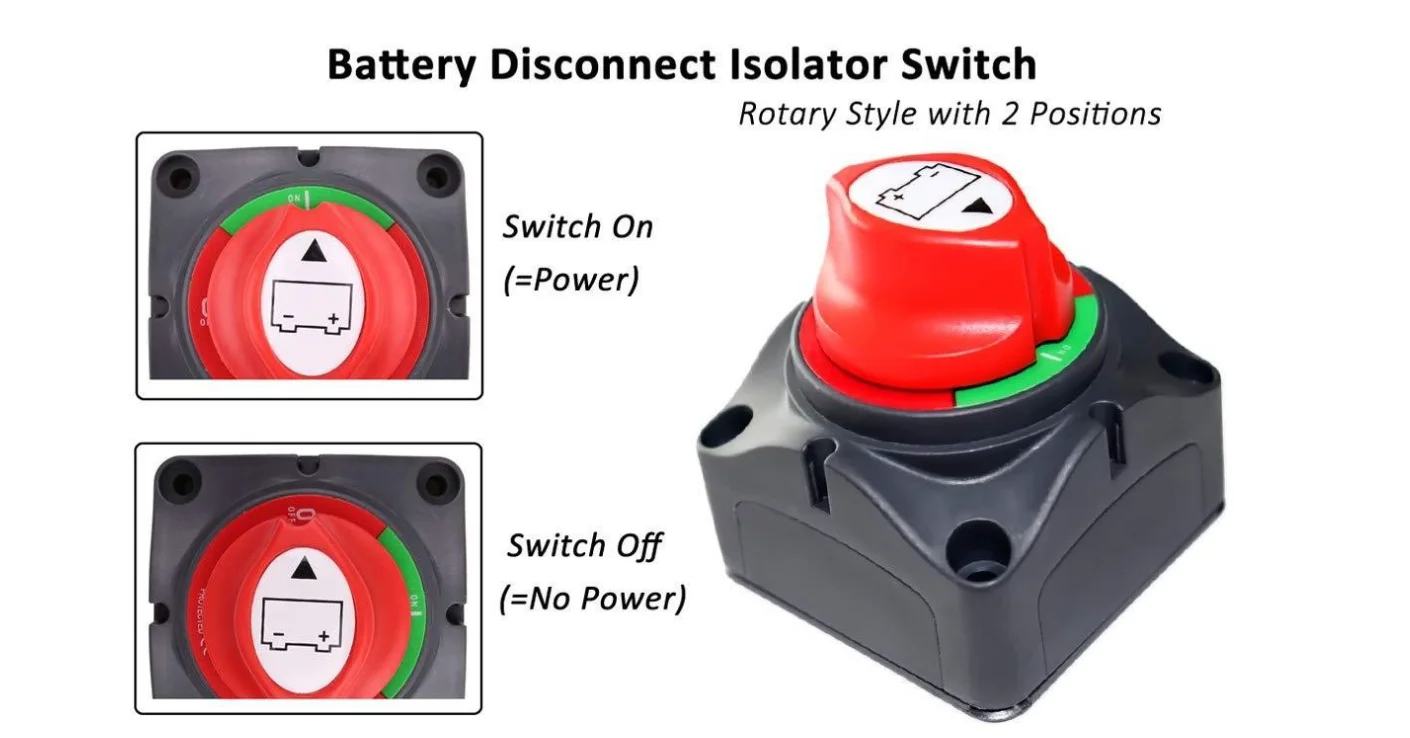
 Interruttore di disconnessione della batteria con 2 posizioni
Strumenti e materiali
Per installare con successo uno staccabatteria, è necessario raccogliere i seguenti strumenti e materiali essenziali:
- Attrezzatura di sicurezza: Occhiali e guanti di sicurezza
- Utensili manuali: Chiavi o bussole, tronchesi e pinze spelafili.
- Forniture elettriche: Nastro elettrico e un interruttore staccabatteria compatibile con il vostro veicolo
- Articoli opzionali: Fascette o passacavi per l'organizzazione dei cavi
Assicurarsi di disporre di tutti i componenti necessari prima di iniziare il processo di installazione per evitare ritardi e garantire un'installazione efficiente e senza intoppi del proprio staccabatteria.
Installazione passo-passo

Per installare uno staccabatteria, procedere come segue:
- Scegliere la posizione: Scegliere un punto facilmente accessibile ma protetto dalle intemperie. Per le auto, questo è spesso vicino alla batteria, mentre le barche possono avere un vano batteria dedicato.
- Scollegare la batteria: Iniziare sempre scollegando prima il terminale negativo e poi quello positivo. In questo modo si riduce il rischio di cortocircuiti accidentali.
- Installare il sezionatore: Montare il sezionatore in modo sicuro nella posizione scelta. Assicurarsi che sia ben fissato per evitare problemi legati alle vibrazioni.
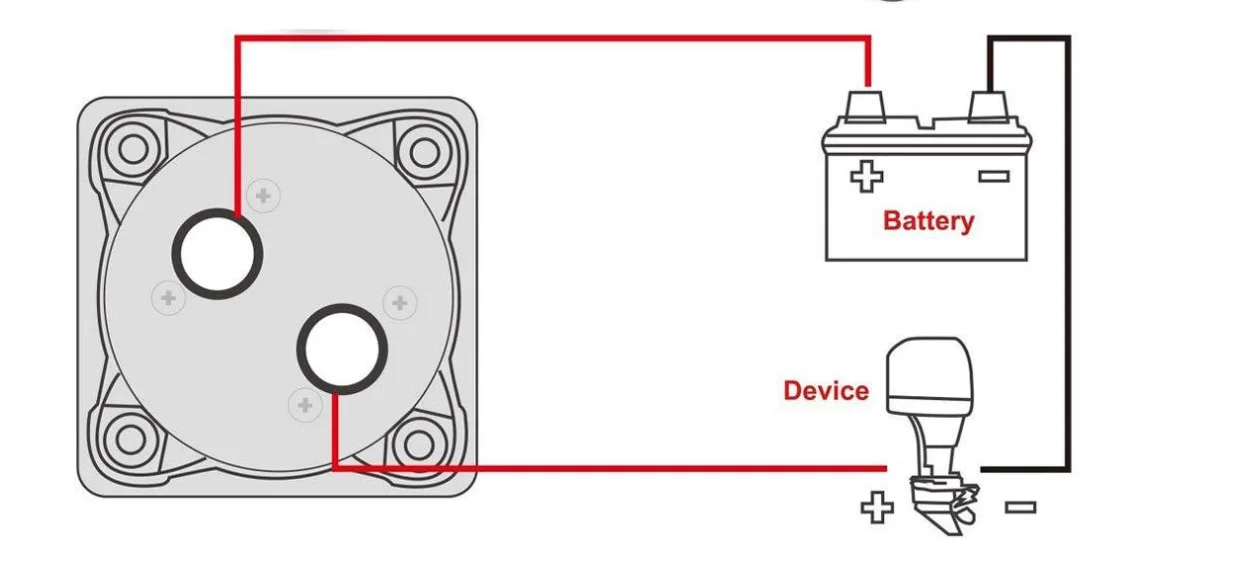
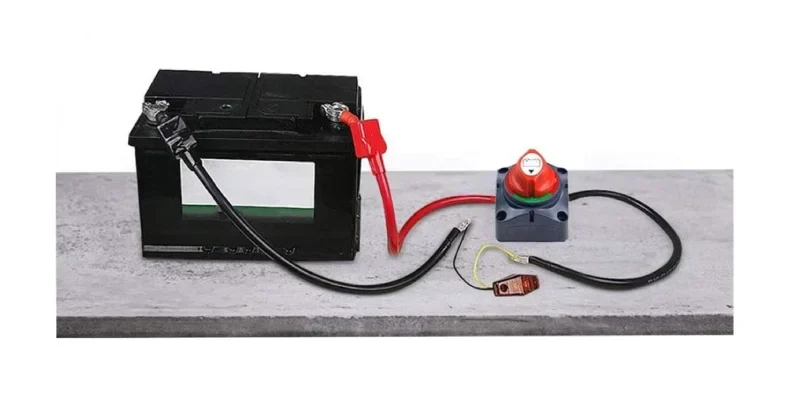
- Collegare l'interruttore:
- Per l'installazione sul lato negativo (la più comune):
- Collegare il cavo negativo della batteria a un terminale dell'interruttore.
- Collegare l'altro terminale dell'interruttore alla massa del veicolo.
- Per l'installazione sul lato positivo:
- Collegare il cavo positivo della batteria a un terminale dell'interruttore.
- Collegare l'altro terminale al punto di distribuzione positivo del veicolo.
- Per l'installazione sul lato negativo (la più comune):
- Fissare il cablaggio: Utilizzate fascette o passacavi per organizzare e proteggere i cavi, assicurandovi che non interferiscano con le parti in movimento.
- Testare l'installazione: Ricollegare la batteria (prima il polo positivo, poi quello negativo) e testare l'interruttore per verificare che scolleghi e ricolleghi correttamente la batteria.
- Etichettare l'interruttore: Contrassegnare chiaramente le posizioni "on" e "off" per evitare confusione durante il funzionamento.
Per gli staccabatteria remoti, potrebbe essere necessario un cablaggio aggiuntivo per collegare l'interruttore a un pannello di controllo o a un portachiavi.
Per indicazioni specifiche, consultare sempre il manuale del veicolo e le istruzioni del produttore dell'interruttore, poiché l'installazione può variare a seconda del veicolo e del tipo di interruttore.
Precauzioni di sicurezza
Quando si installa uno staccabatteria, la priorità è la sicurezza, indossando indumenti protettivi e lavorando in un'area ben ventilata. Scollegare sempre per primo il terminale negativo per ridurre al minimo il rischio di scintille e cortocircuiti elettrici.. È fondamentale scegliere il lato di installazione corretto: mentre molti preferiscono il lato negativo per motivi di sicurezza, alcune applicazioni possono richiedere l'installazione del lato positivo.. Assicurarsi che il lato scelto sia in grado di gestire il carico massimo di ampere del veicolo. Quando si lavora con le batterie delle imbarcazioni, prendere ulteriori precauzioni a causa della potenziale presenza di gas idrogeno esplosivo, e non fumare o creare scintille vicino alla batteria.
Suggerimenti per la manutenzione
- Una manutenzione regolare è fondamentale per garantire la longevità e l'efficacia dello staccabatteria. Ispezionare periodicamente l'interruttore e l'area circostante per rilevare eventuali segni di usura, corrosione o collegamenti allentati. Mantenere l'area pulita e asciutta per evitare problemi legati all'umidità. Se si notano segni di corrosione sui terminali, pulirli con una spazzola metallica e applicare un sottile strato di grasso dielettrico per prevenire l'ossidazione futura. Per i veicoli o le imbarcazioni che rimangono in deposito per periodi prolungati, inserire il sezionatore per evitare che la batteria si scarichi, ma ricordarsi di resettare l'elettronica del veicolo, come l'orologio e le preimpostazioni della radio, al momento della riconnessione.. Inoltre, si consiglia di etichettare chiaramente l'interruttore per evitare confusione e garantire un uso corretto da parte di altre persone che potrebbero utilizzare il veicolo.


