
Mabilis na Sagot: Ang pagtatakda ng timer switch na may mga pin ay kinapapalooban ng paglalagay ng mga timing pin sa paligid ng isang 24-oras na dial ng orasan upang lumikha ng mga iskedyul ng pag-on/off, pagkonekta ng switch sa iyong electrical circuit na sumusunod sa mga lokal na electrical code, at pagsubok sa programadong iskedyul para sa wastong operasyon.
Ang mga timer switch na may mga pin ay nag-aalok ng maaasahang, mekanikal na kontrol sa pag-iiskedyul para sa mga ilaw, bentilador, kagamitan sa pool, at iba pang mga electrical device nang hindi nangangailangan ng digital programming o backup na mga baterya.
Ano ang Timer Switch na may mga Pin?
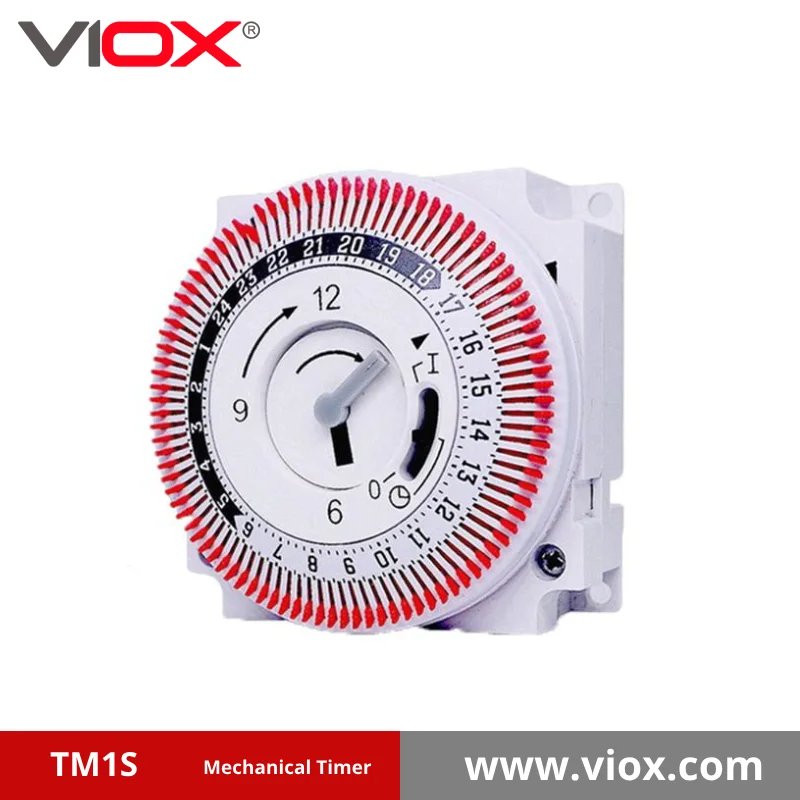
Ang timer switch na may mga pin (tinatawag ding mekanikal na timer switch o pin timer) ay isang electrical control device na gumagamit ng mga pisikal na pin na ipinasok sa paligid ng isang umiikot na 24-oras na dial ng orasan upang awtomatikong i-on at i-off ang mga electrical circuit sa mga paunang natukoy na oras.
Mga Pangunahing Bahagi:
- 24-oras na dial ng orasan na patuloy na umiikot
- Mga timing pin (karaniwang plastik) na nagpapagana sa switch
- Manual override switch para sa agarang kontrol ng on/off
- Mga electrical terminal para sa mga koneksyon ng circuit
- Mounting bracket para sa pag-install ng electrical box
Paghahambing ng mga Uri ng Timer Switch
| Tampok | Pin Timer Switch | Digital Timer Switch | Smart Timer Switch |
|---|---|---|---|
| Paraan ng Pagprograma | Mga pisikal na pin sa dial | Button/LCD interface | Smartphone app |
| Mga Kinakailangan sa Power | Wala (mekanikal) | Kailangan ng backup na baterya | Kinakailangan ang koneksyon sa Wi-Fi |
| Katumpakan | 15-30 minutong pagitan | 1 minutong pagitan | 1 minutong pagitan |
| tibay | 15-20 taon | 5-10 taon | 3-7 taon |
| Gastos | $15-40 | $25-60 | $40-120 |
| Pagiging Kumplikado ng Pag-install | Basic na paglalagay ng kable | Basic na paglalagay ng kable + pagprograma | Kinakailangan ang advanced na pag-setup |
Hakbang-hakbang na Proseso ng Pag-install
Mga Kinakailangan sa Kaligtasan Bago Magsimula
⚠️ BABALA SA KALIGTASAN: Palaging patayin ang power sa circuit breaker bago simulan ang electrical work. Gumamit ng non-contact voltage tester upang i-verify na patay ang power. Kung hindi ka komportable sa electrical work, kumuha ng lisensyadong electrician.
Mga Kinakailangang Tool:
- Wire strippers
- Mga Screwdriver (flathead at Phillips)
- Mga wire na mani
- Non-contact voltage tester
- De-koryenteng tape
Mga Hakbang sa Pag-install
Hakbang 1: Patayin ang Power at Alisin ang Lumang Switch
- Patayin ang circuit breaker na kumokontrol sa lokasyon ng switch
- Alisin ang kasalukuyang switch plate at switch mula sa electrical box
- Subukan ang mga kable gamit ang voltage tester upang kumpirmahin na patay ang power
- Kumuha ng litrato ng mga kasalukuyang koneksyon ng kable para sa sanggunian
Hakbang 2: Tukuyin ang mga Configuration ng Kable
| Pag-setup ng Kable | Paglalarawan | Koneksyon ng Timer |
|---|---|---|
| Dalawang-Kable na Sistema | Hot (itim) at neutral (puti) | Hot sa LINE, load wire sa LOAD |
| Tatlong-Kable na Sistema | Hot, neutral, at ground | Ground sa berdeng screw, hot sa LINE |
| Switch Loop | Hot at switched hot | Kinakailangan ang pagdaragdag ng neutral wire |
Hakbang 3: Ikonekta ang mga Kable ng Timer Switch
- Ikonekta ang papasok na hot wire (karaniwang itim) sa LINE terminal
- Ikonekta ang papalabas na load wire sa LOAD terminal
- Ikonekta ang mga neutral wire kasama ang mga wire nut (kung mayroon)
- Ikonekta ang ground wire sa berdeng ground screw
- I-secure ang lahat ng mga koneksyon gamit ang mga wire nut at electrical tape
Hakbang 4: I-mount ang Timer Switch sa Electrical Box
- Maingat na itupi ang mga kable sa electrical box
- Ihanay ang timer switch sa mga mounting hole
- I-secure gamit ang mga ibinigay na screw
- Ikabit ang takip ng switch plate
Hakbang 5: Ibalik ang Kuryente at Subukan
- Ibalik ang circuit breaker
- Siguraduhing nakakatanggap ng kuryente ang timer switch (dapat gumalaw ang orasan)
- Subukan ang manual override function
- I-program ang mga unang setting ng timer
Pag-program ng Iyong Pin Timer Switch
Pag-unawa sa Clock Dial
Ang 24-oras na dial ay kumakatawan sa isang buong araw, kung saan ang bawat segment ay karaniwang kumakatawan sa 15 o 30 minuto depende sa modelo ng iyong timer.
Mga Feature ng Clock Dial:
- 12 AM (hatinggabi) sa tuktok ng dial
- 6 AM sa kanang bahagi
- 12 PM (tanghali) sa ibaba
- 6 PM sa kaliwang bahagi
Proseso ng Pag-program ng Pin
Hakbang 1: Itakda ang Kasalukuyang Oras
- Paikutin ang dial upang ang kasalukuyang oras ay tumugma sa pointer
- Hayaang mag-synchronize ang motor (maaaring tumagal ng ilang minuto)
- Siguraduhin ang katumpakan ng oras gamit ang isang orasan o relo
Hakbang 2: Ipasok ang mga Timing Pin
- Para sa mga oras na ON: Ipasok ang mga pin sa panlabas na gilid ng mga segment ng dial kung saan mo gustong umandar ang device
- Para sa mga oras na OFF: Alisin ang mga pin o iwanang walang laman ang mga segment kung saan mo gustong patayin ang device
- Ang bawat pin ay karaniwang kumakatawan sa: 15-30 minuto ng ON time
Hakbang 3: Mga Karaniwang Halimbawa ng Pag-program
| Kailangan sa Iskedyul | Estratehiya sa Paglalagay ng Pin |
|---|---|
| Landscape Lighting | Ipasok ang mga pin mula 6 PM hanggang 11 PM at 5 AM hanggang 7 AM |
| Pool Pump | Ipasok ang mga pin para sa 6 na oras na bloke (6 AM-12 PM, 6 PM-12 AM) |
| Security Lighting | Ipasok ang mga pin mula sa oras ng paglubog ng araw hanggang sa pagsikat ng araw |
| Holiday Decorations | Ipasok ang mga pin mula 5 PM hanggang 10 PM araw-araw |
Pag-Troubleshoot-Karaniwang Mga Isyu
Hindi Gumagana nang Tama ang Timer
Problema:
Hindi umaandar/namamatay ang device sa mga naka-program na oras
Mga solusyon:
- Siguraduhing nakapasok nang buo at nakalagay nang maayos ang mga pin
- Tiyakin na ang oras ng orasan ay tumutugma sa aktwal na oras
- Siguraduhing nasa “AUTO” na posisyon ang manual override
- Subukan ang iba't ibang posisyon ng pin upang matukoy ang mga isyu sa timing
Problema:
Mabilis o mabagal ang takbo ng orasan
Mga solusyon:
- Suriin ang boltahe sa timer (dapat tumugma sa rated voltage)
- Palitan ang timer kung may sira ang mekanismo ng orasan
- Siguraduhin ang wastong mga koneksyon ng kuryente
Mga Isyu sa Kuryente
Problema:
Hindi nakakatanggap ng kuryente ang timer
Mga solusyon:
- Suriin ang posisyon ng circuit breaker
- Siguraduhing mahigpit ang mga koneksyon ng wire
- Subukan ang papasok na kuryente gamit ang voltage tester
- Siyasatin kung may maluwag na koneksyon sa electrical box
Pamantayan sa Pagpili ng Timer Switch
Mga Electrical Specification na Dapat Isaalang-alang
| Pagtutukoy | Standard Range | Mga Alituntunin sa Pagpili |
|---|---|---|
| Boltahe Rating | 120V o 240V | Dapat tumugma sa boltahe ng iyong circuit |
| Kasalukuyang Rating | 15A, 20A, 30A | Dapat lumampas sa amperage ng nakakonektang load |
| Uri ng Motor | Sabay (Synchronous) | Mas tumpak kaysa sa spring-wound |
| Rating ng Contact | Resistive vs. Inductive | Inductive para sa mga motor/fluorescent |
Kailan Pipiliin ang mga Pin Timer
Pinakamahusay na Gamit:
- Panlabas na kontrol sa ilaw
- Mga kagamitan sa pool at spa
- Mga bentilador
- Mga sistema ng irigasyon sa landscape
- Mga display ng dekorasyon sa holiday
Mga Bentahe ng mga Pin Timer:
- Walang programming na mawawala sa panahon ng pagkawala ng kuryente
- Simple, madaling gamitin na operasyon
- Mahabang buhay ng serbisyo (15-20 taon karaniwan)
- Mas mababang gastos kaysa sa mga digital na alternatibo
- Hindi kailangan ng pagpapalit ng baterya
Pagsunod sa Code at Mga Pagsasaalang-alang sa Kaligtasan
Mga Kinakailangan sa Electrical Code
Mga Alituntunin ng National Electrical Code (NEC):
- Ang mga timer switch ay dapat na nakalista sa pamamagitan ng UL o katulad na laboratoryo ng pagsubok
- Ang pag-install ay dapat sumunod sa mga tagubilin ng tagagawa
- Kinakailangan ang tamang laki ng wire para sa mga konektadong load
- Maaaring kailanganin ang proteksyon ng GFCI para sa mga panlabas na aplikasyon
Mga Pagsasaalang-alang sa Lokal na Kodigo:
- Ang ilang mga hurisdiksyon ay nangangailangan ng mga permit para sa pag-install ng timer switch
- Maaaring kailanganin ang lisensyadong electrician para sa ilang mga aplikasyon
- Ang mga panlabas na pag-install ay madalas na nangangailangan ng mga enclosure na hindi tinatablan ng panahon
Pinakamahusay na Kasanayan sa Kaligtasan
🔒 LISTAHAN NG PAG-IINGAT SA KALIGTASAN:
- ✓ Palaging patayin ang kuryente sa breaker bago mag-install
- ✓ Gumamit ng tamang wire connector na na-rate para sa aplikasyon
- ✓ I-verify na ang lahat ng mga koneksyon ay ligtas bago ibalik ang kuryente
- ✓ Subukan ang proteksyon ng GFCI buwan-buwan kung naaangkop
- ✓ Mag-iskedyul ng taunang inspeksyon ng mga panlabas na pag-install
Mga Tip ng Dalubhasa para sa Pinakamainam na Pagganap
💡 Mga Propesyonal na Rekomendasyon:
- Pumili ng mga de-kalidad na brand tulad ng Intermatic, Leviton, o Woods para sa maaasahang operasyon
- Sukatin nang tama – dapat kayanin ng timer ang hindi bababa sa 125% ng konektadong load
- Isaalang-alang ang proteksyon sa surge para sa mga electronic load at LED lighting
- Magplano para sa pagpapalawak – mag-install ng mas malaking kapasidad na timer kung posible ang mga load sa hinaharap
- I-dokumento ang mga setting – kumuha ng mga larawan ng mga posisyon ng pin para sa sanggunian sa hinaharap
Pagpapanatili at mahabang buhay
Iskedyul ng Nakagawiang Pagpapanatili
| Dalas | Gawain sa Pagpapanatili | Layunin |
|---|---|---|
| Buwanang | Suriin ang katumpakan ng orasan | Tiyakin ang tamang timing |
| quarterly | Linisin ang dial at mga pin | Pigilan ang mechanical binding |
| Taun-taon | Subukan ang manual override | I-verify ang emergency operation |
| Dalawang beses sa isang taon | Siyasatin ang mga koneksyon | Pigilan ang mga problema sa kuryente |
Kailan Papalitan ang Timer Switch
Mga Tagapahiwatig ng Pagpapalit:
- Ang orasan ay patuloy na tumatakbo nang mabilis o mabagal sa kabila ng tamang boltahe
- Ang mga pin ay hindi nananatiling ligtas sa posisyon
- Ang manual override ay hindi gumagana nang maayos
- Nakikitang pinsala sa dial o housing
- Ang mga electrical contact ay nagpapakita ng mga palatandaan ng pagkasunog o pagkakapuntos
Madalas Na Tinatanong Na Mga Katanungan
Gaano katumpak ang mga pin timer switch?
Ang mga pin timer switch ay karaniwang nagpapanatili ng katumpakan sa loob ng 1-2 minuto bawat araw kapag maayos na na-install at pinananatili, na ginagawa itong angkop para sa karamihan ng mga residential at komersyal na aplikasyon ng timing.
Maaari ba akong gumamit ng pin timer switch sa mga LED light?
Oo, ngunit tiyakin na ang timer ay na-rate para sa uri ng LED driver na ginamit. Ang ilang mga LED fixture na may mga electronic driver ay maaaring mangailangan ng mga timer na partikular na na-rate para sa mga electronic load.
Ano ang pagkakaiba sa pagitan ng resistive at inductive load ratings?
Ang mga resistive load (incandescent lights, heaters) ay may mas mababang startup current, habang ang mga inductive load (motors, fluorescent lights) ay may mas mataas na startup current na nangangailangan ng mga espesyal na rated na contact ng timer.
Gaano katagal ang mga pin timer switch?
Ang mga de-kalidad na mechanical pin timer ay karaniwang tumatagal ng 15-20 taon na may tamang pag-install at pagpapanatili, na mas mahaba kaysa sa mga digital timer switch.
Gumagana ba ang mga pin timer kapag may power outage?
Ang mga pin timer ay patuloy na tumatakbo kahit sa maikling power outage dahil gumagamit sila ng mekanikal na mekanismo, ngunit ang matagalang pagkawala ng kuryente ay mangangailangan ng pag-reset ng oras kapag bumalik ang kuryente.
Gumagana ba ang mga pin timer sa mga smart home system?
Ang mga tradisyonal na pin timer ay gumagana nang hiwalay sa mga smart home system, ngunit ang ilang mga tagagawa ay nag-aalok ng mga hybrid na modelo na pinagsasama ang mekanikal na pagiging maaasahan sa mga opsyon sa smart connectivity.
Konklusyon
Ang pagtatakda ng timer switch gamit ang mga pin ay nagbibigay ng maaasahan at pangmatagalang kontrol sa pag-iskedyul para sa iyong mga electrical device nang hindi nangangailangan ng komplikadong digital programming. Sa pamamagitan ng pagsunod sa tamang pamamaraan ng pag-install, pag-unawa sa mga pamamaraan ng pin programming, at pagpapanatili ng pagsunod sa code, maaari kang makamit ang mga dekada ng maaasahang automated na kontrol.
Mga kaugnay na
Pag-unawa sa mga Uri ng Timer Switch
