
⚠️ PERINGATAN KESELAMATAN KRITIS: Penggantian pemutus utama melibatkan pekerjaan dengan panel listrik bertegangan yang dapat menyebabkan sengatan listrik, kebakaran, atau kematian. Pekerjaan ini biasanya memerlukan izin dan teknisi listrik berlisensi di sebagian besar wilayah hukum. Selalu konsultasikan kode lokal dan pertimbangkan instalasi profesional untuk keselamatan dan kepatuhan.
Mengganti pemutus utama adalah peningkatan listrik penting yang melindungi seluruh sistem kelistrikan rumah Anda. Anda perlu memahami kapan penggantian diperlukan, persyaratan keselamatan, dan prosedur pemasangan yang benar untuk memastikan keselamatan keluarga Anda dan kepatuhan terhadap kode.
Apa Itu Pemutus Utama dan Kapan Perlu Diganti?
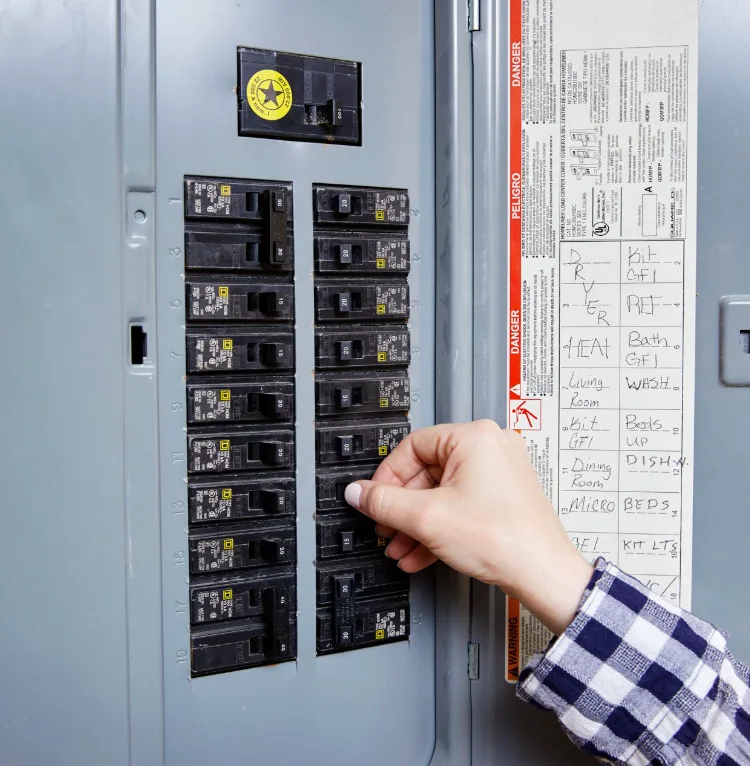
Pemutus utama adalah sakelar pemutus listrik utama yang mengontrol aliran daya ke seluruh panel listrik Anda. Terletak di bagian atas sebagian besar panel perumahan, ia bertindak sebagai garis pertahanan pertama terhadap kelebihan beban listrik dan menyediakan sarana untuk mematikan semua daya ke rumah Anda.
Tanda-tanda pemutus utama Anda perlu diganti:
- Sering trip tanpa kelebihan beban yang jelas
- Bau terbakar atau tanda terbakar yang terlihat di sekitar breaker
- Pemutus terasa panas saat disentuh
- Pemutus tidak mau tetap dalam posisi “PADA”
- Usia melebihi 25-30 tahun (terutama pada panel Federal Pacific atau Zinsco)
- Suara berderak atau percikan api saat beralih
Di Mana Letak Pemutus Arus Utama? Panduan Lokasi Lengkap untuk Pemilik Rumah
Perbandingan Jenis Pemutus Utama
| Jenis Pemutus Sirkuit | Rentang Arus Listrik | Terbaik untuk | Fitur Keamanan | Kisaran Biaya |
|---|---|---|---|---|
| Termal-Magnetik Standar | 100A-200A | Sebagian besar rumah hunian | Proteksi arus berlebih | $75-$150 |
| GFCI Pemutus Utama | 100A-200A | Lokasi basah, kolam renang | Perlindungan gangguan tanah | $200-$400 |
| Pemutus Utama Arus Gangguan Busur | 100A-200A | Kepatuhan kode modern | Deteksi gangguan busur api | $300-$500 |
| Amper Tinggi (225A+) | 225A-400A | Rumah besar, beban berat | Kapasitas yang ditingkatkan | $400-$800 |
Persyaratan Keselamatan dan Kepatuhan Kode
🚨 PERSYARATAN IZIN: Sebagian besar wilayah hukum memerlukan izin listrik untuk penggantian pemutus utama. Hubungi departemen bangunan setempat Anda sebelum memulai pekerjaan.
Persyaratan Kode Kelistrikan Nasional (NEC) :
- Pekerjaan harus sesuai dengan Pasal 230 NEC (Layanan)
- Diperlukan landasan dan ikatan yang tepat
- Perlindungan GFCI mungkin diperlukan dalam instalasi tertentu
- Inspeksi profesional biasanya diperlukan
Peralatan Pelindung Diri (APD) yang Diperlukan:
- Kacamata pengaman dengan pelindung samping
- Sarung tangan listrik berinsulasi (Kelas 0 minimum)
- Alas kaki non-konduktif
- Pakaian tahan api
- Peralatan berinsulasi yang dinilai untuk pekerjaan listrik
Kapan Harus Memanggil Profesional vs. Pertimbangan DIY
Hubungi Teknisi Listrik Berlisensi Jika:
- Wilayah Anda memerlukan instalasi profesional berdasarkan kode
- Anda tidak nyaman bekerja dengan sistem kelistrikan
- Panel adalah Federal Pacific, Zinsco, atau merek yang ditarik lainnya
- Pemutusan meter diperlukan
- Sistem pentanahan perlu diperbarui
- Anda tidak memiliki peralatan atau pengalaman yang tepat
DIY Mungkin Dimungkinkan Jika:
- Kode lokal mengizinkan pekerjaan listrik pemilik rumah
- Anda memiliki pengalaman listrik dan peralatan yang tepat
- Panel yang ada dalam kondisi baik
- Tidak diperlukan pemutusan meter
- Anda bisa mendapatkan izin yang sesuai
Proses Penggantian Pemutus Utama Langkah demi Langkah
⚠️ PERINGATAN: Proses ini melibatkan tegangan yang mematikan. Anggap ini hanya informasi pendidikan. Instalasi profesional disarankan.
Fase 1: Persiapan dan Keselamatan
- Hubungi perusahaan utilitas untuk membahas pemutusan daya jika pemutusan meter diperlukan
- Dapatkan izin listrik dari departemen bangunan setempat Anda
- Kumpulkan peralatan yang tepat:
- Obeng berisolasi
- Pengupas kawat
- Penguji tegangan (non-kontak dan multimeter)
- Kunci torsi
- Mur atau konektor kawat
- Matikan semua pemutus individual di panel
- Verifikasi daya mati menggunakan penguji tegangan
Fase 2: Pelepasan Pemutus Utama
- Foto koneksi yang ada sebagai referensi
- Uji tegangan pada terminal pemutus utama (seharusnya menunjukkan 240V jika aktif)
- Remove panel cover dengan hati-hati untuk menghindari kontak dengan bagian yang bertegangan
- Lepaskan kabel netral dan ground dari pemutus utama jika terhubung
- Lepaskan koneksi kabel panas dari terminal pemutus utama
- Lepaskan pemutus utama lama dari bus bar panel
Fase 3: Pemasangan Pemutus Baru
- Verifikasi kompatibilitas pemutus baru dengan produsen panel Anda
- Sejajarkan pemutus baru dengan bus bar dan tekan dengan kuat hingga terpasang sepenuhnya
- Sambungkan kembali kabel panas ke terminal pemutus baru menggunakan spesifikasi torsi yang tepat
- Sambungkan kembali kabel netral dan ground jika berlaku
- Verifikasi semua koneksi kencang dan terpasang dengan benar
Fase 4: Pengujian dan Inspeksi
- Pasang kembali penutup panel memastikan tidak ada kabel yang terjepit
- Nyalakan pemutus utama perlahan dan dengarkan suara yang tidak biasa
- Uji pemutus individual satu per satu
- Verifikasi operasi yang benar dengan penguji tegangan
- Jadwalkan inspeksi listrik sebagaimana disyaratkan oleh kode lokal
Tips Ahli untuk Pemasangan yang Aman
💡 TIPS PROFESIONAL: Selalu gunakan pemutus yang dirancang khusus untuk merek panel Anda. Kompatibilitas silang dapat menimbulkan bahaya keselamatan dan pelanggaran kode.
💡 TIPS PROFESIONAL: Kencangkan koneksi sesuai spesifikasi pabrikan. Koneksi yang kurang kencang menyebabkan percikan api dan panas berlebih; koneksi yang terlalu kencang dapat merusak peralatan.
💡 TIPS PROFESIONAL: Ambil foto sebelum melepaskan apa pun. Identifikasi kabel yang tepat mencegah kesalahan berbahaya selama penyambungan kembali.
Panduan Pemilihan Pemutus Utama
Memilih Amper yang Tepat:
- 100A: Rumah kecil, beban listrik minimal
- 150A: Rumah rata-rata dengan peralatan standar
- 200A: Rumah modern dengan pemanas listrik, A/C, beberapa peralatan
- 225A+: Rumah besar atau beban listrik berat
Persyaratan Kompatibilitas Panel:
- Pemutus harus sesuai dengan produsen panel yang tepat (Kotak D, GE, Siemens, dll.)
- Verifikasi konfigurasi bus bar dan gaya pemasangan
- Periksa ruang yang tersedia dan persyaratan jarak bebas
- Pastikan peringkat tegangan yang tepat (120/240V untuk perumahan)
Masalah Umum dan Pemecahan Masalah
| Masalah | Kemungkinan Penyebabnya | Solusi |
|---|---|---|
| Pemutus tidak mau menyala | Kerusakan internal, kelebihan beban | Ganti pemutus, periksa kelebihan beban |
| Bau terbakar | Koneksi longgar, kelebihan beban | Matikan segera, hubungi teknisi listrik |
| Tidak ada daya setelah pemasangan | Pengkabelan yang salah, pemutus yang rusak | Verifikasi koneksi, uji pemutus |
| Pemutus sirkuit langsung tersandung | Korsleting, gangguan ground | Periksa pengkabelan, gunakan pemutus GFCI jika diperlukan |
Analisis Biaya dan Pertimbangan Profesional
Rincian Biaya DIY:
- Pemutus utama: $75-$500 (tergantung jenis dan ampere)
- Izin: $50-$200
- Peralatan (jika diperlukan): $100-$300
- Total Biaya DIY: $225-$1,000
Biaya Pemasangan Profesional:
- Upah tenaga kerja: $200-$500
- Material: $75-$500
- Izin: $50-$200
- Total Biaya Profesional: $325-$1,200
💡 REKOMENDASI AHLI: Perbedaan biaya antara DIY dan pemasangan profesional seringkali minimal ketika memperhitungkan persyaratan izin, biaya peralatan, dan risiko keselamatan. Pemasangan profesional memastikan kepatuhan terhadap kode dan cakupan garansi.
Pertanyaan yang Sering Diajukan
Berapa lama penggantian pemutus utama memakan waktu?
Pemasangan profesional biasanya memakan waktu 2-4 jam, termasuk pengujian dan pembersihan. Proyek DIY mungkin memakan waktu lebih lama karena persyaratan izin dan penjadwalan inspeksi.
Bisakah saya mengganti pemutus utama tanpa mematikan daya di meteran?
Dalam kebanyakan kasus, tidak. Penggantian pemutus utama biasanya memerlukan pemutusan daya sepenuhnya, yang seringkali melibatkan koordinasi perusahaan utilitas untuk pemutusan meteran.
Apakah asuransi rumah saya akan menanggung kerusakan akibat pekerjaan listrik DIY?
Banyak polis asuransi mengecualikan pertanggungan untuk pekerjaan listrik tanpa izin atau pemasangan DIY yang tidak memenuhi persyaratan kode. Periksa polis Anda sebelum melanjutkan.
Apa perbedaan antara pemutus utama dan pemutus arus utama?
Pemutus utama menyediakan pemutusan dan perlindungan arus berlebih, sedangkan pemutus arus utama (sakelar) hanya menyediakan pemutusan tanpa perlindungan arus berlebih.
Seberapa sering pemutus utama harus diganti?
Pemutus utama berkualitas dapat bertahan 25-40 tahun dengan perawatan yang tepat. Namun, panel dari produsen tertentu (Federal Pacific, Zinsco) harus diganti tanpa memandang usia karena masalah keamanan.
Bisakah saya meningkatkan dari layanan 100A ke 200A hanya dengan penggantian pemutus?
Tidak. Peningkatan layanan memerlukan basis meteran baru, panel, dan seringkali peningkatan saluran utilitas. Ini selalu merupakan pekerjaan profesional yang memerlukan izin dan koordinasi utilitas.
Apa yang terjadi jika saya menggunakan jenis pemutus yang salah untuk panel saya?
Menggunakan pemutus yang tidak kompatibel menciptakan bahaya keselamatan yang serius termasuk risiko kebakaran, bahaya sengatan listrik, dan pelanggaran kode. Selalu gunakan pemutus yang disetujui pabrikan.
Apakah saya memerlukan peralatan khusus untuk penggantian pemutus utama?
Ya. Peralatan penting termasuk peralatan listrik berinsulasi, penguji tegangan, dan seringkali kunci torsi untuk pengencangan sambungan yang tepat. Peralatan standar tidak memadai dan berbahaya.
Daftar Periksa Keselamatan dan Rekomendasi Akhir
Sebelum Memulai Pekerjaan Apa Pun:
- ✅ Verifikasi persyaratan izin setempat
- ✅ Konfirmasikan tingkat keahlian Anda sesuai dengan kompleksitas proyek
- ✅ Kumpulkan semua APD dan peralatan yang diperlukan
- ✅ Rencanakan inspeksi profesional
- ✅ Pertimbangkan pemasangan profesional untuk keselamatan dan garansi
🚨 INGAT: Penggantian pemutus utama melibatkan tegangan yang berpotensi mematikan. Jika ragu, pekerjakan ahli listrik berlisensi. Keselamatan Anda dan keselamatan keluarga Anda lebih berharga daripada potensi penghematan.
Pemasangan profesional memastikan:
- Kepatuhan kode dan penanganan izin
- Prosedur keselamatan yang tepat
- Cakupan garansi
- Perlindungan asuransi
- Pemecahan masalah ahli jika masalah muncul
Untuk pekerjaan listrik yang kompleks seperti penggantian pemutus utama, berinvestasi dalam pemasangan profesional memberikan ketenangan pikiran dan keamanan jangka panjang yang tidak dapat ditandingi oleh pendekatan DIY.
Terkait
Panduan Lengkap Simbol Pemutus Sirkuit
Di Mana Kotak Distribusi Terletak dan Cara Menemukannya
Apa Itu Miniature Circuit Breaker (MCB): Panduan Lengkap untuk Keselamatan dan Pemilihan
