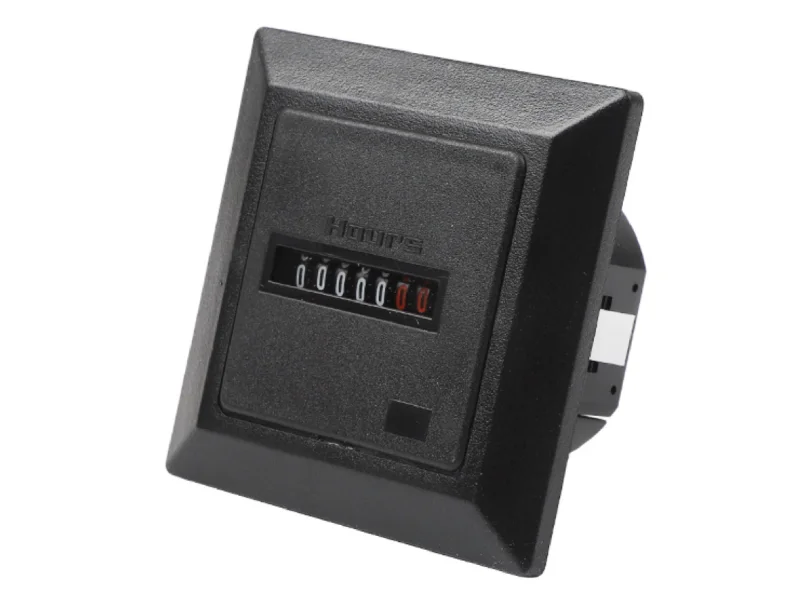
Hour meters are essential devices used to measure and record the operational time of machinery and equipment, playing a crucial role in maintenance scheduling and operational efficiency across various industries.
What Are Hour Meters?

Hour meters, also known as elapsed time counters or time accumulators, are devices that track the running time of equipment by connecting to a machine’s engine or power source. When the equipment is in use, it sends electrical signals to the hour meter, which calculates and displays the elapsed time. These instruments come in two main varieties: mechanical hour meters, which use gears and dials to record time but may be less accurate due to mechanical errors, and digital hour meters, which utilize electronic components and typically feature an LCD display for higher accuracy and additional functionalities like reset options.
Hour Meter Operation
Hour meters operate on two main principles depending on their type:
- Mechanical hour meters use a motor-driven gear system to rotate a display wheel. When powered on, the internal motor pushes gears to rotate, incrementing the display by one number after each hour passes.
- Digital hour meters employ quartz crystal oscillators to calculate time. When voltage is applied, the oscillator vibrates at a fixed frequency, allowing precise time calculation. These meters typically use electronic circuits to measure voltage and current signals, converting them into digital readings.
Both types are designed to start counting when the equipment is powered on and stop when it’s turned off, providing an accurate measure of operational hours. This information is crucial for scheduling maintenance, tracking equipment usage, and ensuring optimal performance across various industries.
Types of Hour Meters
Hour meters come in various configurations to suit different applications and power sources:
- Analog meters display time on a dial with a needle, ideal for quick visual checks.
- Digital versions offer precise LCD readings, often showing hours and tenths of hours.
- AC hour meters are designed for alternating current equipment.
- DC hour meters are used with direct current devices like battery-operated machinery.
- Panel mount types are specifically designed for installation in control panels.
Each type offers unique advantages, allowing users to select the most appropriate meter for their specific needs and operating environment.
Applications Across Industries
Hour meters find widespread use across various sectors, enhancing operational efficiency and maintenance practices. In the construction industry, these devices are crucial for scheduling preventive maintenance on heavy machinery, reducing breakdowns and extending equipment lifespan. Farmers rely on hour meters to monitor usage of tractors and other agricultural equipment, optimizing maintenance schedules and improving overall productivity. Rental services utilize these instruments to track the usage of rented tools and machinery, ensuring accurate billing based on actual operating hours. In the power generation sector, hour meters help identify excessive idling in generators, allowing for better fuel management and cost control.
Key Buying Considerations
When selecting an hour meter, several key factors should be considered to ensure optimal performance and compatibility:
- Power source compatibility (AC or DC) with the intended equipment.
- Durability features like shock resistance and environmental sealing for harsh conditions.
- Reset functionality for tracking specific intervals or overall usage.
- Display readability, including larger or backlit options for low-light environments.
- Accuracy requirements, with digital meters typically offering higher precision than analog versions.
Additionally, buyers should evaluate the meter’s voltage and frequency range to ensure it operates accurately across various power conditions. For applications requiring detailed data, some advanced digital models offer backlight features and large 7 mm displays for enhanced visibility.
Installation and Setup of Hour Meters
Installing an hour meter is a straightforward process that can be completed in a few steps:
- Choose a suitable mounting location, typically near the equipment’s control panel or in a visible area.
- For most gas-powered equipment, wrap the meter’s wire around the spark plug wire 4-5 times, about 1.5 inches from the spark plug boot.
- Secure the wrapped wire with zip ties and electrical tape to prevent unwinding.
- Mount the hour meter using the provided screws or double-sided outdoor tape for metal surfaces.
- Route the wire away from moving parts and hot components.
- For digital hour meters, ensure proper connection to the power source and configure settings like pulse per revolution (ppr) according to the equipment specifications.
Explore more on Youtube
Waterproof Hour Meter Selection
To ensure your hour meter is waterproof, consider the following key factors:
- Look for an IP68 waterproof rating, which indicates the highest level of protection against water and dust ingress.
- Choose meters with fully encapsulated epoxy cases, which provide superior environmental durability.
- Opt for digital hour meters designed specifically for outdoor and marine applications, as they often feature better waterproofing.
- Check for certifications like CE, which can indicate compliance with waterproofing standards.
When installing, ensure proper sealing around connection points and use waterproof tape or sealant if necessary. Some manufacturers offer pre-waterproofed units that require no additional protection, simplifying installation in wet environments. Remember, while many hour meters claim to be waterproof, actual performance can vary, so it’s crucial to select a reputable brand known for reliability in harsh conditions.
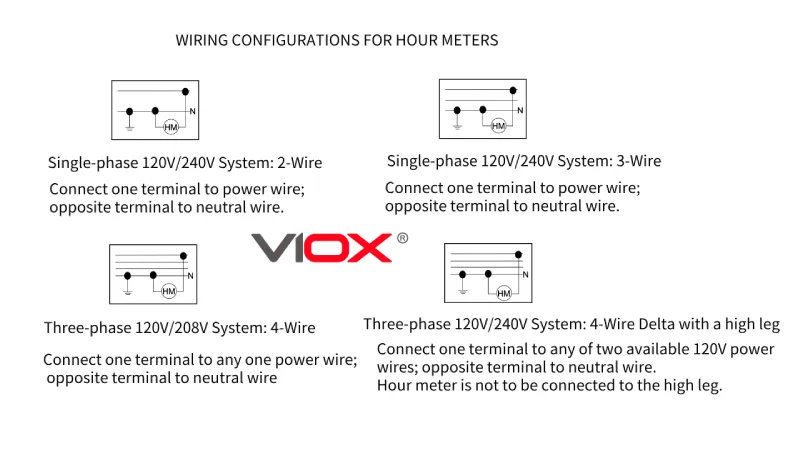
Wiring Configurations for Hour Meters
Hour meters typically require simple wiring configurations to function properly. For most applications, hour meters use either a 2-wire or 3-wire setup:
- 2-wire configuration: One wire connects to a positive power source that is energized when the equipment is running, while the other wire connects to ground. This setup is common for basic hour meters.
- 3-wire configuration: In addition to the power and ground wires, a third wire connects to a signal source, such as an ignition wire or alternator, to more accurately detect when the equipment is operating.
For gas-powered equipment, the sensing wire is often wrapped around the spark plug wire to detect engine operation through induction. On electrical equipment, the hour meter may connect directly to the power supply or control circuit. Always consult the manufacturer’s instructions for specific wiring details, as improper connections can lead to inaccurate readings or damage to the meter.
Common Issues and Troubleshooting Hour Meters
Common issues with hour meters often involve inaccurate readings or complete failure to operate. Here are some typical problems and troubleshooting steps:
- No display or operation: Check for proper power connection and voltage. Ensure the meter is receiving 12V (or the appropriate voltage) when the equipment is running. If power is present but the meter isn’t working, it may need replacement.
- Inconsistent readings: This could be due to loose wiring or improper installation. For inductive meters, ensure the wire is wrapped correctly around the spark plug wire. For direct-wired meters, check all connections for security.
- Slow or erratic counting: In mechanical meters, this may indicate internal gear damage. For digital meters, it could be a sign of a failing internal battery or circuit board issues.
- Meter resets unexpectedly: This is often caused by power fluctuations or a failing internal battery in digital meters. Ensure stable power supply and consider replacing the meter if the problem persists.
If troubleshooting doesn’t resolve the issue, consult the manufacturer’s documentation or consider professional repair or replacement. Regular maintenance and proper installation in a location shielded from extreme conditions can help prevent many common hour meter problems.
Signal Wire Testing
To test if the signal wires to your hour meter are damaged, follow these steps:
- Use a multimeter to check for continuity along the length of the signal wire. Set the multimeter to continuity mode and touch the probes to each end of the wire. A beep or low resistance reading indicates an intact wire.
- Measure voltage at the hour meter connection when the engine is running. For most systems, you should see 12V DC. If no voltage is present, the wire may be damaged or disconnected.
- For inductive hour meters that wrap around spark plug wires, ensure the wire is properly wrapped and secured. Loose connections can cause intermittent operation.
- On diesel engines or systems using oil pressure switches, check that the switch is functioning correctly by testing for continuity when the engine is running.
If these tests indicate a problem, inspect the wiring for visible damage, loose connections, or corrosion. In some cases, accessing wiring harnesses may require partial disassembly of the equipment. If you’re unsure about performing these tests, consult a qualified technician to avoid potential damage to your equipment’s electrical system.


