
Hiter odgovor: Nastavitev časovnega stikala z zatiči vključuje vstavljanje časovnih zatičev okoli 24-urne številčnice za ustvarjanje urnikov vklopa/izklopa, priključitev stikala na električni tokokrog v skladu z lokalnimi električnimi predpisi in testiranje programiranega urnika za pravilno delovanje.
Časovniki z zatiči ponujajo zanesljivo, mehansko krmiljenje razporejanja luči, ventilatorjev, opreme za bazene in drugih električnih naprav brez potrebe po digitalnem programiranju ali rezervnih baterijah.
Kaj je časovno stikalo z zatiči?
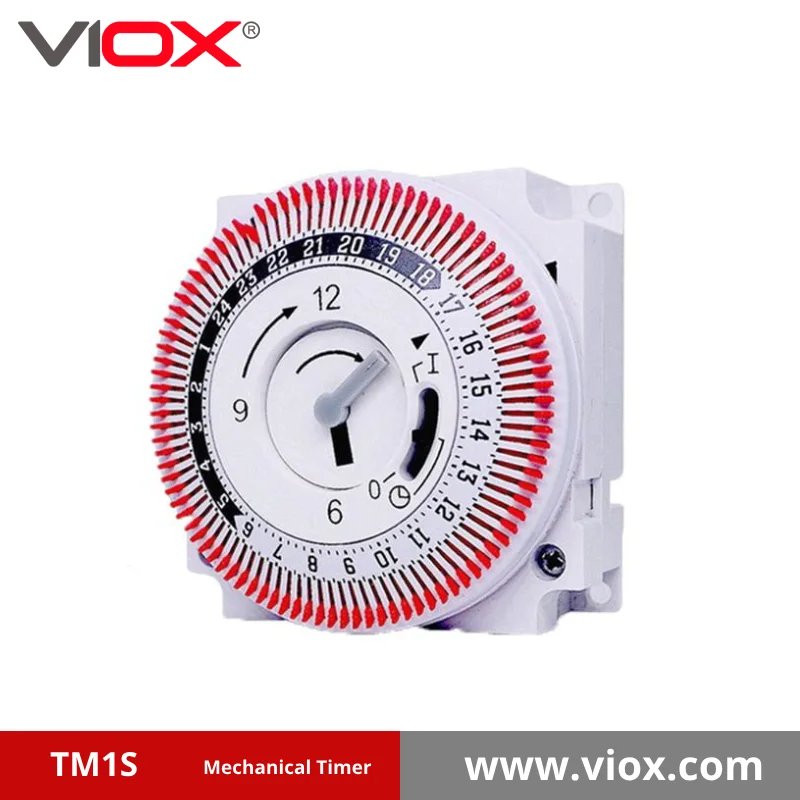
Časovno stikalo s čepi (imenovano tudi mehanski časovnik Stikalo ali pin timer) je električna krmilna naprava, ki uporablja fizične pine, vstavljene okoli vrteče se 24-urne številčnice, za samodejno vklapljanje in izklapljanje električnih tokokrogov ob vnaprej določenih časih.
Ključne sestavine:
- 24-urna številčnica ki se neprekinjeno vrti
- Časovni zatiči (običajno plastični), ki aktivirajo stikalo
- Ročno stikalo za preklic za takojšen vklop/izklop
- Električni terminali za priključke tokokrogov
- Montažni nosilec za montažo električne omarice
Primerjava vrst časovnih stikal
| Funkcija | Časovno stikalo s pritiskom | Digitalno stikalo časovnika | Pametno časovno stikalo |
|---|---|---|---|
| Metoda programiranja | Fizični zatiči na številčnici | Vmesnik z gumbi/LCD-zaslonom | Aplikacija za pametne telefone |
| Zahteve glede napajanja | Brez (mehansko) | Potrebna je rezervna baterija | Potrebna je povezava Wi-Fi |
| Natančnost | 15–30-minutni intervali | 1-minutni intervali | 1-minutni intervali |
| Trajnost | 15-20 let | 5–10 let | 3–7 let |
| Stroški | $15-40 | $25-60 | $40-120 |
| Zahtevnost namestitve | Osnovno ožičenje | Osnovno ožičenje + programiranje | Zahtevana je napredna nastavitev |
Postopek namestitve po korakih
Varnostne zahteve pred začetkom
⚠️ VARNOSTNO OPOZORILO: Pred začetkom električnih del vedno izklopite napajanje na odklopniku. Za preverjanje, ali je napajanje izklopljeno, uporabite brezkontaktni tester napetosti. Če niste vešči električnih del, najemite pooblaščenega električarja.
Potrebna orodja:
- Klešče za odstranjevanje izolacije
- Izvijači (ploski in križni)
- Žične matice
- Brezkontaktni tester napetosti
- Električni trak
Koraki namestitve
1. korak: Izklopite napajanje in odstranite staro stikalo
- Izklopite odklopnik, ki nadzoruje lokacijo stikala
- Odstranite obstoječo stikalno ploščo in stikalo iz električne omarice.
- Preverite žice z testerjem napetosti, da se prepričate, da je napajanje izklopljeno
- Za referenco fotografirajte obstoječe žične povezave
2. korak: Določite konfiguracije žic
| Nastavitev žice | Opis | Povezava s časovnikom |
|---|---|---|
| Dvožični sistem | Vroča (črna) in nevtralna (bela) | Vroče do LINE, obremenitvena žica do LOAD |
| Trižični sistem | Vroče, nevtralno in ozemljeno | Ozemljitev na zeleni vijak, vroča na linijo |
| Preklopna zanka | Vroče in preklopljeno vroče | Zahteva dodatek nevtralne žice |
3. korak: Priključite žice časovnega stikala
- Priključite dohodno žico pod napetostjo (običajno črno) na priključek LINE
- Priključite izhodno žico za obremenitev na priključek LOAD
- Nevtralne žice povežite z žičnimi maticami (če so prisotne).
- Ozemljitveno žico priključite na zeleni ozemljitveni vijak
- Vse povezave pritrdite z žičnimi maticami in izolirnim trakom
4. korak: Namestite časovno stikalo v električno omarico
- Previdno zložite žice v električno omarico
- Poravnajte časovno stikalo z montažnimi luknjami
- Pritrdite s priloženimi vijaki
- Namestite pokrov stikalne plošče
5. korak: Obnovite napajanje in preizkusite
- Ponovno vklopite odklopnik
- Preverite, ali je časovnik priključen na napajanje (ura se mora začeti premikati).
- Preizkus funkcije ročnega preklapljanja
- Začetne nastavitve časovnika programa
Programiranje stikala s pin časovnikom
Razumevanje številčnice ure
24-urni prikaz predstavlja cel dan, pri čemer vsak segment običajno predstavlja 15 ali 30 minut, odvisno od modela časovnika.
Značilnosti številčnice ure:
- 00:00 (polnoč) na vrhu številčnice
- 6.00 zjutraj na desni strani
- 12.00 (poldne) na dnu
- 18.00 na levi strani
Postopek programiranja pinov
1. korak: Nastavitev trenutnega časa
- Zavrtite številčnico, tako da se trenutni čas poravna s kazalcem
- Pustite, da se motor sinhronizira (lahko traja nekaj minut)
- Preverite točnost časa z uro ali ročno uro
2. korak: Vstavite časovne zatiče
- Za čase vklopa: Vstavite zatiče na zunanji rob segmentov številčnice, kjer želite, da se naprava vklopi
- Za čase IZKLOP: Odstranite žebljičke ali pustite prazne segmente tam, kjer želite, da se naprava izklopi
- Vsak pin običajno predstavlja: 15–30 minut vklopa
3. korak: Pogosti primeri programiranja
| Potreba po urniku | Strategija postavitve žebljičkov |
|---|---|
| Krajinska razsvetljava | Vstavljajte žebljičke od 18.00 do 23.00 in od 5.00 do 7.00. |
| Črpalka za bazen | Vstavite zatiče za 6-urne bloke (6.00–12.00, 18.00–0.00) |
| Varnostna razsvetljava | Vstavite žebljičke od sončnega zahoda do sončnega vzhoda |
| Praznični okraski | Vstavljajte žebljičke vsak dan od 17. do 22. ure |
Odpravljanje pogostih težav
Časovnik ne deluje pravilno
Težava:
Naprava se ne vklopi/izklopi ob programiranih časih
Rešitve:
- Preverite, ali so zatiči popolnoma vstavljeni in varno nameščeni
- Preverite, ali se čas na uri ujema z dejanskim časom
- Prepričajte se, da je ročni nadzor v položaju »AVTO«
- Preizkusite z različnimi položaji pinov, da ugotovite težave s časovnim usklajevanjem.
Težava:
Ura teče hitro ali počasi
Rešitve:
- Preverite napetost na časovniku (mora se ujemati z nazivno napetostjo)
- Zamenjajte časovnik, če je urni mehanizem pokvarjen
- Preverite pravilne električne povezave
Električne težave
Težava:
Časovnik ne prejema napajanja
Rešitve:
- Preverite položaj odklopnika
- Preverite, ali so žične povezave varne
- Preizkusite dovodno napajanje z testerjem napetosti
- Preverite morebitne ohlapne povezave v električni omarici
Merila za izbiro časovnega stikala
Električne specifikacije, ki jih je treba upoštevati
| Specifikacija | Standardni razpon | Smernice za izbor |
|---|---|---|
| Napetost | 120 V ali 240 V | Mora se ujemati z napetostjo vašega tokokroga |
| Trenutna ocena | 15A, 20A, 30A | Mora preseči priključeno breme |
| Tip motorja | Sinhrono | Natančnejši od vzmetnega |
| Ocena stikov | Uporovni v primerjavi z induktivnim | Induktivni za motorje/fluorescentne sijalke |
Kdaj izbrati časovnike Pin
Najboljše aplikacije:
- Nadzor zunanje razsvetljave
- Oprema za bazene in spa
- Ventilatorji
- Namakalni sistemi za krajino
- Razstave prazničnih okraskov
Prednosti pin časovnikov:
- Med izpadom električne energije se program ne more izgubiti
- Preprosto, intuitivno upravljanje
- Dolga življenjska doba (običajno 15-20 let)
- Nižji stroški kot digitalne alternative
- Zamenjava baterije ni potrebna
Skladnost s kodeksom in varnostni vidiki
Zahteve električnih predpisov
Smernice Nacionalnega električnega predpisa (NEC):
- Časovna stikala morajo biti odobrena s strani UL ali podobnega preskusnega laboratorija.
- Namestitev mora biti v skladu z navodili proizvajalca
- Zahtevana je ustrezna velikost žic za priključene obremenitve
- Za zunanjo uporabo je lahko potrebna zaščita GFCI
Premisleki glede lokalnih predpisov:
- Nekatere jurisdikcije zahtevajo dovoljenja za namestitev časovnega stikala
- Za določene aplikacije bo morda potreben pooblaščeni električar
- Zunanje namestitve pogosto zahtevajo vremensko odporna ohišja
Najboljše varnostne prakse
🔒 VARNOSTNI KONTROLNI SEZNAM:
- ✓ Pred namestitvijo vedno izklopite napajanje na odklopniku.
- ✓ Uporabite ustrezne žične konektorje, ki so primerni za uporabo.
- ✓ Preden ponovno vzpostavite napajanje, preverite, ali so vse povezave varne.
- ✓ Po potrebi mesečno testirajte zaščito GFCI
- ✓ Načrtujte letni pregled zunanjih instalacij
Strokovni nasveti za optimalno delovanje
💡 Strokovna priporočila:
- Izberite kakovostne blagovne znamke kot so Intermatic, Leviton ali Woods za zanesljivo delovanje
- Pravilno dimenzionirajte – časovnik naj bi obdelal vsaj 125% priključene obremenitve
- Razmislite o prenapetostni zaščiti za elektronske obremenitve in LED razsvetljavo
- Načrt za širitev – če so možne prihodnje obremenitve, namestite časovnik z večjo zmogljivostjo
- Nastavitve dokumenta – fotografirajte položaje žebljičkov za poznejšo uporabo
Vzdrževanje in trajnost
Načrt rednega vzdrževanja
| Frekvenca | Vzdrževalna naloga | Namen |
|---|---|---|
| Mesečno | Preverite natančnost ure | Zagotovite pravilen čas |
| Četrtletno | Čista številčnica in zatiči | Preprečite mehansko vezanje |
| Letno | Preizkus ročnega preglasitve | Preverite delovanje v sili |
| Dvakrat letno | Preverite povezave | Preprečite električne težave |
Kdaj zamenjati časovno stikalo
Kazalniki zamenjave:
- Ura kljub ustrezni napetosti nenehno teče hitro ali počasi
- Zatiči ne ostanejo varno na svojem mestu
- Ročno upravljanje ne deluje pravilno
- Vidna poškodba številčnice ali ohišja
- Električni stiki kažejo znake ožiganja ali jamkanja
Pogosto Zastavljena Vprašanja
Kako natančna so stikala s pin časovnikom?
Stikala s pin časovnikom običajno vzdržujejo natančnost v 1-2 minutah na dan, če so pravilno nameščena in vzdrževana, zaradi česar so primerna za večino stanovanjskih in poslovnih časovnih aplikacij.
Ali lahko uporabljam časovno stikalo z LED lučkami?
Da, vendar se prepričajte, da je časovnik zasnovan za vrsto uporabljenega LED gonilnika. Nekatere LED svetilke z elektronskimi gonilniki lahko zahtevajo časovnike, posebej zasnovane za elektronske obremenitve.
Kakšna je razlika med uporovno in induktivno obremenitvijo?
Uporne obremenitve (žarnice z žarilno nitko, grelniki) imajo nižji zagonski tok, medtem ko imajo induktivne obremenitve (motorji, fluorescenčne luči) višji zagonski tok, ki zahteva posebej dimenzionirane časovne kontakte.
Kako dolgo zdržijo časovna stikala s pin-om?
Kakovostni mehanski časovniki z ustrezno namestitvijo in vzdrževanjem običajno zdržijo 15–20 let, kar je bistveno dlje kot digitalni časovniki.
Ali lahko časovniki s pinom delujejo med izpadi električne energije?
Pin časovniki še naprej merijo čas med kratkotrajnimi izpadi električne energije, saj uporabljajo mehanski mehanizem, pri daljših izpadih pa bo treba čas ponastaviti, ko se napajanje vrne.
Ali PIN-časovniki delujejo s sistemi pametnega doma?
Tradicionalni pin časovniki delujejo neodvisno od sistemov pametnega doma, vendar nekateri proizvajalci ponujajo hibridne modele, ki združujejo mehansko zanesljivost s pametnimi možnostmi povezljivosti.
Zaključek
Nastavitev časovnega stikala z priključki zagotavlja zanesljiv in dolgoročen nadzor nad vašimi električnimi napravami brez zapletenega digitalnega programiranja. Z upoštevanjem pravilnih postopkov namestitve, razumevanjem tehnik programiranja z priključki in vzdrževanjem skladnosti s predpisi lahko dosežete desetletja zanesljivega avtomatiziranega nadzora.
Povezano
Razumevanje vrst časovnih stikal
