
Шуурхай хариулт: A battery disconnect switch should be installed on the negative terminal таны зай нь дээд тал нь аюулгүй байдал. Энэ сэргийлдэг оч бууруулж, цахилгааны аюул, болон дараах салбарын шилдэг туршлага. Гэсэн хэдий ч, зарим тусгай програмууд шаардаж болох эерэг талаас нь суулгах.
Understanding where to install your battery disconnect switch is crucial for vehicle safety, preventing battery drain, and protecting your electrical system. This comprehensive guide explains exactly why placement matters and how to make the right choice for your specific application.
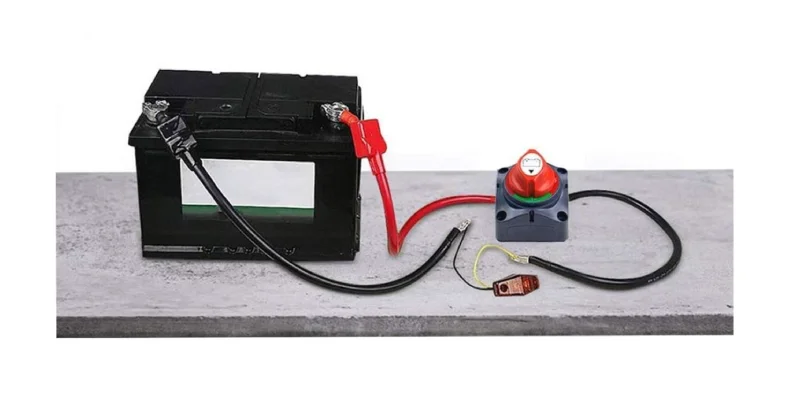
What is a Battery Disconnect Switch?

Нь battery disconnect switch (also called a battery cut-off switch or battery isolator) is a mechanical device that completely interrupts the electrical connection between your battery and vehicle’s electrical system. You use this switch to:
- Prevent battery drain during storage
- Enhance vehicle security
- Meet racing safety requirements
- Perform electrical maintenance safely
- Comply with marine and RV regulations
Мэргэжилтнүүдийн Зөвлөгөө: Professional mechanics install over 90% of battery disconnect switches on the negative terminal due to superior safety benefits.
Key Differences: Negative vs Positive Terminal Installation
| Суурилуулалтын байршил | Аюулгүй байдлын түвшин | Spark Risk | Ground Protection | Professional Preference |
|---|---|---|---|---|
| Negative Terminal | Хамгийн өндөр | Хамгийн бага | Complete | 90% of installations |
| Positive Terminal | Дунд зэрэг | Илүү өндөр | Partial | 10% of installations |
Detailed Comparison of Installation Methods
| Хүчин зүйл | Negative Terminal Installation | Positive Terminal Installation |
|---|---|---|
| Spark Prevention | Eliminates spark risk completely | High spark risk when switching |
| Богино залгааны хамгаалалт | Full protection against ground shorts | Limited protection |
| Installation Difficulty | Easier – fewer connections | More complex – multiple cables |
| NHRA Compliance | Meets all racing requirements | May not meet certain standards |
| Зардал | Standard switches work | May need specialized switches |
| Засвар үйлчилгээний хандалт | Simple single-point disconnect | Multiple connection points |
Why Negative Terminal Installation is Recommended
1. Maximum Safety Benefits
Installing on the negative terminal eliminates the risk of accidental sparks when you operate the switch. Since the negative terminal connects to the vehicle’s ground, disconnecting it removes all potential for electrical flow.
2. Complete Circuit Interruption
When you disconnect the negative terminal, you break the ground connection for the entire electrical system. This means:
- No current can flow anywhere in the vehicle
- All electrical components are completely isolated
- Zero risk of parasitic drain
3. Professional Standards Compliance
Major automotive organizations recommend negative terminal installation:
- NHRA (National Hot Rod Association): Requires negative side disconnect for racing
- ABYC (Ану-ын Завь болон дарвуулт Завины Зөвлөл): Specifies negative terminal for marine applications
- RV Industry Association: Recommends negative side for recreational vehicles
Аюулгүй байдлын анхааруулга: Always disconnect the negative terminal first when working on any vehicle electrical system to prevent sparks and potential battery explosion.
When to Use Positive Terminal Installation
While negative terminal installation is standard, certain situations require positive side placement:
Marine Applications with Multiple Batteries
| Програм | Terminal Choice | Reason |
|---|---|---|
| Single battery systems | Negative | Standard safety protocol |
| Dual battery with common ground | Positive | Maintains ground reference |
| House/starter battery setup | Positive on house | Preserves starter function |
Special Vehicle Requirements
- Emergency vehicles: May need positive disconnect to maintain radio memory
- Classic cars with positive ground: Require positive terminal disconnect
- Some European vehicles: Factory specifications may require positive placement
Алхам алхмаар Суулгах гарын Авлага
Installing on Negative Terminal (Recommended)
- Gather Required Tools
- Battery disconnect switch
- Wire cutters/strippers
- Wrenches (typically 10mm and 13mm)
- Safety glasses and gloves
- Dielectric grease
- Prepare the Battery
- Turn off all electrical accessories
- Remove keys from ignition
- Open hood and locate battery
- Disconnect Battery Cables
- Always remove negative cable first
- Then remove positive cable
- Secure positive cable away from battery
- Install the Switch
- Cut negative cable 6-8 inches from battery terminal
- Strip 1/2 inch of insulation from each end
- Connect battery side to switch “BAT” terminal
- Connect vehicle side to switch “GND” terminal
- Туршилтын суурилуулалт
- Reconnect positive cable first
- Reconnect negative cable to battery
- Test switch operation with multimeter
- Verify all electrical systems work properly
Мэргэжилтнүүдийн Зөвлөгөө: Apply dielectric grease to all connections to prevent corrosion and ensure long-term reliability.
Нийтлэг хэрэглээ ба хэрэглээний тохиолдол
Vehicle Storage Solutions
You need a battery disconnect switch when storing vehicles for extended periods:
- Classic cars: Prevents vintage electrical system drain
- Boats: Meets Coast Guard requirements for safety
- RVs: Eliminates parasitic drain from onboard electronics
- Farm equipment: Protects batteries during seasonal storage
Racing and Performance Requirements
| Racing Organization | Шаардлага | Terminal Specification |
|---|---|---|
| NHRA | Mandatory for 11.99 ET or faster | Negative terminal only |
| IHRA | Required for specific classes | Negative preferred |
| SCCA | Recommended for all race cars | Negative terminal |
Security and Theft Prevention
Installing a hidden battery disconnect switch provides:
- Additional theft deterrent beyond standard alarms
- Quick disable method for long-term parking
- Protection against hot-wiring attempts
Selection Guide: Choosing the Right Switch
Key Specifications to Consider
| Тодорхойлолт | Minimum Requirement | Professional Grade |
|---|---|---|
| Amperage Rating | 100 amps | 250+ amps |
| Continuous Duty | 50 amps | 125+ amps |
| Terminal Size | 3/8 inch | 1/2 inch |
| Орон сууцны материал | Хуванцар | Marine-grade brass |
| Weatherproofing | Basic seal | IP67 rated |
Switch Types and Their Best Uses
- Rotary Switches
- Best for: Easy access applications
- Amperage range: 100-300 amps
- Price range: $15-50
- Knife Switches
- Best for: High-amperage applications
- Amperage range: 200-500 amps
- Price range: $30-100
- Remote/Electronic Switches
- Best for: Hidden installations
- Amperage range: 100-250 amps
- Price range: $50-200
Алдааг Олж Засварлах Нь Нийтлэг Асуудлууд
Problem: Switch Gets Hot During Use
Causes and Solutions:
- Undersized switch: Upgrade to higher amperage rating
- Loose connections: Retighten and apply dielectric grease
- Corrosion: Clean terminals with battery cleaner
Problem: Electrical Systems Don’t Fully Disconnect
Оношлогооны алхамууд:
- Test with multimeter across switch terminals
- Check for alternative ground paths
- Verify switch is on negative terminal
- Inspect for bypassed circuits
Аюулгүй байдлын анхааруулга: Never work on electrical systems without proper safety equipment. Batteries contain sulfuric acid and can produce explosive gases.
Professional Installation Tips
Wire Gauge Selection
| Vehicle Type | Recommended Wire Gauge | Хамгийн их гүйдэл |
|---|---|---|
| Passenger cars | 4 AWG | 150 amps |
| Trucks/SUVs | 2 AWG | 200 amps |
| RVs/Boats | 1/0 AWG | 300 amps |
| Racing applications | 2/0 AWG | 400 amps |
Placement Considerations
- Install switch within 18 inches of battery
- Mount in accessible but protected location
- Avoid areas with extreme heat or moisture
- Consider using a waterproof cover for outdoor installations
Байнга Асуудаг Асуултууд
What makes negative terminal installation safer than positive?
Negative terminal installation is safer because it completely eliminates the ground connection, preventing any possibility of sparks when operating the switch. The negative terminal connects to the vehicle’s chassis ground, so disconnecting it breaks the circuit entirely without risk of arcing.
Can I install disconnect switches on both terminals?
While technically possible, installing switches on both terminals is unnecessary and not recommended. A single switch on the negative terminal provides complete disconnection. Dual switches add complexity without additional safety benefits.
How do I know what amperage rating I need?
You need a switch rated for at least 1.5 times your maximum electrical load. Most passenger vehicles require 125-175 amp switches, while trucks and RVs need 200-300 amp ratings. Check your alternator output for guidance.
Will a battery disconnect switch prevent all battery drain?
A properly installed negative terminal disconnect switch prevents 99% of battery drain. However, some batteries have minimal self-discharge (1-3% per month) that occurs internally regardless of external connections.
Do I need a special switch for marine applications?
Yes, marine applications require ignition-protected, waterproof switches that meet ABYC standards. Look for switches specifically rated for marine use with proper IP67 or higher water resistance ratings.
What should I look for when buying a battery disconnect switch?
Look for appropriate amperage rating (minimum 125 amps for cars), quality terminals that accept your cable size, weatherproof construction for your application, and safety certifications like UL or CE marking.
How often should I operate my battery disconnect switch?
You should operate your disconnect switch monthly to prevent contact corrosion and ensure smooth operation. Apply dielectric grease annually to maintain optimal performance and prevent seizing.
Can a battery disconnect switch damage my vehicle’s computer?
When properly installed on the negative terminal and operated with the ignition off, battery disconnect switches won’t damage vehicle computers. Always turn off the ignition before disconnecting to protect sensitive electronics.
Түргэн Лавлагаа Гарын Авлага
Installation Checklist
- Choose negative terminal installation (recommended)
- Select switch with 1.5x your max amperage need
- Gather all tools and safety equipment
- Disconnect negative cable first
- Install switch within 18 inches of battery
- Apply dielectric grease to all connections
- Test operation before finalizing installation
- Add weatherproof cover if needed
Аюулгүй байдлын протокол
- Always wear safety glasses and gloves
- Remove jewelry before working on battery
- Disconnect negative terminal first
- Keep metal tools away from positive terminal
- Work in well-ventilated area
- Have baking soda nearby for acid spills
Мэргэжлийн зөвлөмж ба дараагийн алхамууд
Installing a battery disconnect switch on the negative terminal provides maximum safety and functionality for 90% of applications. This simple upgrade protects your battery, enhances security, and can meet various regulatory requirements.
When to Seek Professional Installation:
- If you’re uncomfortable working with electrical systems
- For complex multi-battery configurations
- When local codes require certified installation
- If your vehicle has specialized electrical requirements
Remember that proper installation ensures years of reliable operation and maximum safety benefits. Whether you’re storing a classic car, meeting racing requirements, or preventing battery drain in your RV, choosing negative terminal installation follows industry best practices and professional standards.
For specific vehicle applications or to ensure compliance with local regulations, consult with a certified automotive electrician who can assess your unique requirements and ensure proper installation.
Холбоотой
Батерейг салгах унтраалга хэрхэн суулгах талаар
DC тусгаарлагчийн зөв унтраалга хэрхэн сонгох вэ: бүрэн гарын авлага
