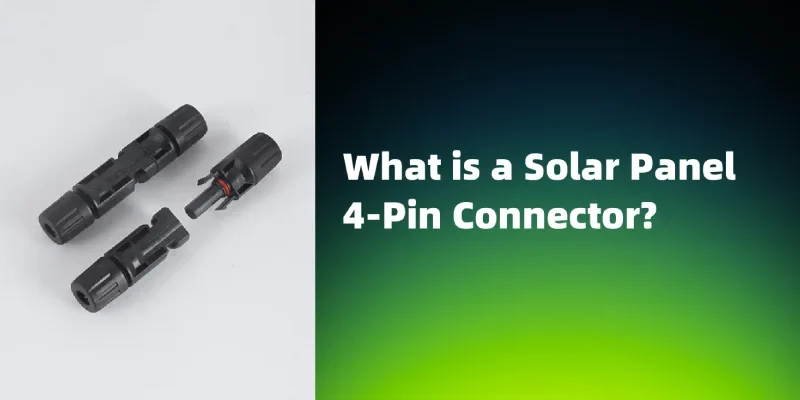
Конструкція 4-контактного роз'єму для сонячних панелей
Конструкція 4-контактного роз'єму для сонячних панелей включає в себе штекер і гніздо, які з'єднуються разом, створюючи надійне електричне з'єднання. Цей механізм замикання має вирішальне значення для забезпечення надійності у зовнішніх умовах, оскільки вимагає спеціального інструменту для від'єднання, щоб запобігти випадковому роз'єднанню під напругою. Кожна сонячна панель зазвичай постачається з попередньо встановленими роз'ємами MC4 - одним чоловічим і одним жіночим, що полегшує ефективну передачу енергії та масштабованість системи. Штирі роз'ємів діаметром 4 мм і конструкція із застібкою дозволяють швидко з'єднувати їх вручну, що значно спрощує і прискорює процес підключення сонячних панелей порівняно зі старими методами, які покладалися на ручне з'єднання клемних колодок.

4-контактний роз'єм для сонячних панелей VIOX
Характеристики напруги та струму
Роз'єми MC4 призначені для роботи зі специфічними вимогами до напруги та струму в системах сонячних панелей. Ось короткий огляд їх електричних характеристик:
| Специфікація | Рейтинг |
|---|---|
| Максимальна напруга системи | 1000В або 1500В (залежно від моделі) |
| Максимальний струм | 30А - 50А (залежить від моделі) |
| Контактний опір | ≤0.5 mΩ |
| Опір ізоляції | >1000 MΩ |
Ці роз'єми розроблені для ефективної передачі постійного струму, що генерується сонячними панелями, зберігаючи при цьому безпеку та надійність. Високі номінальні значення напруги і струму забезпечують сумісність з широким спектром сонячних установок, від невеликих домашніх систем до великих комерційних масивів. Щоб забезпечити оптимальну продуктивність і безпеку, дуже важливо вибрати роз'єми MC4, які відповідають конкретним вимогам до напруги і струму вашої системи сонячних панелей.
Стандарти довговічності та безпеки
4-контактні роз'єми для сонячних панелей розроблені відповідно до суворих стандартів міцності та безпеки, забезпечуючи надійну роботу в суворих зовнішніх умовах. Ці роз'єми відповідають декільком ключовим специфікаціям:
- Ступінь захисту IP67: Забезпечує захист від пилу та занурення у воду на глибину до 1 метра на 30 хвилин.
- Стійкість до ультрафіолету: Витримує тривалий вплив сонячного світла без деградації.
- Температурний діапазон: Зазвичай працює в діапазоні від -40°C до +85°C (від -40°F до +185°F).
- Сертифікація UL 6703: Забезпечує відповідність стандартам безпеки для використання у фотоелектричних системах.
- Сертифікація TÜV: Підтверджує якість і безпеку для використання на європейських ринках.
Ці стандарти сприяють репутації 4-контактних роз'ємів для сонячних панелей як надійних і довговічних в інсталяціях сонячних панелей, що робить їх кращим вибором як для житлових, так і для комерційних застосувань.
Процес встановлення сонячної панелі за допомогою 4-контактного роз'єму
Процес встановлення сонячних панелей за допомогою 4-контактного роз'єму Solar Panel 4-Pin розроблений таким чином, щоб бути ефективним і простим, що робить його доступним як для професіоналів, так і для ентузіастів-любителів. Ось огляд ключових етапів:
- Розміщення панелей: Розмістіть сонячні панелі на монтажній конструкції, переконавшись, що вони надійно закріплені та зорієнтовані для оптимального впливу сонячного світла.
- Ідентифікація з'єднувача: Знайдіть попередньо прикріплені 4-контактні роз'єми сонячних панелей на кожній панелі. Як правило, один з них буде чоловічим, а інший - жіночим.
- Струноутворення: З'єднайте панелі послідовно, приєднавши позитивний (зазвичай червоний) 4-контактний роз'єм сонячної панелі однієї панелі до негативного (зазвичай чорного) роз'єму наступної панелі. Таким чином створюється "ланцюжок" панелей.
- Погодостійкі з'єднання: Переконайтеся, що всі з'єднання повністю вставлені та зафіксовані. Характерний звук "клацання" свідчить про надійне з'єднання, що має вирішальне значення для довгострокової надійності системи у зовнішніх умовах.
- Управління кабелями: Організуйте та закріпіть кабелі за допомогою стійких до ультрафіолету стяжок або кабельних затискачів. Це запобігає перенапруженню роз'ємів і захищає проводку від пошкоджень, спричинених навколишнім середовищем.
- Підключення розподільчої коробки: Прокладіть основні позитивні та негативні кабелі від струн панелі до розподільної або комбінованої коробки, яка потім підключається до інвертора.
- Заземлення: Належним чином заземліть систему відповідно до місцевих електротехнічних норм, що може передбачати підключення дроту заземлення до рам панелей і монтажних конструкцій.
- Перевірка: Перед завершенням монтажу перевірте за допомогою мультиметра належну напругу на струнах і наявність замикань на землю.
- Підключення інвертора: Завершіть систему, підключивши вхід постійного струму від сонячної батареї до інвертора, який перетворює постійний струм на змінний для домашнього використання.
Протягом усього процесу встановлення дуже важливо дбайливо поводитися з роз'ємами MC4, уникаючи впливу бруду або вологи, які можуть погіршити якість з'єднання. Конструкція роз'ємів MC4 значно скорочує час монтажу в порівнянні зі старими методами з використанням клемних колодок, дозволяючи швидше налаштувати сонячні батареї.
Новачкам у сфері сонячних установок рекомендується потренуватися під'єднувати і від'єднувати 4-контактні роз'єми сонячних панелей перед початком роботи з реальною системою. Це допоможе забезпечити належну техніку та зменшити ризик пошкодження роз'ємів або панелей під час процесу встановлення.


