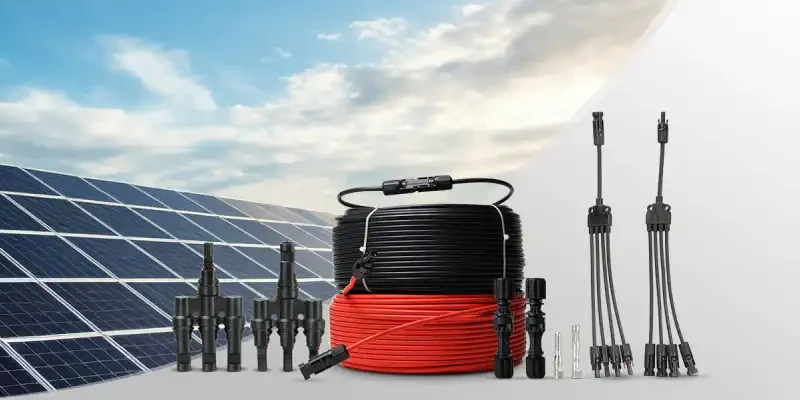
Розуміння роз'ємів для сонячних панелей
A. Визначення та основна функція
З'єднувачі для сонячних панелей - це спеціалізовані електричні пристрої, призначені для встановлення безпечного та надійного з'єднання між сонячними панелями та іншими компонентами фотоелектричної системи, такими як інвертори, контролери заряду та акумулятори. Їх основна функція - сприяти ефективній передачі електроенергії, виробленої сонячними панелями, забезпечуючи безперебійний потік енергії по всій системі.
- Електричне з'єднання: З'єднувачі з'єднують окремі сонячні панелі в масив, забезпечуючи передачу електричного струму. Вони гарантують, що енергія, вироблена панелями, може бути ефективно спрямована до інверторів або систем зберігання енергії.
- Мінімізація втрат потужності: Високоякісні роз'єми призначені для мінімізації опору і втрат потужності під час передачі енергії. Ця ефективність має вирішальне значення для максимізації загальної продуктивності сонячної установки.
- Стійкість до погодних умов: З'єднувачі сонячних панелей виготовлені таким чином, щоб витримувати суворі умови навколишнього середовища, включаючи вплив ультрафіолетового випромінювання, вологи та екстремальних температур. Така міцність забезпечує довговічне і надійне з'єднання протягом усього терміну служби сонячної системи.
- Функції безпеки: Багато роз'ємів мають механізми блокування, які запобігають випадковому відключенню, знижуючи ризик виникнення електричної дуги або короткого замикання. Цей аспект безпеки має важливе значення для підтримки безпечної та стабільної роботи фотоелектричної системи.
- Модульність і масштабованість: Роз'єми дозволяють легко розширювати сонячні батареї, створюючи послідовні або паралельні конфігурації. Така модульність сприяє гнучкому проектуванню системи та спрощує обслуговування.
B. Роль у фотоелектричних системах
- Встановіть ефективні електричні з'єднання між панелями та іншими компонентами.
- Забезпечте безпеку та надійність системи завдяки надійним запірним механізмам.
- Модульна конструкція та масштабованість для легкого розширення системи.
- Спростіть процес встановлення за допомогою функції plug-and-play.
C. Ключові особливості
- Погодостійка конструкція: Більшість сонячних роз'ємів, зокрема роз'єми MC4, спроектовані таким чином, щоб витримувати суворі умови навколишнього середовища, включаючи дощ, сніг і екстремальні температури. Така стійкість до погодних умов гарантує надійну роботу і довговічність у зовнішньому застосуванні.
- Надійний запірний механізм: Роз'єми для сонячних панелей зазвичай мають фіксуючу конструкцію, яка запобігає випадковому від'єднанню. Цей механізм підвищує стабільність і безпеку електричних з'єднань, що має вирішальне значення для довгострокової експлуатації.
- Високі номінальні значення напруги та струму: Роз'єми розраховані на високу напругу (до 1500 В для нових моделей MC4) і струм (зазвичай від 20А до 30А), що гарантує безпечне керування електричним навантаженням, яке генерується сонячними панелями.
- Сумісність: Багато сонячних роз'ємів, особливо типу MC4, розроблені таким чином, щоб бути універсально сумісними з різними брендами і моделями сонячних панелей. Така сумісність спрощує встановлення та обслуговування різних систем.
- Простота монтажу: Роз'єми типу "підключи і працюй" дозволяють швидко збирати панелі без використання складних інструментів, що полегшує монтажникам з'єднання панелей в послідовну або паралельну конфігурацію.
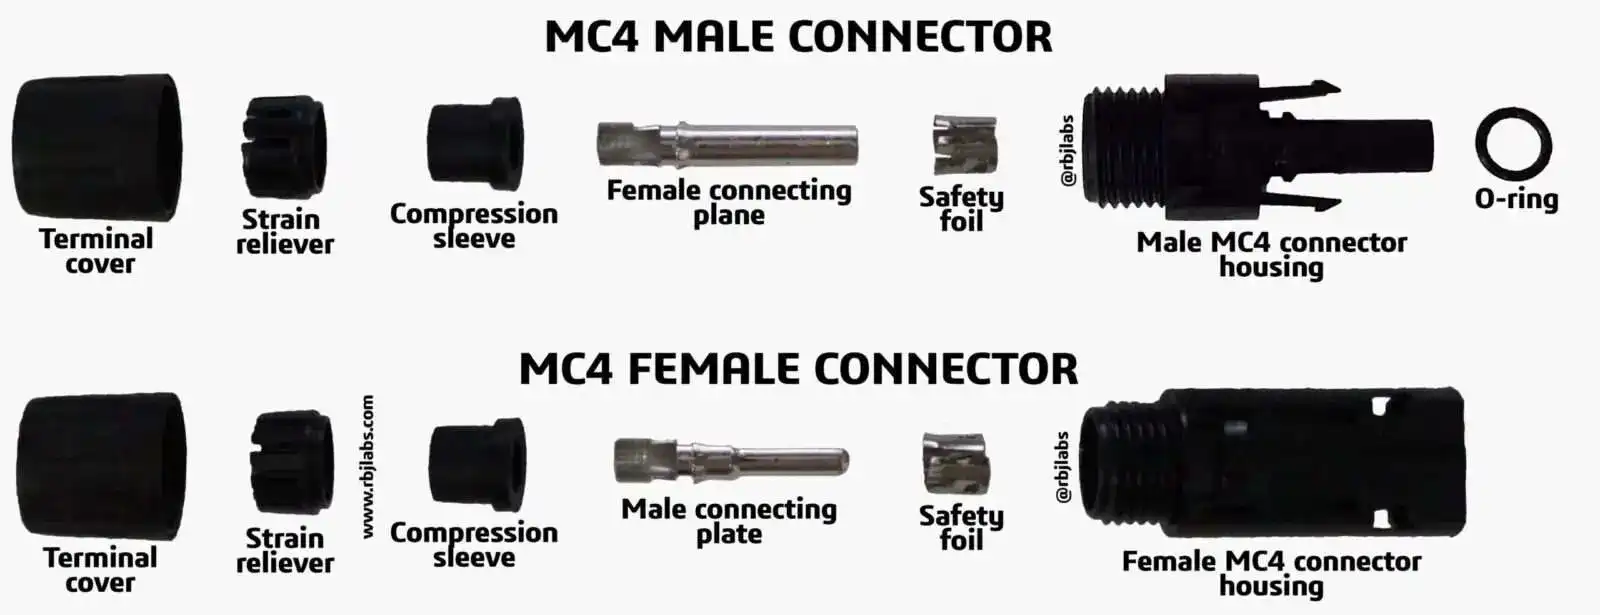
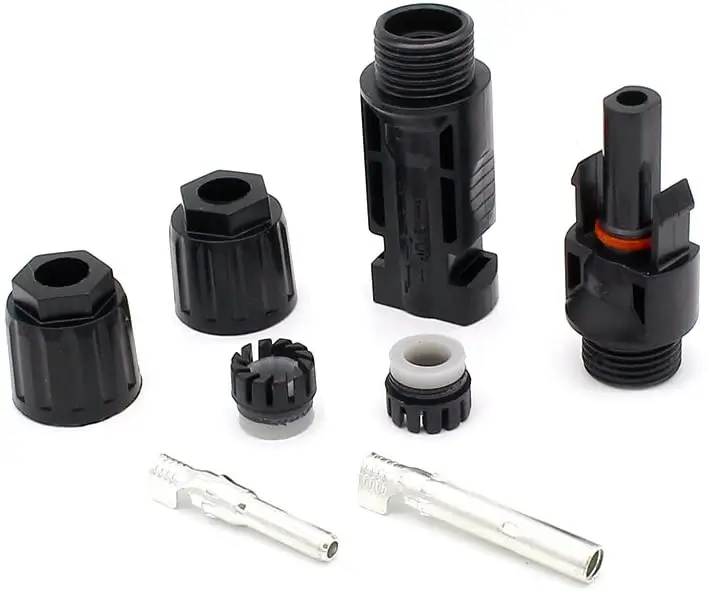
D. Компоненти сонячних роз'ємів
заслуга в тому, що https://diysolarforum.com/threads/what-cable-do-i-need.29253/
- Чоловічі та жіночі роз'єми: Роз'єми сонячних панелей зазвичай складаються з чоловічої та жіночої частин, які надійно з'єднуються між собою. Чоловічий роз'єм зазвичай має металевий штифт, тоді як жіночий роз'єм містить металеве гніздо. Така конструкція забезпечує надійне електричне з'єднання.
- Корпус: Корпус захищає внутрішні компоненти від впливу факторів навколишнього середовища та забезпечує ізоляцію. Він часто включає гумову прокладку, яка створює водонепроникне ущільнення при з'єднанні чоловічого і жіночого роз'ємів.
- Контактні штифти: Ці металеві елементи в роз'ємах встановлюють електричне з'єднання між панелями. Вони виготовляються з провідних матеріалів, таких як луджена мідь, щоб забезпечити ефективну передачу енергії.
- Обтискний механізм: Для деяких інсталяцій роз'єми потребують обтискних інструментів, щоб надійно прикріпити дроти до контактних штифтів. Цей процес включає в себе зачистку кінців дроту, обтискання їх на штирі, а потім збірку в корпусі роз'єму.
- Комбіновані коробки: У великих системах поряд з роз'ємами можуть використовуватися комбіновані коробки для об'єднання декількох ланцюжків панелей в один вихід для полегшення підключення до інверторів.
Типи роз'ємів для сонячних панелей
A. Роз'єми MC4
Роз'єми MC4 призначені для створення надійного, стійкого до атмосферних впливів з'єднання в системах сонячних панелей. Чоловічий і жіночий компоненти забезпечують правильну полярність і щільне прилягання, що має вирішальне значення для ефективної передачі енергії та безпеки системи. Високі номінальні значення струму і напруги, а також відмінний захист від перепадів температур і впливу навколишнього середовища роблять їх ідеальними для різних сонячних установок.
Технічні характеристики
- Поточний рейтинг: 39 - 104 A
- Номінальна напруга: До 1 000 В
- Температурний діапазон: Зазвичай розрахований на максимальну температуру 105ºC.
- Ступінь захисту від проникнення (IP): IP68, що забезпечує повний захист від пилу та занурення у воду.
Типи:
- Штекерний роз'єм: Має циліндричний штифт, який вставляється в гніздо.
- Гніздо для роз'єму: Містить гніздо, призначене для прийому штекера, що забезпечує надійне з'єднання.
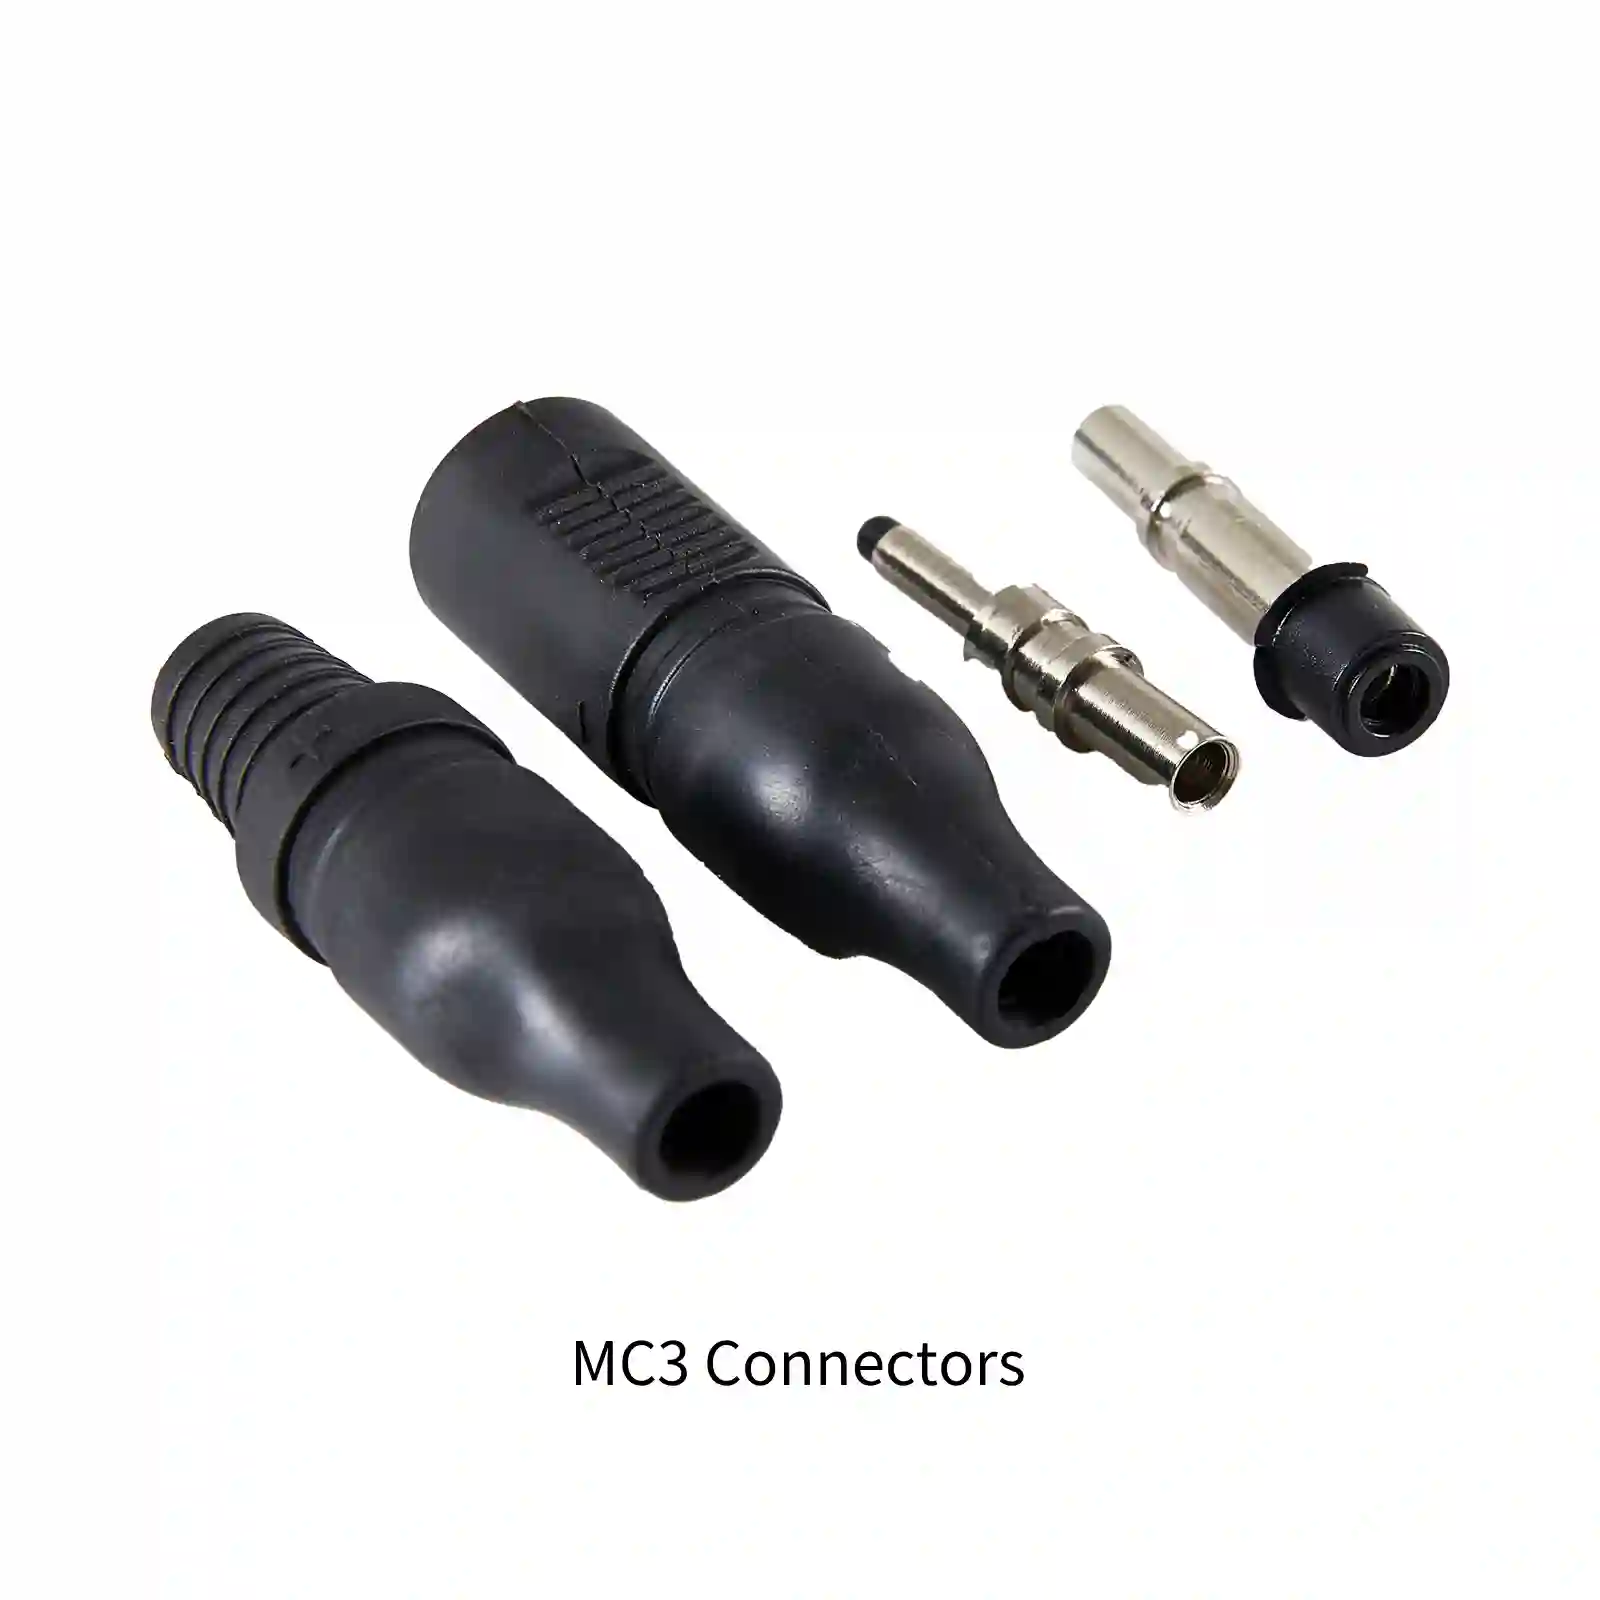
B. Роз'єми MC3
Роз'єми MC3 - це старше покоління сонячних роз'ємів:
- Номінальний струм: 20 - 43 А
- Номінальна напруга: До 1 000 В
- Ступінь захисту від проникнення (IP): IP65, що захищає від пилу, але забезпечує лише обмежену водонепроникність.
Ці роз'єми мають замикаючий механізм, але менш надійні порівняно з роз'ємами MC4, що робить їх менш придатними для сучасних інсталяцій.
C. З'єднувачі Amphenol H4
Роз'єми Amphenol H4 розроблені як надійна альтернатива роз'ємам MC4:
- Поточний номінал: 15 - 45 A
- Номінальна напруга: До 1 500 В
- Ступінь захисту від проникнення (IP): IP68, що забезпечує високу стійкість до пилу та води.
Вони мають конструкцію, що не потребує інструментів, для легкого встановлення та від'єднання, що підвищує зручність використання у фотоелектричних системах.
D. Інші поширені типи
З'єднувачі Tyco (SolarLok)
- Номінальний струм: 20 - 30 А
- Номінальна напруга: До 1 500 В
- Ступінь захисту від проникнення (IP): IP65.
Ці роз'єми мають гендерно-нейтральний дизайн, що дозволяє з'єднувати будь-які два роз'єми без використання спеціальних чоловічих або жіночих компонентів.
Роз'єми T4
- Поточний номінал: 15 - 45 A
- Номінальна напруга: До 1 500 В
- Ступінь захисту від проникнення (IP): IP68.
Роз'єми T4 спроектовані для зручності використання з можливістю збирання без інструментів, що спрощує монтаж.
З'єднувачі Radox
- Поточний рейтинг: До 38 А
- Номінальна напруга: До 1 000 В
- Ступінь захисту від проникнення (IP): IP68.
Ці роз'єми відомі своєю довговічністю та стійкістю до впливу факторів навколишнього середовища.
Підключення сонячних панелей: послідовне та паралельне підключення
Правильне підключення сонячних панелей має важливе значення для оптимізації продуктивності фотоелектричних систем. Два основних способи з'єднання сонячних панелей - послідовне і паралельне з'єднання, кожен з яких має свої особливості, переваги та вплив на напругу і струм.
A. Послідовне з'єднання
1. Метод та переваги
При послідовному з'єднанні сонячні панелі з'єднуються кінець в кінець. Позитивна клема однієї панелі з'єднується з негативною клемою наступної панелі. Така конфігурація призводить до утворення єдиного ланцюжка панелей.
Вигоди:
- Вища вихідна напруга: Загальна вихідна напруга збільшується при додаванні напруг кожної панелі, що робить його придатним для систем, які потребують більш високої напруги.
- Простота: Послідовне з'єднання просте в налаштуванні і вимагає меншої кількості дротів, ніж паралельна конфігурація.
- Покращена продуктивність у сонячних умовах: Послідовне з'єднання може бути більш ефективним на незатінених ділянках, оскільки весь ланцюг працює на одному рівні струму.
2. Вплив на напругу та струм
- Напруга: Загальна вихідна напруга - це сума напруг кожної панелі. Наприклад, якщо три 12В панелі з'єднані послідовно, загальна напруга становитиме 36В.
- Струм: вихідний струм залишається постійним і дорівнює номінальному струму окремих панелей. Таким чином, якщо кожна панель виробляє 5А, загальний струм залишається 5А.
B. Паралельне з'єднання
1. Метод та переваги
При паралельному з'єднанні всі позитивні клеми сонячних панелей з'єднуються разом, а всі негативні клеми також з'єднуються. Така конфігурація дозволяє декільком лініям панелей працювати незалежно.
Вигоди:
- Збільшений вихідний струм: Загальний вихідний струм збільшується при додаванні струмів від кожної панелі, що робить його ідеальним для систем, які потребують більшого струму.
- Відмовостійкість: Якщо одна панель не справляється з роботою або виходить з ладу, це суттєво не впливає на продуктивність інших панелей, що працюють паралельно.
- Нижчий рівень напруги: Ця конфігурація безпечніша для низьковольтних застосувань і спрощує налаштування заряджання акумулятора.
2. Вплив на напругу та струм
- Напруга: Вихідна напруга залишається постійною і дорівнює напрузі однієї панелі. Наприклад, якщо три 12В панелі з'єднані паралельно, загальна напруга все одно буде 12В.
- Струм: загальний вихідний струм - це сума струмів від кожної панелі. Наприклад, якщо три панелі видають по 5А кожна, загальний струм буде 15А.
C. Порівняння послідовного та паралельного підключення
| Особливість | Послідовне з'єднання | Паралельне з'єднання |
|---|---|---|
| Вихід напруги | Збільшення (сума всіх напруг на панелі) | Постійна (дорівнює одній напрузі панелі) |
| Поточний вихід | Постійна (дорівнює струму однієї панелі) | Збільшення (сума струмів усіх панелей) |
| Складність конфігурації | Простіше налаштування електропроводки | Потрібна додаткова проводка |
| Наслідки виходу панелі з ладу | Впливає на весь рядок, якщо одна панель виходить з ладу | Інші панелі продовжують працювати |
| Ідеальний варіант використання | Високовольтні застосування | Застосування при низькій напрузі або змішаному освітленні |
Роз'єми MC4 в деталях
A. Особливості конструкції
Роз'єми MC4 розроблені з урахуванням високих вимог, що пред'являються до систем сонячної енергетики. Основні конструктивні особливості включають
- Погодостійка конструкція: Роз'єми MC4 витримують екстремальні умови навколишнього середовища, включаючи дощ, сніг і високі температури. Вони оснащені високоякісним гумовим ущільнювачем, який забезпечує водонепроникне з'єднання, захищаючи електричні контакти від вологи та корозії.
- Міцні матеріали: Корпуси роз'ємів MC4 зазвичай виготовляються зі стійких до ультрафіолетового випромінювання та вогнетривких матеріалів, таких як PPO (поліфеніленоксид) або PA (поліамід), що забезпечує довговічність та продуктивність у суворих умовах.
- Поляризований дизайн: Роз'єми поляризовані, що означає, що їх можна підключати тільки в правильній орієнтації. Ця функція допомагає запобігти підключенню зворотної полярності, що може пошкодити сонячні панелі або інвертори.
- Високі номінальні напруги та струми: Роз'єми MC4 розраховані на напругу до 1 500 В постійного струму і струм до 50 А, що робить їх придатними для широкого спектру сонячних систем.
B. Механізм блокування та безпека
Роз'єми MC4 оснащені надійним механізмом блокування, який запобігає випадковому від'єднанню:
- Система блокування Snap-In: Для роз'єднання роз'ємів потрібен інструмент, який гарантує, що вони залишаться надійно з'єднаними навіть при механічних навантаженнях або суворих умовах навколишнього середовища. Ця функція має вирішальне значення для збереження цілісності електричних з'єднань в сонячних установках.
- Відповідність стандартам безпеки: Роз'єми MC4 відповідають міжнародним стандартам безпеки, таким як UL, IEC і TUV. Ці сертифікати гарантують, що вони відповідають суворим вимогам безпеки для використання в сонячних фотоелектричних системах.
- Низький контактний опір: Конструкція мінімізує електричний опір, що допомагає зменшити втрати енергії через з'єднання. Ця ефективність є життєво важливою для максимізації загальної продуктивності сонячних енергетичних систем.
C. MC4 Інструменти для відключення
Щоб безпечно від'єднати роз'єми MC4, не пошкодивши їх, використовуються спеціальні інструменти:
- Інструмент для роз'єднання роз'ємів MC4: Цей інструмент спеціально розроблений для розблокування блокувального механізму роз'ємів MC4. Він дозволяє користувачам безпечно роз'єднувати штекерні та гніздові компоненти без застосування надмірної сили, яка може призвести до пошкодження.
- Простота використання: Інструмент для від'єднання спрощує процес обслуговування або реконфігурації сонячних установок, дозволяючи швидко від'єднувати їх у разі потреби. Ця функція особливо корисна під час технічного обслуговування або усунення несправностей.
Додаткове обладнання для електропроводки
A. Багатогалузеві роз'єми MC4
1. Мета та функції
Багатогілкові роз'єми MC4 призначені для з'єднання декількох лінійок сонячних панелей до одного виходу. Їх основне призначення - спростити процес підключення, дозволяючи об'єднати кілька панелей в одну точку з'єднання, що веде до інвертора або комбінованої коробки. Це зменшує кількість необхідних кабелів і впорядковує схему проводки, роблячи установку більш чистою і керованою.
2. Типи (чоловічі та жіночі результати)
Багатогілкові роз'єми MC4 зазвичай бувають двох конфігурацій:
- Чоловічі виходи: Ці роз'єми мають штирі, які підключаються до гніздових роз'ємів сонячних панелей або інших відгалужень.
- Гніздові виходи: Ці роз'єми оснащені гніздами, призначеними для прийому штифтів від інших роз'ємів або сонячних панелей.
Ці конфігурації забезпечують гнучкість з'єднань, що дозволяє інсталяторам створювати індивідуальні налаштування відповідно до конкретних потреб сонячної батареї.
B. Комбіновані фотоелектричні модулі
1. Коли варто використовувати комбіновані коробки
Фотоелектричні з'єднувальні коробки необхідні для великих сонячних установок, де потрібно ефективно з'єднати кілька рядів сонячних панелей. Вони особливо корисні, коли:
- Система включає в себе багато сонячних панелей (зазвичай більше трьох рядів).
- Існує потреба в централізації з'єднань, щоб зменшити складність проводки.
- Потрібні посилені заходи безпеки, такі як захист ланцюгів і можливості моніторингу.
Коробки-комбінатори об'єднують струм з декількох ліній в один вихід, який можна легко підключити до інвертора, спрощуючи загальну конструкцію системи.
2. Переваги для великих систем
Використання фотоелектричних комбінованих блоків має кілька переваг для великих сонячних електростанцій:
- Зменшення складності: Об'єднуючи кілька виходів панелей в одній коробці, комбіновані коробки зводять до мінімуму кількість проводів, що йдуть до інвертора, спрощуючи монтаж і зменшуючи кількість потенційних точок відмови.
- Підвищена безпека: Комбіновані коробки часто оснащені захисними пристроями, такими як запобіжники та автоматичні вимикачі, які захищають від перенапруги та короткого замикання, підвищуючи загальну безпеку системи.
- Легше обслуговування: Завдяки впорядкованій проводці та доступним компонентам, завдання технічного обслуговування стають простішими, дозволяючи технічним спеціалістам швидко перевіряти з'єднання та усувати несправності.
- Масштабованість: Фотоелектричні комбіновані блоки полегшують майбутнє розширення, дозволяючи інтегрувати додаткові нитки без перепроектування всієї системи.
Найкращі практики встановлення
A. Необхідні інструменти
Щоб правильно встановити сонячні панелі, вам знадобляться такі інструменти:
- Свердло: Для створення отворів у монтажній поверхні.
- Викрутки: Для кріплення кріплень і панелей.
- Гайкові ключі: Для затягування болтів і гайок.
- Знімачі для зачистки проводів: Для підготовки електричних проводів.
- Обтискний інструмент: Для надійного прикріплення роз'ємів до проводів.
- Рівень: Щоб переконатися, що панелі встановлені рівномірно.
- Захисне спорядження: Включно з рукавичками, захисними окулярами та каскою.
- Драбина або риштування: Для безпечного доступу на дах.
- Інструмент для роз'єднання MC4: Для безпечного з'єднання та роз'єднання роз'ємів MC4.
B. Покрокове керівництво по встановленню
- Планування та дозволи:
- Вивчіть місцеві правила та отримайте необхідні дозволи перед встановленням.
- Оцінка місця:
- Оцініть місце встановлення на предмет впливу сонячних променів, затінення деревами або будівлями, а також цілісності даху.
- Монтаж системи кріплення:
- Надійно встановіть монтажні кронштейни на даху або землі відповідно до інструкцій виробника.
- Розміщення панелей:
- Розмістіть сонячні панелі на монтажній системі так, щоб вони були орієнтовані для оптимального впливу сонячного світла.
- Електричні з'єднання:
- Підготуйте дроти від кожної панелі за допомогою зачистки проводів. З'єднайте панелі послідовно або паралельно за необхідності за допомогою роз'ємів MC4.
- Заземлення:
- Забезпечте належне заземлення системи, щоб запобігти електричним несправностям.
- Підключення інвертора:
- Підключіть вихід сонячних панелей до інвертора, дотримуючись усіх електротехнічних норм і стандартів безпеки.
- Тестування Системи:
- Після того, як все підключено, протестуйте систему, щоб переконатися, що вона працює належним чином, перш ніж завершити встановлення.
- Фінальна перевірка:
- Перевірте всі з'єднання, кріплення та проводку на надійність і відповідність стандартам безпеки.
C. Типові помилки, яких слід уникати
- Неадекватні дослідження та планування:
- Нерозуміння системних вимог може призвести до неправильного вибору розміру або розміщення сонячних панелей.
- Неправильне розміщення та позиціонування:
- Встановлення панелей у затінених місцях або під неправильним кутом може значно зменшити виробництво енергії.
- Нехтування електробезпекою:
- Недотримання електротехнічних правил може створити загрозу безпеці; якщо ви не впевнені, завжди звертайтеся до ліцензованого електрика.
- Затягування з'єднань:
- Надмірне затягування болтів може призвести до пошкодження панелей; переконайтеся, що вони щільно, але не надмірно затягнуті.
- Ігнорування планування технічного обслуговування:
- Якщо не планувати регулярне технічне обслуговування, з часом це може призвести до проблем з продуктивністю.
D. Правильний вибір розмірів провідників
Правильний вибір провідників має важливе значення для забезпечення безпечної та ефективної роботи системи сонячних панелей:
- Розрахувати поточні потреби:
- Визначте загальну вихідну потужність струму, виходячи з конфігурації (послідовне або паралельне з'єднання) ваших сонячних панелей.
- Використовуйте відповідний калібр дроту:
- Зверніться до таблиці американського калібру дроту (AWG), щоб вибрати розмір дроту, який може витримати максимальний струм без перегріву.
- Подумай про падіння напруги:
- Для довших дистанцій враховуйте падіння напруги, використовуючи дріт більшого перерізу, щоб мінімізувати втрати енергії на відстані.
- Дотримуйтесь місцевих правил:
- Переконайтеся, що розмір провідників відповідає місцевим електротехнічним нормам і стандартам для сонячних установок.
Аналіз витрат
1. Початкові інвестиції:
- Вартість роз'ємів: Роз'єми MC4 широко розглядаються як економічно ефективні рішення для встановлення сонячних панелей, зазвичай їхня ціна становить від \$0,50 до \$2,00 за роз'єм, залежно від виробника та кількості, що закуповується. Інші типи роз'ємів, такі як MC3 або Amphenol H4, можуть відрізнятися за ціною, але в цілому знаходяться в аналогічному діапазоні.
- Витрати на встановлення: Встановлення сонячних роз'ємів зазвичай вимагає мінімальних трудовитрат завдяки їхній зручній конструкції, яка дозволяє швидко збирати та розбирати їх за допомогою стандартних інструментів. Така простота монтажу може знизити загальні витрати на робочу силу в порівнянні з більш складними системами електропроводки.
2. Довгострокові заощадження:
- Довговічність і обслуговування: Роз'єми MC4 розроблені таким чином, щоб витримувати суворі умови навколишнього середовища, забезпечуючи тривалий термін служби з мінімальними вимогами до технічного обслуговування. Їх довговічність означає меншу кількість замін з часом, що призводить до економії коштів.
- Енергоефективність: Високоякісні з'єднувачі мінімізують втрати енергії завдяки низькому опору контактів, що може підвищити загальну ефективність сонячної фотоелектричної системи. Ця ефективність сприяє збільшенню виробництва енергії та потенційній економії на рахунках за електроенергію протягом усього терміну служби системи.
- Скорочення часу простою: Надійні роз'єми зменшують ймовірність збоїв або простоїв системи, забезпечуючи стабільну генерацію енергії та максимізуючи рентабельність інвестицій.
Відомі виробники роз'ємів для сонячних панелей
Найвідоміші виробники роз'ємів для сонячних панелей включають в себе:
1. Мультиконтактні (MC) / Stäubli
Винахідник промислового стандарту роз'єму MC4
Відомий своєю надійністю, сумісністю та довговічністю
Роз'єми MC4 мають конструкцію "вилка-розетка" для швидкого з'єднання
Веб-сайт: www.staubli.com
2. Амфенол
Виробляє роз'єм Helios H4, розроблений для високої пропускної здатності та міцної конструкції
Роз'єми Helios H4 сумісні з роз'ємами MC4
Також виробляє роз'єм T4 з конструкцією, що не потребує інструментів, для легкого встановлення та від'єднання
Веб-сайт: www.amphenol.com
3. Tyco Electronics (TE Connectivity)
Розробляє сонячні роз'єми під брендом SolarLok
Роз'єм SolarLok PV4 сертифікований UL і TÜV, відповідає нормам NEC
Має гендерно нейтральний дизайн, що дозволяє з'єднувати будь-які два роз'єми без використання спеціальних чоловічих або жіночих компонентів
Веб-сайт: www.te.com
4. HUBER+SUHNER
Виробляє роз'єм Radox, спеціально розроблений для вимогливих сонячних систем
Пропонує високу механічну та електричну міцність для довготривалої надійності в складних інсталяціях
Роз'єми Radox забезпечують надійне з'єднання в суворих умовах експлуатації
Веб-сайт: www.hubersuhner.com
Висновок
З'єднувачі сонячних панелей відіграють вирішальну роль в ефективності, безпеці та довговічності фотоелектричних систем. Оскільки сонячна енергетика продовжує розвиватися, ці компоненти, ймовірно, будуть і надалі вдосконалюватися в дизайні, довговічності та продуктивності. Розуміння різних типів роз'ємів, їх правильного встановлення та обслуговування є важливим для всіх, хто бере участь у проектах сонячної енергетики, від власників будинків до операторів великих сонячних електростанцій.
Основні висновки з цього посібника включають
- Важливість вибору правильного типу роз'єму для конкретних потреб вашої сонячної установки
- Вирішальна роль правильного встановлення та обслуговування в забезпеченні ефективності та безпеки системи
- Постійний розвиток технології роз'ємів, що обіцяє підвищити продуктивність і надійність сонячних енергетичних систем
- Важливість врахування екологічних факторів та довгострокових фінансових наслідків при виборі з'єднувачів
Оскільки сонячна енергія продовжує відігравати все більш важливу роль у нашому переході до сталих джерел енергії, такі, здавалося б, невеликі, але важливі компоненти, як роз'єми для сонячних панелей, залишатимуться в авангарді галузевих інновацій та передових практик.


