Вступ
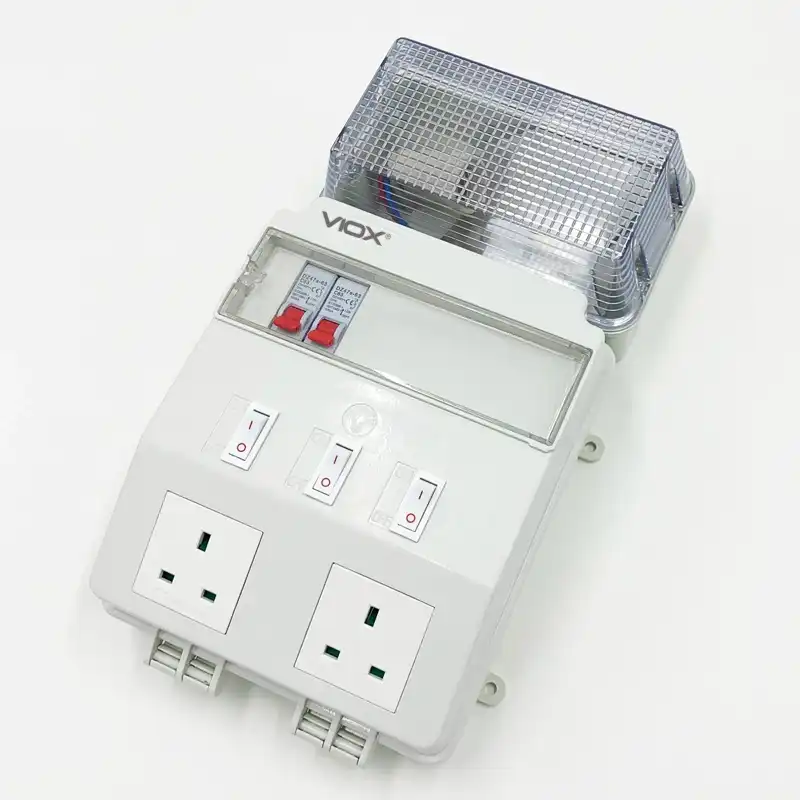
Готовий щит - це автономний, компактний і універсальний розподільний щит, який ідеально підходить для невеликих об'єктів, таких як невеликі будинки, сараї або господарські будівлі. Цей посібник допоможе вам зрозуміти, підключити та налаштувати готовий щит, щоб забезпечити надійне та ефективне електропостачання.
При роботі з електрикою обов'язково проконсультуйтеся з фахівцем. При роботі з електрикою існує небезпека. Зверніться до електрика.
Про готову дошку
Огляд
Готовий щит має вбудовані штепсельні вилки, автоматичні вимикачі та захист від витоку струму на землю. Його можна використовувати як основний розподільчий щит у різних сценаріях.

Ключові компоненти
- Захист від витоку струму на землю: Захищає безпеку людини, відключаючи живлення в разі дисбалансу струму.
- Автоматичний вимикачs: Захист ланцюгів від перевантаження по струму.
- Змішані схеми: Поєднання штепсельних і освітлювальних ланцюгів всередині плати.

Розпакування та початкове налаштування
Коли ви розпакуєте готову плату, ви знайдете розподільчу плату, упаковану захисними матеріалами. Сам щит компактний, незважаючи на велику коробку. Готовий щит поставляється з уже встановленими штепсельними розетками та вимикачами, що робить його практично готовим до використання.
Розуміння компонентів

Готова плата оснащена розеткою, вимикачами та пристроєм заземлення. Пристрій захисного заземлення - це важливий елемент безпеки, який захищає від ураження електричним струмом. Він контролює струм, що надходить на плату і виходить з неї, забезпечуючи швидке усунення будь-яких невідповідностей.
Наприклад, якщо нагрівач, підключений до плати, має пошкоджену ізоляцію, пристрій захисту від витоку струму на землю виявить витік струму на землю і відключить живлення, запобігаючи ураженню електричним струмом.
Підготовка до встановлення
- Безпека понад усе: Перед початком будь-яких електромонтажних робіт завжди переконайтеся, що джерело живлення вимкнено.
- Необхідні інструменти та матеріали: Викрутки, плоскогубці, зачистки для дроту, відповідні кабелі та сальники.
Вибір правильного розміру кабелю
Розмір кабелю, який ви використовуєте, має вирішальне значення і повинен визначатися навантаженням. Наприклад, якщо ви використовуєте кабель 2,5 мм, переконайтеся, що він сумісний з потужністю вашого автоматичного вимикача:
- Для живлення 63 Ампер вам знадобиться значно товстіший кабель, ніж 1,5 мм, який зазвичай витримує лише 16 Ампер.
Покрокове підключення
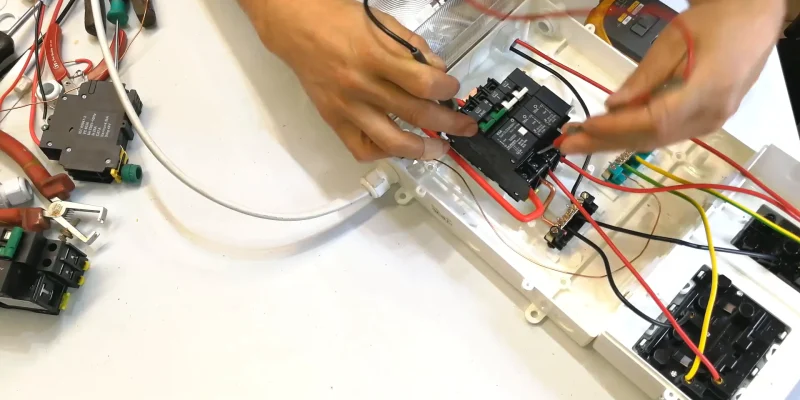
- Відкриваємо готову дошку: Зніміть передню кришку, щоб отримати доступ до внутрішніх клем і вимикачів.
- Вибір кабелю: Вибирайте кабелі, виходячи з вимог до навантаження та номіналів автоматичних вимикачів.
- Підживлення Головного джерела:
- Вибирайте кабель живлення, розрахований на максимальний струм.
- Підключіть кабель живлення через відповідний сальник до готової плати.
- Заземлення, занулення та нейтральні з'єднання:
- Підключіть дріт заземлення до шини заземлення.
- Зачистіть і під'єднайте нульовий і робочий дроти до відповідних клем на автоматичних вимикачах.
- Тестування витоку землі: Натисніть кнопку перевірки, щоб переконатися, що захист від витоку струму на землю працює належним чином.
- Встановлення лампочки: Готова дошка поставляється з гніздом для лампочки, в яке можна встановити енергозберігаючу або світлодіодну лампочку максимальною потужністю 60 Вт, хоча гніздо може витримати до 100 Вт.
Розширення готової дошки
Якщо ви бажаєте розширити можливості готової плати, ви можете додати додаткові вимикачі. Плата дозволяє встановлювати декілька вимикачів, що дає змогу ефективно керувати різними ланцюгами.
Додаючи нові ланцюги, переконайтеся, що використовувані кабелі витримують відповідні навантаження нових вимикачів. Наприклад, для вимикача на 16 А потрібні кабелі з номінальним струмом щонайменше 16 А.
Завершення встановлення
- Закріпити дроти: Переконайтеся, що всі з'єднання затягнуті та надійно закріплені.
- Закриваємо Раду: Встановіть передню кришку, закривши всі отвори заглушками або фітингами.
- Монтуємо готову дошку: Закріпіть плату на стіні або в корпусі, забезпечивши її захист від атмосферних впливів, якщо вона встановлена на вулиці.
Тестування готової дошки
Після того, як все підключено, важливо протестувати систему. Пристрій захисту від витоків струму на землю слід тестувати щомісяця, щоб переконатися, що він функціонує належним чином. Це робиться натисканням кнопки тестування, яка повинна спрацювати, відключивши пристрій від живлення.
Проведіть тести на безперервність за допомогою мультиметра, щоб перевірити правильність з'єднань і переконатися у відсутності короткого замикання в системі.

Пояснення принципів
- Захист від витоку струму на землю: Пристрій захисту від витоків струму на землю (ПЗВ) контролює різницю між струмом, що входить і виходить з ланцюга. Якщо є дисбаланс, це означає, що деякий струм витікає через непередбачений шлях, наприклад, через людину або в землю. Цей витік може спричинити небезпеку ураження електричним струмом, що може призвести до тяжких травм або смерті. Щоб запобігти цьому, ELD відключає живлення.
- Вибір кабелю: Вибір правильного розміру кабелю має вирішальне значення. Кабель повинен витримувати максимальний струм, який дозволяє вимикач, перш ніж він спрацює. Наприклад, кабель 2,5 мм² зазвичай використовується для ланцюгів до 16 ампер. Для більших струмів, наприклад, 30 ампер, знадобиться товстіший кабель перерізом 6 мм².
- Процес з'єднання: Під час підключення переконайтеся, що оголені дроти правильно вставлені в клеми без пошкодження мідних жил. Надійно затягуйте гвинти, щоб уникнути виникнення електричної дуги або нещільних з'єднань, які можуть спричинити перегрів і потенційну пожежну небезпеку.
- Схеми, що розширюються: При додаванні нових ланцюгів використовуйте мідні з'єднувачі для рівномірного та безпечного розподілу навантаження. Уникайте багаторазового з'єднання перемичками (послідовного з'єднання), яке може призвести до небезпечного розподілу навантаження і перевантаження окремих кабелів.
Висновок
- Підсумки процесу: Підсумуємо ключові кроки з підключення готової плати.
- Поради з безпеки та обслуговування: Наголошуйте на важливості регулярних перевірок і дотримання електротехнічних норм.
- Останні думки: Підкресліть зручність і надійність готової дошки для різних застосувань.
Стаття на тему
Готова дошка: Повний посібник з монтажу, компонентів та огляд африканського ринку


