I. Introduction
A. Brief explanation of mechanical timers
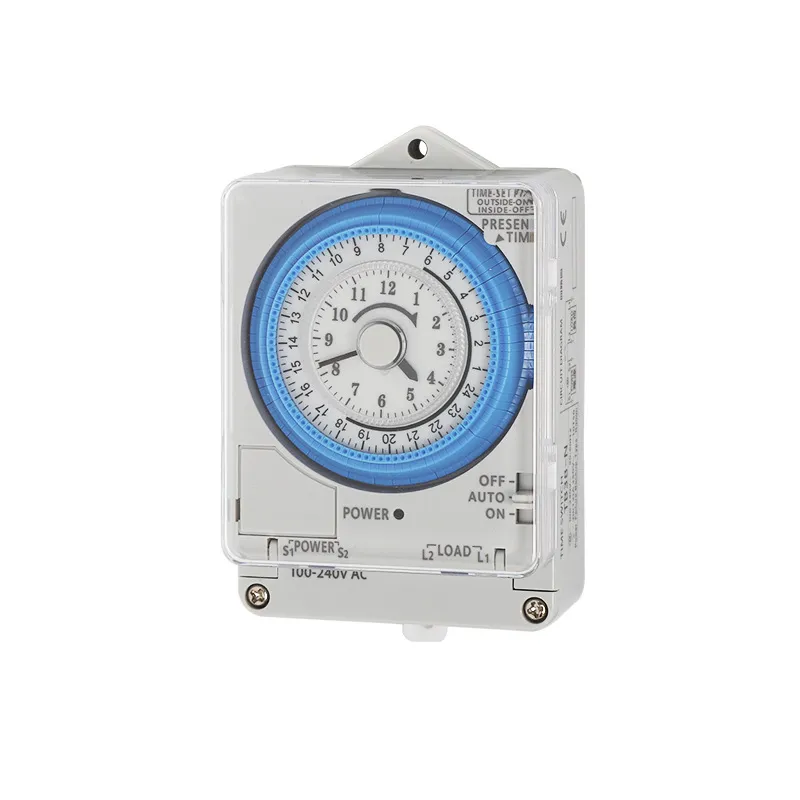
Mechanical timers are devices designed to control the operation of electrical appliances by automating their on and off cycles. They typically use a mechanical mechanism, such as gears and springs, to track time and trigger actions at predetermined intervals. Unlike electronic timers, which rely on digital components, mechanical timers are often simpler and more durable, making them suitable for various applications.
B. Importance of timers in daily life and various applications
Mechanical timers often face several common issues affecting their performance:
- Home Automation: Timers can control lighting, heating, and cooling systems, allowing homeowners to set schedules for when devices should operate.
- Gardening: They can automate irrigation systems, ensuring plants receive the right amount of water at scheduled times.
- Industrial Use: In factories, timers help manage machinery operations, improving productivity by automating processes.
- Pool Pumps: Timers regulate pool filtration systems, ensuring clean water while saving energy by running pumps only during off-peak hours.
- Security Systems: They can be programmed to turn lights on and off to simulate occupancy, enhancing home security.
C. Overview of common issues with mechanical timers
- Incorrect Settings: Improper user configuration leading to operational errors.
- Wiring Problems: Loose or faulty connections disrupting power supply.
- Mechanical Failures: Component jamming or breakage due to dirt accumulation or wear.
- Power Supply Issues: Dead batteries or electrical shorts in electric timers.
- Environmental Factors: Adverse effects from high humidity or extreme temperatures.
II. Common Reasons for Mechanical Timer Malfunctions
A. Incorrect Timer Settings
Misaligned Time Indicators
Misalignment can occur when the timer’s clock face is not correctly set to the current time, leading to inaccurate on/off cycles. Users should ensure that the time indicators align properly with the actual time to avoid operational errors.
Improper Programming of On/Off Cycles
If the on/off cycles are not programmed correctly, the timer may fail to activate devices at the desired times. This can happen if users do not follow specific programming instructions for their timer model, resulting in either extended or shortened operation durations.
Daylight Saving Time Confusion
Adjusting for daylight saving time can lead to confusion, especially if users forget to reset their timers after the change. Failure to adjust for this can result in timers operating an hour off, causing appliances to turn on or off at unexpected times.
B. Wiring Problems
Mechanical timers can experience various wiring issues that may prevent them from functioning properly. Here are some common wiring problems:
Loose Connections
Loose connections can disrupt the flow of electricity to the timer, causing it to malfunction. It’s essential to inspect all wiring terminals and ensure they are securely connected. Loose connections can lead to intermittent operation or complete failure of the timer.
Frayed Wires
Worn or frayed wires can create shorts or interruptions in the electrical circuit, which may prevent the timer from receiving power. Regularly checking for visible damage to wires is crucial, as frayed wires can pose safety hazards and lead to further electrical issues.
Incorrect Wiring Setup
If the timer is not wired according to the manufacturer’s specifications, it may not work correctly. This includes ensuring that the correct terminals are used for power input and output. Users should consult the timer’s manual for proper wiring diagrams and instructions to avoid setup errors.
C. Broken or Stuck Parts
Mechanical timers rely on various moving components to function correctly. Over time, these parts can become worn or obstructed, leading to malfunctions. Here are some common issues related to broken or stuck parts:
Worn Out Gears
Gears are essential for the timer’s mechanism, allowing it to track time accurately. Over time, gears can wear down due to friction and repeated use, which may cause them to slip or fail to engage properly. This can result in the timer not advancing as it should, leading to inaccurate timing.
Damaged Springs
Springs play a critical role in maintaining tension and ensuring that the timer’s mechanism operates smoothly. If a spring becomes damaged or loses its elasticity, it may not provide the necessary force for the timer to function correctly. This can lead to irregular timing cycles or complete failure of the timer.
Dust and Debris Accumulation
Dust and debris can accumulate inside the timer, causing moving parts to become stuck or hindered. This buildup can prevent gears from turning freely or springs from operating effectively. Regular cleaning is essential to maintain optimal performance and prevent blockages that could lead to mechanical failure.
D. Power Supply Issues
Mechanical timers can face several power supply-related problems that may impede their functionality. Here are some common issues:
1. Dead Batteries (for Battery-Operated Timers)
For battery-operated mechanical timers, dead or depleted batteries are a frequent cause of malfunction. If the timer is unresponsive or the display is unclear, replacing the battery is often the first step in troubleshooting. Regularly checking battery levels can prevent unexpected failures.
2. Electrical Shorts
Electrical shorts can occur due to damaged wiring or improper connections, leading to a disruption in power flow. This can cause the timer to fail to operate or reset unexpectedly. Inspecting the wiring for any signs of damage and ensuring all connections are secure is essential for preventing shorts.
3. Inadequate Power Source
Mechanical timers require a consistent power supply to function correctly. An inadequate power source, such as low voltage from an electrical outlet or a malfunctioning circuit, can prevent the timer from operating as intended. Users should verify that the timer is connected to a reliable power source and check for any blown fuses or tripped circuit breakers.
E. Environmental Factors
Mechanical timers can be significantly affected by environmental conditions, which may lead to performance issues or malfunctions. Here are some key factors:
1. High Humidity Effects
High humidity can reduce the insulation strength of electrical components within mechanical timers. When humidity levels exceed 80%, moisture can accumulate inside the device, leading to condensation that may cause short circuits or corrosion of internal parts. This not only affects the timer’s accuracy but can also lead to complete failure if moisture penetrates critical components.
2. Extreme Temperature Impact
Mechanical timers are sensitive to temperature fluctuations. High temperatures can cause overheating, which may damage internal components and reduce the timer’s lifespan. Conversely, extremely low temperatures can lead to brittleness in materials and affect the mechanical movement of gears and springs, resulting in erratic operation or failure to function altogether. Timers should always be used within the specified temperature range provided by the manufacturer.
3. Exposure to Direct Sunlight or Heat Sources
Direct sunlight or placement near heat sources can exacerbate the effects of temperature on mechanical timers. Prolonged exposure can lead to overheating, warping of plastic components, and degradation of materials such as rubber seals and insulation. This exposure can compromise the timer’s reliability and accuracy over time, making it essential to install timers in shaded or climate-controlled environments.
III. How to Diagnose a Faulty Mechanical Timer
Diagnosing a faulty mechanical timer involves systematic checks to identify the underlying issues. Here’s a structured approach:
A. Visual Inspection Techniques
1. Physical Damage Check
Begin with a thorough visual examination of the timer. Look for any signs of physical damage, such as cracks, burns, or corrosion on the casing and components. This can indicate internal failures.
2. Connection Inspection
Examine all wiring connections for looseness or corrosion. Loose or burnt connections can disrupt power flow and affect functionality.
3. Display Functionality
If the timer has a display, check whether it is functioning correctly. A non-operational display can signal electrical issues or internal faults.
B. Testing for Power Supply Issues
1. Voltage Measurement
Use a multimeter to test the voltage at the timer’s terminals. Ensure that it meets the specified requirements for proper operation. Any discrepancies may indicate power supply problems.
2. Manual Override Test
Most mechanical timers have a manual override feature. Engage this function to see if the timer responds manually. If it operates manually but not automatically, the issue likely lies within the timing mechanism itself.
3. Load Verification
Check that the connected load does not exceed the timer’s capacity. Overloading can cause erratic behavior or complete failure.
C. Checking for Proper Mechanical Movement
1. Timing Accuracy Test
Set the timer for a short interval (e.g., 5 minutes) and observe whether it switches at the correct time. Repeat this test several times to assess consistency in operation.
2. Internal Mechanism Inspection
If possible, carefully open the timer housing (after disconnecting power) and inspect internal components like gears and springs for wear, corrosion, or obstruction from dust and debris.
3. Environmental Assessment
Consider whether environmental factors such as humidity or temperature extremes could be affecting performance. Ensure that the timer is suitable for its operating conditions.
Example:
IV. Step-by-Step Guide to Fixing a Mechanical Timer
A. Checking and Adjusting Settings
- Resetting the timer
- Properly aligning time indicators
- Reprogramming on/off cycles
B. Inspecting and Fixing Wiring
- Tightening loose connections
- Replacing frayed wires
- Correcting wiring setup
C. Cleaning and Lubricating Parts
- Safely opening the timer housing
- Removing dust and debris
- Applying appropriate lubricants
D. Addressing Power Supply Problems
- Replacing batteries
- Checking for and fixing electrical shorts
- Ensuring proper power source connection
Example:
E. Dealing with Environmental Factors
- Relocating the timer to a more suitable environment
- Using protective enclosures
- Implementing temperature control measures
V. When to Replace Your Mechanical Timer
Determining when to replace a mechanical timer involves assessing its performance, cost-effectiveness of repairs, and potential upgrades. Here’s a detailed overview:
A. Signs That Indicate Replacement Is Necessary
- Erratic TimingIf the timer consistently activates or deactivates devices at incorrect times, it may indicate internal wear or malfunction that cannot be easily fixed.
- Complete Failure to SwitchA timer that fails to turn on or off connected devices altogether is a strong indicator that it may need replacement.
- Stuck MechanismIf the timer is stuck in one position (either “on” or “off”) and does not respond to adjustments, this suggests significant mechanical failure.
- Unusual NoisesClicking, grinding, or buzzing sounds can indicate internal damage or wear, suggesting that the timer may not operate reliably moving forward.
- Visible DamageCracks, burns, or corrosion on the casing or internal components can compromise functionality and safety, warranting replacement.
B. Cost Comparison: Repair vs. Replacement
- Repair CostsRepairing a mechanical timer can involve labor costs for disassembly, cleaning, replacing worn parts (like gears and springs), and reassembly. Depending on the extent of the damage, repair costs can accumulate quickly.
- Replacement CostsMechanical timers are generally inexpensive; purchasing a new unit may cost less than repairing an old one. Additionally, newer models often come with improved features and reliability.
- Cost-EffectivenessIf repairs exceed 50% of the cost of a new timer, replacement is typically more cost-effective. Consider long-term reliability and warranty options when making this decision.
C. Upgrading to Digital or Smart Timers
- Enhanced FeaturesDigital and smart timers offer advanced functionalities such as programmable schedules, remote access via smartphone apps, and energy monitoring capabilities that mechanical timers lack.
- Improved AccuracyDigital timers provide more precise timing control and often include features like countdown timers and multiple programming options, which enhance usability.
- Energy EfficiencySmart timers can optimize energy usage by allowing users to set schedules based on peak usage times, potentially leading to lower utility bills.
- Ease of UseMany digital timers feature user-friendly interfaces that simplify programming compared to traditional mechanical models.
VI. Preventive Maintenance Tips for Mechanical Timers
Regular maintenance of mechanical timers is essential to ensure their longevity and reliable performance. Here are some effective preventive maintenance tips:
A. Regular Cleaning Schedule
- Dust and Debris RemovalEstablish a routine cleaning schedule to remove dust and debris from the timer’s exterior and interior. Use compressed air to blow out particles that may accumulate inside, which can hinder mechanical movement.
- Disassembly for Deep CleaningFor thorough maintenance, consider disassembling the timer periodically (after disconnecting power) to clean all components. Pay special attention to gears and springs, ensuring they are free of dirt and grime.
- Cleaning FrequencyDepending on the environment where the timer operates (e.g., dusty or humid conditions), aim to clean the timer every few months or as needed to prevent buildup.
B. Periodic Lubrication
- Lubrication of Moving PartsApply a small amount of appropriate lubricant (like clock oil) to moving parts such as gears and springs. This reduces friction, ensuring smooth operation and preventing wear over time.
- Manufacturer RecommendationsAlways refer to the manufacturer’s guidelines regarding lubrication frequency and type of lubricant to use, as different timers may have specific requirements.
- Signs of Insufficient LubricationIf you notice unusual noises or resistance in the timer’s operation, it may be a sign that lubrication is needed. Regular checks can help identify these issues early.
C. Protecting from Environmental Factors
- Humidity ControlHigh humidity can lead to moisture accumulation inside the timer, causing corrosion or electrical shorts. If possible, place timers in climate-controlled environments or use dehumidifiers in areas prone to moisture.
- Temperature RegulationAvoid exposing timers to extreme temperatures, which can affect mechanical components and overall functionality. Ensure timers are installed in areas with stable temperature conditions.
- Shielding from Direct SunlightProtect timers from direct sunlight or heat sources that can cause overheating and damage plastic components. Use protective enclosures or relocate timers as necessary to mitigate these risks.
VII. Troubleshooting Specific Mechanical Timer Types
Mechanical timers can vary significantly based on their application, such as wall outlet timers, appliance timers, and industrial mechanical timers. Here’s a structured approach to troubleshooting each type.
A. Wall Outlet Timers
1. Common Issues
- Incorrect Settings: Ensure the timer is set correctly. Misalignment of time indicators can lead to improper operation.
- Power Supply Problems: Check that the timer is plugged in and receiving power. Loose connections or blown fuses can disrupt functionality.
- Mechanical Movement: Inspect for stuck gears or broken components that may prevent the timer from advancing.
2. Troubleshooting Steps
- Verify the timer settings and adjust them as necessary.
- Inspect the power outlet and connections for any issues.
- Open the timer casing (if applicable) to clean and lubricate internal parts.
B. Appliance Timers
1. Common Issues
- Wiring Problems: Loose or frayed wires can lead to operational failures. Ensure all connections are secure.
- Broken or Stuck Parts: Gears and springs may become jammed due to dirt or age, affecting timing accuracy.
- Environmental Factors: High humidity or extreme temperatures can impact performance.
2. Troubleshooting Steps
- Check wiring connections for security and integrity.
- Inspect internal components for wear or blockage, cleaning and lubricating as needed.
- Ensure the timer is placed in a suitable environment away from moisture and heat sources.
C. Industrial Mechanical Timers
1. Common Issues
- Power Supply Issues: Industrial timers may require a stable power supply; check for electrical shorts or inadequate voltage.
- Wear and Tear: Frequent use can lead to significant wear on internal components, resulting in erratic timing.
- Dust and Debris Accumulation: Industrial environments often have higher levels of dust, which can interfere with mechanical movement.
2. Troubleshooting Steps
- Test the voltage supply to ensure adequate power is reaching the timer.
- Conduct a thorough inspection of gears and springs for damage, replacing any worn parts as necessary.
- Regularly clean the timer to prevent dust buildup that could hinder operation.
Related Article:
Common Timer Switch Wiring Methods
How to Program a Light Switch Timer
As a Timer manufacturer, VIOX not only produces a variety of high-quality Timer, but also provides professional advice for all your Timers needs. If you have other questions, please feel free to contact us.
