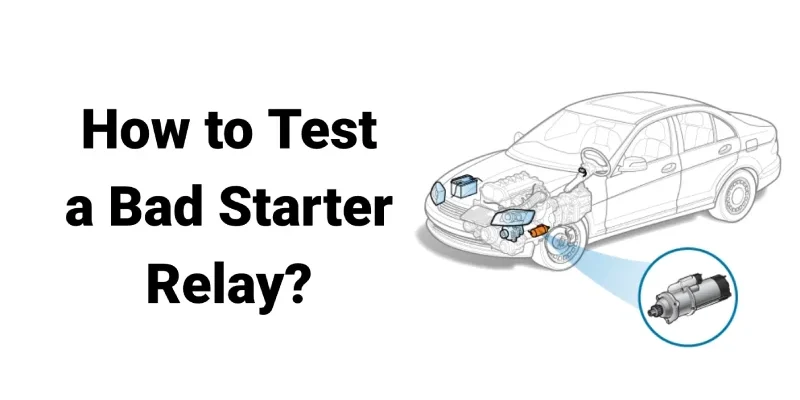
A starter relay plays a crucial role in a vehicle’s ignition system, controlling the flow of electrical current between the battery and starter motor. Testing a bad starter relay involves understanding its function, recognizing failure symptoms, and performing specific diagnostic procedures to ensure reliable engine starts.
Starter Relay Function
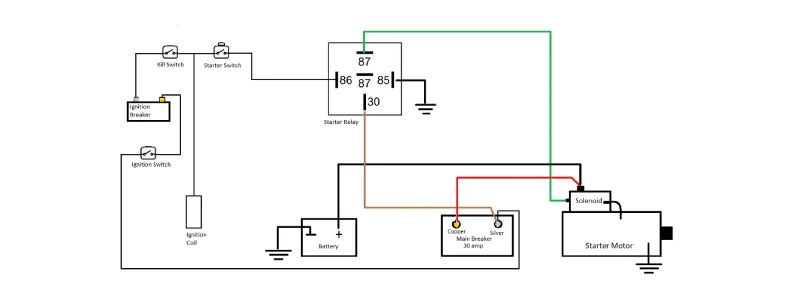
The starter relay serves as an electromechanical switch that regulates the flow of electrical current between the battery and the starter motor in a vehicle’s ignition system. This crucial component acts as an intermediary, allowing a small current from the ignition switch to activate a larger current flow to the starter motor, effectively preventing excessive wear on the ignition switch and minimizing voltage drop. By isolating the high-current circuit from the low-current ignition switch, the starter relay ensures a reliable and efficient engine start-up process while protecting other electrical components in the vehicle.
Starter Relay Operation
The starter relay operates as an electromagnetic switch, controlling the flow of high current from the battery to the starter motor. When the ignition key is turned, a small current energizes the relay’s electromagnet, creating a magnetic field that attracts an iron core or armature. This movement closes the relay’s contacts, allowing a large current to flow directly from the battery to the starter motor.
Key components of the starter relay include:
- Electromagnet coil: Generates the magnetic field when energized
- Armature: Moves in response to the magnetic field
- Contacts: Open or close to control current flow
- Spring: Returns the armature to its original position when de-energized
By acting as an intermediary, the starter relay protects the ignition switch from high currents and ensures efficient power delivery to the starter motor, enabling reliable engine starts.
Symptoms of Starter Relay Failure
When a starter relay begins to fail, several distinct symptoms may manifest, alerting the driver to potential issues with the vehicle’s starting system:
- No response when turning the key or pressing the start button: This is often the most obvious sign of a faulty starter relay. When you attempt to start the vehicle, you may hear no sound at all, indicating that the relay is not transmitting the electrical signal to engage the starter motor.
- Clicking sound but engine doesn’t turn over: If you hear a rapid clicking noise when trying to start the car, but the engine doesn’t crank, it could indicate that the starter relay is engaging but not providing enough current to the starter motor.
- Intermittent starting issues: The vehicle may start normally sometimes but fail to start at other times. This inconsistent behavior can be a sign of a relay that is on the verge of complete failure.
- Starter stays engaged after engine starts: If the starter motor continues to run after the engine has started, it could be due to the starter relay contacts being stuck in the closed position.
- Electrical system issues: A faulty starter relay can sometimes cause other electrical components to malfunction, such as dimming headlights or fluctuating dashboard lights when attempting to start the vehicle.
- Battery drain: If the starter relay is stuck in the “on” position, it can continuously draw power from the battery, leading to a drained battery even when the vehicle is not in use.
Recognizing these symptoms early can help prevent more serious issues and allow for timely replacement of the starter relay. It’s important to note that some of these symptoms can also be caused by other electrical system problems, so a proper diagnosis is crucial before replacing any components.
Testing a Faulty Starter Relay
Testing a faulty starter relay is a crucial step in diagnosing starting system issues. Here’s a step-by-step guide to effectively test your vehicle’s starter relay:
Visual Inspection:
Begin by examining the relay for any signs of physical damage, corrosion, or loose connections. A damaged or corroded relay may need immediate replacement.
Multimeter Test:
Set your multimeter to measure resistance (Ohms). Place one probe on the lead of the ignition circuit terminal and the other on the ground lead. The reading should be less than 5 Ohms. A higher reading indicates a faulty relay.
Battery Voltage Test:
Set the multimeter to DC voltage. Connect the positive probe to the battery terminal on the relay and the negative probe to a good ground. The reading should match your battery voltage (typically 12-14 volts).
Activation Test:
Have an assistant turn the ignition key to the “start” position. Listen for an audible click from the relay. A click indicates that the relay is receiving power and attempting to close the circuit.
Bypass Test:
Locate the starter relay in your vehicle’s fuse box. Remove the relay and bridge the battery and starter terminals using a screwdriver or jumper wire. If the engine cranks, it suggests the relay is faulty and needs replacement.
Continuity Test:
Remove the relay from the fuse box. Set the multimeter to continuity mode. Test continuity between the relay’s input and output terminals. With the relay de-energized, there should be no continuity. Energize the relay by applying 12V to its control terminals. You should now hear a click and detect continuity between the input and output terminals.
Voltage Drop Test:
Connect the multimeter’s positive probe to the relay’s input terminal and the negative probe to its output terminal. Have an assistant crank the engine. A reading of more than 0.2 volts indicates excessive resistance in the relay, suggesting it needs replacement.
Remember to consult your vehicle’s manual for specific relay locations and testing procedures, as they can vary between makes and models. If you’re unsure about performing these tests yourself, it’s advisable to seek assistance from a qualified mechanic to ensure accurate diagnosis and prevent potential damage to your vehicle’s electrical system.
Replacing a Faulty Starter Relay
Once you’ve confirmed that your starter relay is faulty, replacing it is a relatively straightforward process. Here’s a step-by-step guide to replacing a faulty starter relay:
Safety First:
Ensure the vehicle is parked on a level surface with the engine off. Disconnect the negative terminal of the battery to prevent electrical shock or short circuits.
Locate the Starter Relay:
The starter relay is typically found in the engine compartment’s fuse box or near the battery. Consult your vehicle’s manual for the exact location, as it can vary between makes and models.
Remove the Old Relay:
Carefully pull the old relay straight out of its socket. If it’s held in place by bolts, use the appropriate wrench to remove them. Inspect the socket for any signs of corrosion or damage. Clean the socket if necessary using electrical contact cleaner.
Install the New Relay:
Ensure you have the correct replacement relay for your specific vehicle model. Align the new relay with the socket and push it firmly into place. If bolts were removed, replace and tighten them securely.
Reconnect the Battery:
Reconnect the negative terminal of the battery.
Test the New Relay:
Turn the ignition key to start the engine. Listen for the characteristic click of the relay engaging. Ensure the engine starts smoothly.
Verify Proper Function:
Take the vehicle for a short test drive to confirm that the starting issues have been resolved.
It’s important to note that while replacing a starter relay is generally a DIY-friendly task, if you’re unsure about any step in the process, it’s best to consult a professional mechanic. This ensures the job is done correctly and prevents potential damage to your vehicle’s electrical system.
Remember to dispose of the old relay properly, as it may contain harmful materials. Many auto parts stores offer recycling services for old automotive components.
By following these steps, you can successfully replace a faulty starter relay and get your vehicle back on the road quickly and safely. Regular maintenance and prompt attention to starting issues can help prevent more serious problems and extend the life of your vehicle’s electrical system.


