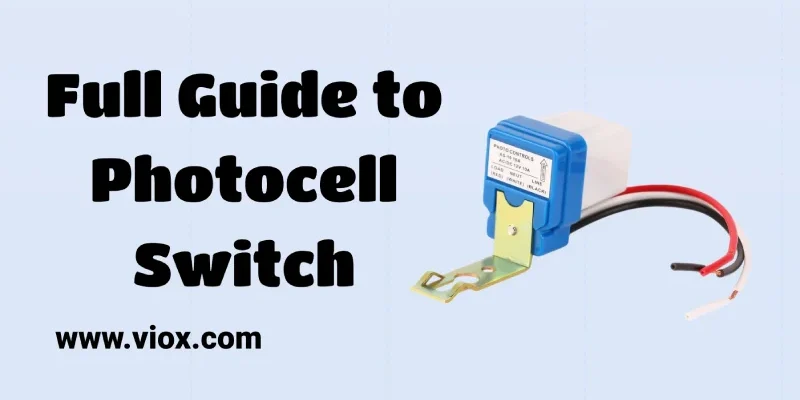
What is a Photocell Switch?
A photocell switch, also referred to as a photoelectric or light-dependent resistor (LDR), is an electronic component that automatically controls lighting based on ambient light levels. At its core is a photoresistor, whose electrical resistance changes in response to light intensity. This light-sensitive element enables the device to turn lights on when darkness falls and off when daylight returns, making it ideal for applications like streetlights, security lighting, and other outdoor illumination systems that require automated control without manual intervention.
Photocell Operating Mechanism
A photocell switch operates on the principle of photoconductivity, utilizing a light-sensitive semiconductor material like cadmium sulfide (CdS) or cadmium selenide (CdSe). The core component is a variable resistor whose resistance changes in response to light intensity. In darkness or low light conditions, the photocell’s resistance is high, allowing current to flow through the circuit and activate the connected lighting. As light levels increase, photons are absorbed by the semiconductor material, causing electrons to become excited and increasing conductivity. This decreases the resistance, interrupting the current flow and turning off the lights. The switch typically contains three wires:
- Black (hot): Connects to the power source
- White (neutral): Completes the circuit
- Red (load): Connects to the light fixture
When light levels fall below a preset threshold, the photocell’s internal switch closes, completing the circuit and turning on the lights. This automatic operation ensures energy-efficient lighting control without manual intervention.
Types of Photocell Sensors
Several types of photocell sensors are available, each designed for specific applications and user requirements:
- Dusk-to-Dawn Sensors: Automatically activate lights at sunset and deactivate them at sunrise.
- Adjustable Lux Level Sensors: Allow users to set specific light thresholds for activation and deactivation.
- Timer-Integrated Sensors: Combine photocell functionality with a timer for control based on both light levels and preset time schedules.
- Multi-Circuit Sensors: Can independently control multiple lighting circuits for greater flexibility in large-scale installations.
Key Wiring Specifications
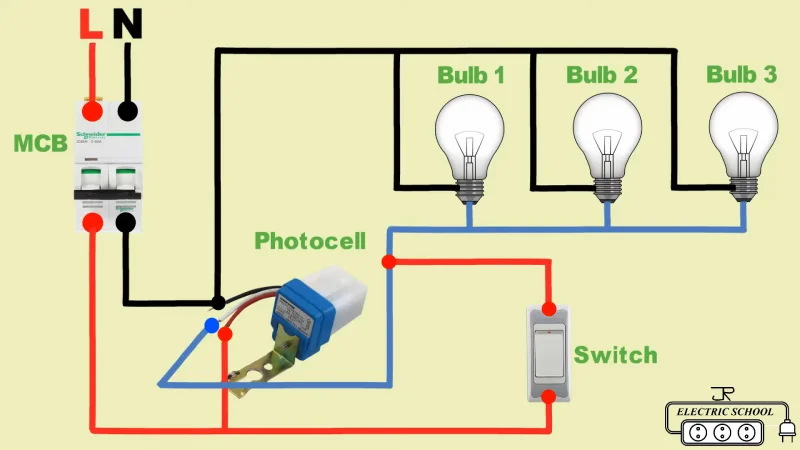
Photocell Switch Wiring Diagram
When selecting and installing a photocell sensor, consider key wiring specifications for optimal performance and safety. The voltage compatibility of the sensor must match your electrical system, typically 120V or 240V AC. Choose appropriate wire gauge and length based on your specific setup to maintain efficiency. Basic setups often require three wires (hot, neutral, ground), while more advanced systems may need additional conductors. Always consult manufacturer instructions and local electrical codes for proper installation and compliance.
Photocell Switch Installation Guide
Installing a photocell switch requires careful attention to safety and proper wiring techniques. Before beginning, ensure that the power to the circuit is completely turned off at the breaker to prevent electrical hazards.
The installation process typically involves the following steps:
- Identify the wires:
- Black wire: Usually the “hot” or live wire
- White wire: Typically the neutral wire
- Red wire: Often the “switched” wire that connects to the light fixture
- Green or bare copper wire: The ground wire
- Make connections:
- Connect the black wire from the power source to the black wire of the photocell.
- Join the red wire from the photocell to the black wire of the light fixture.
- Connect all white (neutral) wires together.
- Secure all ground wires together and to the grounding terminal.
- Mount the photocell: Position the sensor where it can detect natural light without interference from artificial light sources. Ensure it’s weatherproof if installed outdoors.
- Test the installation: Restore power and verify functionality by covering the photocell to simulate darkness.
Consider factors like voltage compatibility, load capacity, and environmental conditions when selecting a photocell switch. Some models offer adjustable sensitivity for fine-tuning activation levels. While DIY installation is possible for simple setups, complex systems or those requiring compliance with specific electrical codes may require professional installation.
Selecting the Right Photocell
When selecting the right photocell sensor for your lighting needs, consider these key factors:
- Application requirements: Determine the type of objects to be detected and the required sensing distance.
- Functional principle: Choose between through-beam, retro-reflective, or diffuse sensors based on your setup.
- Compatibility: Ensure voltage compatibility with your electrical system.
- Installation and mounting: Consider ease of installation and compatibility with your existing system.
Always consult manufacturer specifications and consider warranty, operating temperature range, and energy efficiency. For complex setups, seek advice from a qualified electrician.
Photocell vs Timer Advantages
Photocell switches offer several advantages over timer switches for outdoor lighting control:
- Adaptability: Automatically adjust to seasonal changes in daylight hours.
- Energy efficiency: Reduce energy consumption compared to fixed-timer systems.
- Convenience: Require minimal maintenance and eliminate manual adjustments.
- Enhanced security: Ensure consistent illumination during dark hours.
Explore more: Full Guide to Timer Switch
Replacement Timing and Process of Photocell Switch
Photocell switches typically need replacement when they fail to control lighting or show signs of wear. Common indicators include:
- Lights staying on during daylight hours.
- Failing to turn on at dusk.
- Cycling on and off erratically.
- Yellowing or clouding of the sensor lens.
To replace a faulty photocell:
- Turn off power at the circuit breaker.
- Remove the old photocell by unscrewing it from its mounting location.
- Disconnect the wires, noting their connections.
- Install the new photocell, connecting wires as before.
- Seal around the new photocell to prevent moisture ingress.
- Restore power and test functionality.
If you’re uncomfortable working with electrical systems, consult a qualified electrician for safe replacement.
Common Troubleshooting Tips for Photocell Switches
Photocell switches can encounter various issues that affect performance. Here are some common troubleshooting tips:
- Check for obstructions that may interfere with detection.
- Verify power supply with a multimeter.
- Inspect wiring for loose connections or damage.
- Test functionality by simulating darkness.
- Adjust sensitivity if applicable.
- Check for interference from nearby light sources.
If issues persist, consider replacing the photocell unit or consulting a professional electrician for further diagnosis.


